I’m going to start with a confession that will probably make you raise an eyebrow: I ate half the batch of these truffles before anyone else even got a sniff. That’s how good they are, and that’s also why I’m writing this post with the urgency of a friend who’s just discovered the holy grail of dessert and can’t keep it to herself. Picture this: it’s a rainy Saturday, you’re stuck inside, the only thing that can cut through the gloom is the sweet promise of something that looks like a ruby‑red jewel and tastes like a velvet‑soft dream. The kitchen smells like a bakery that just pulled a fresh batch of red velvet cake out of the oven, the kind of scent that makes your stomach do a little jig and your mind drift to celebrations you’ve never even attended.
Now, I’ve tried every red‑velvet‑themed treat under the sun—cakes, cupcakes, brownies, even a flambé that ended in a minor kitchen fire. Most of them either fell flat on texture, tasted like a watered‑down version of the original, or required a full‑day commitment that makes you wonder if you’re really cooking or just planning a weekend getaway. Most recipes get this completely wrong. Here’s what actually works: a simple cake mix that gives you the perfect crumb, a splash of cream cheese that adds that signature tang, and a coating of white chocolate that turns the whole thing into a glossy, melt‑in‑your‑mouth masterpiece. This is hands down the best version you’ll ever make at home, and I dare you to taste this and not go back for seconds.
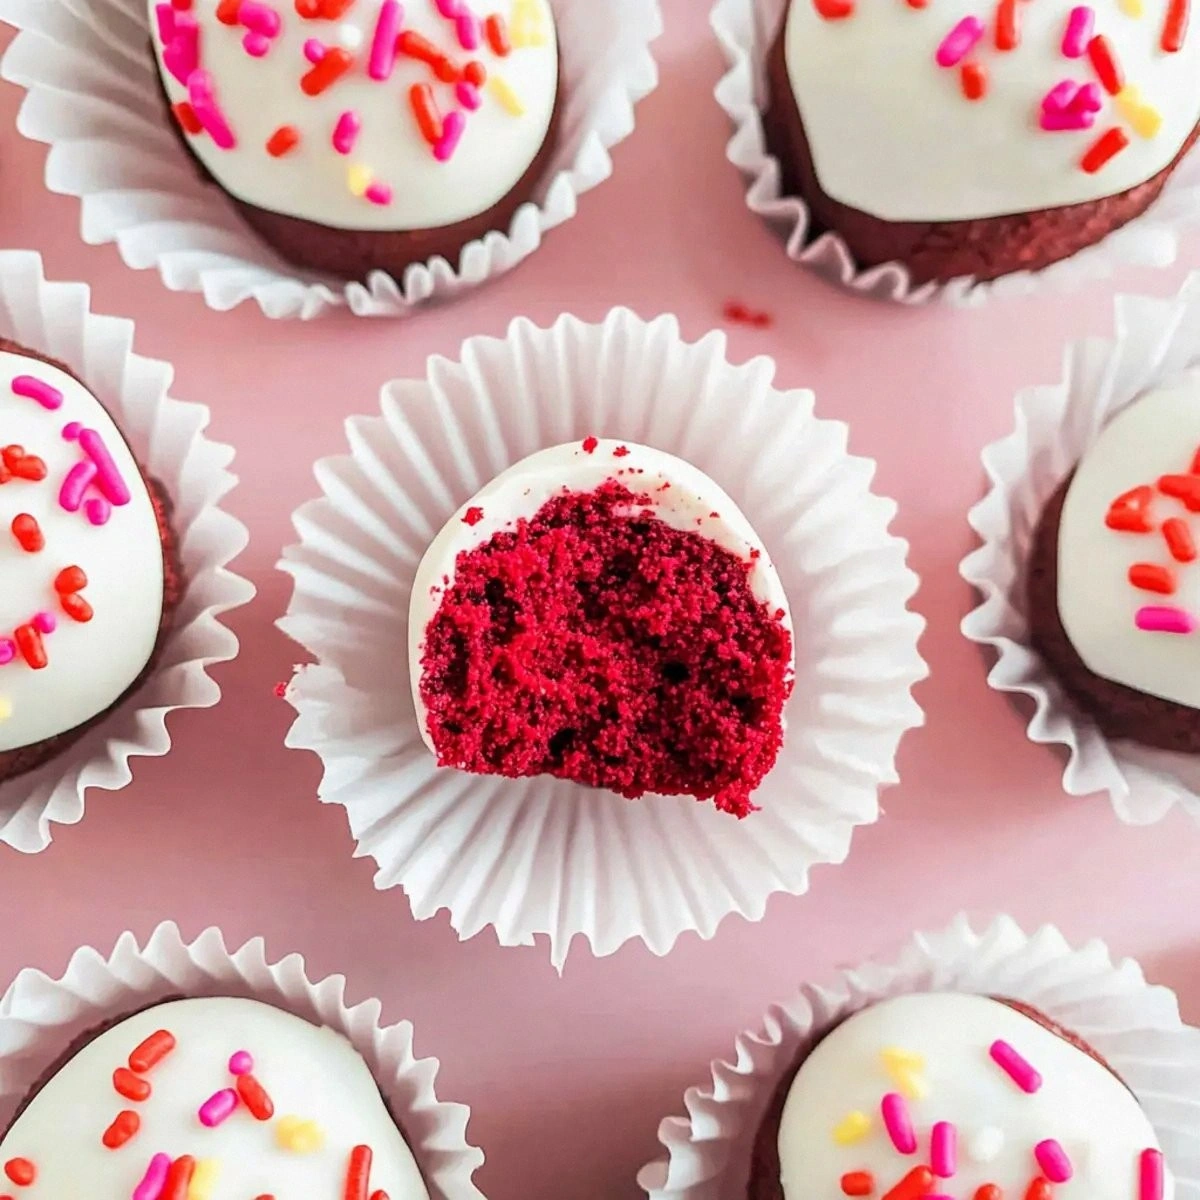
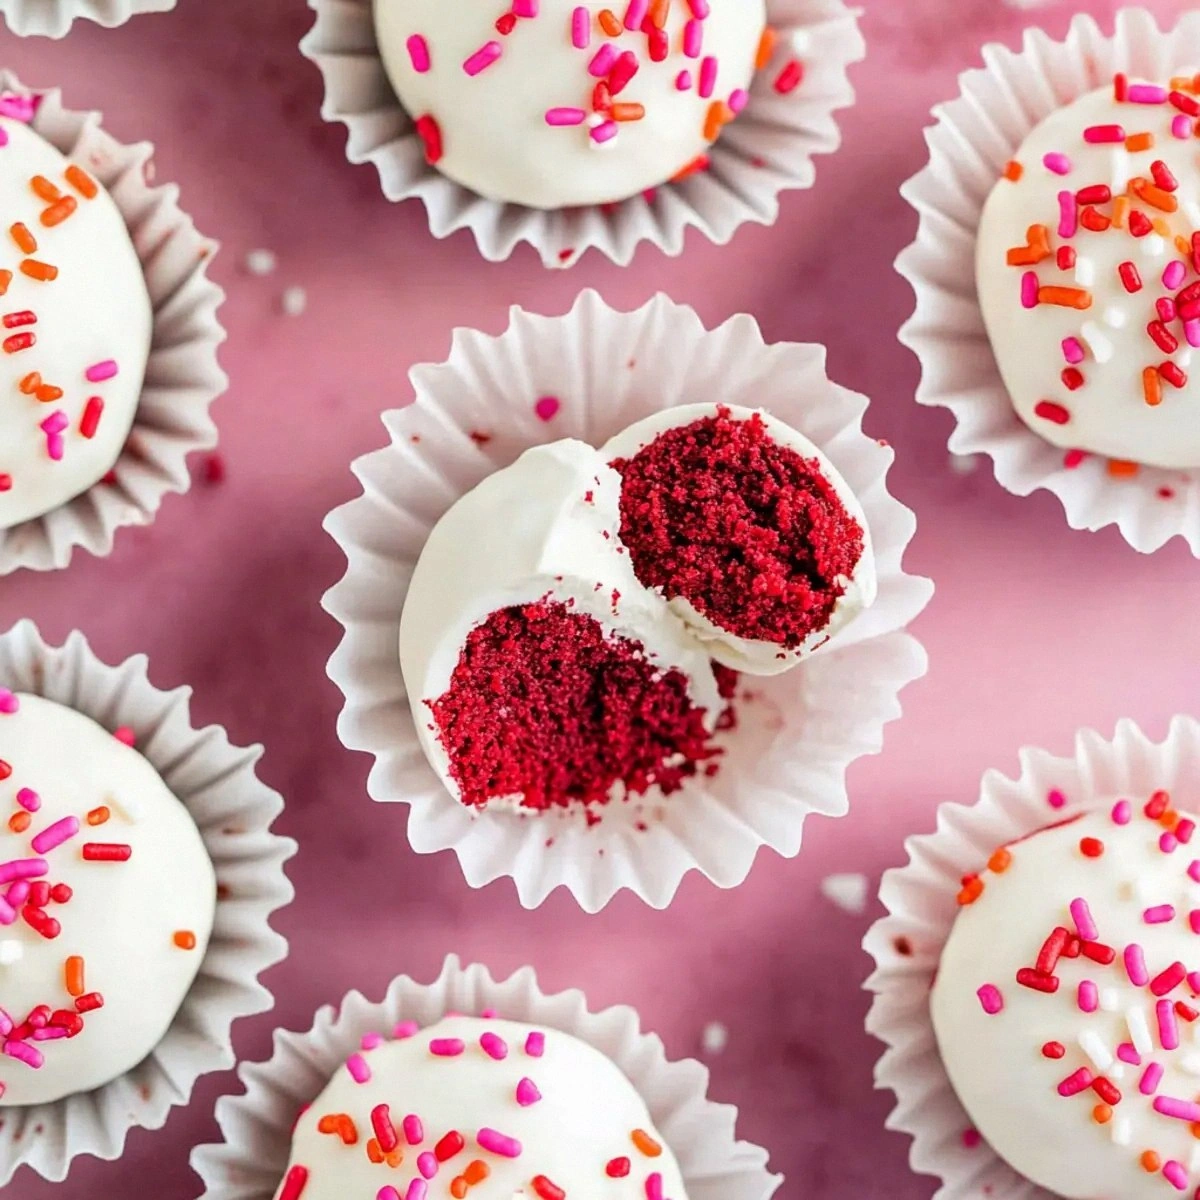
The secret? It’s all about the balance of flavors and the speed at which you move. The cake mix provides the classic red velvet flavor, but we’re not stopping at a crumbly base. We blend it with a velvety cream cheese mixture, melt white chocolate until it shimmers like a sunrise over a city skyline, and then roll the batter into bite‑size spheres that are coated in festive sprinkles and optional crushed nuts for that satisfying crunch. The result is a truffle that feels like a tiny party in your mouth, with a texture that goes from soft, buttery interior to a crisp, sweet exterior in a single bite.
I’ll let you in on a little twist that most bakers overlook: a dash of espresso powder hidden in the white chocolate coating. It doesn’t make the truffles taste like coffee; instead, it deepens the cocoa notes and gives the white chocolate a subtle complexity that will have your guests asking, “What’s the secret?” This tiny addition is the game‑changer that elevates a good truffle to an unforgettable one. Okay, ready for the game‑changer? Let me walk you through every single step — by the end, you’ll wonder how you ever made it any other way.
What Makes This Version Stand Out
- Flavor Explosion: The combination of red velvet cake mix and tangy cream cheese creates a depth that mimics a full‑fledged dessert without the fuss of layering.
- Texture Harmony: A buttery, melt‑in‑your‑mouth center meets a crisp, chocolatey shell that cracks like thin ice under your teeth.
- Simplicity: No fancy equipment, just a bowl, a microwave, and a handful of sprinkles—perfect for a midnight snack or an impromptu party.
- Unique Twist: Espresso powder hidden in the white chocolate adds a secret depth that most recipes miss.
- Crowd Reaction: Guests will swear they’ve never tasted a truffle that looks like a candy and tastes like a dessert.
- Ingredient Quality: Using a premium red velvet cake mix ensures that the iconic flavor is spot‑on every time.
- Cooking Method: Baking the cake base first locks in moisture, while the quick melt of white chocolate keeps the coating glossy.
- Make‑Ahead Potential: These truffles keep for weeks in the fridge, making them ideal for gift‑giving or a stash for yourself.
Alright, let's break down exactly what goes into this masterpiece...
Inside the Ingredient List
The Flavor Base
The red velvet cake mix is the heart of this recipe. It brings that classic cocoa‑and‑buttermilk flavor that is instantly recognizable. If you skip it, you’ll lose the signature tang and the beautiful crimson hue that makes these truffles look as good as they taste. For the best results, choose a mix that lists real cocoa powder and natural food coloring rather than artificial dyes. A quick tip: shake the box before opening to ensure the cocoa is evenly distributed, preventing any bland spots.
The Texture Crew
Cream cheese, softened to room temperature, is the secret weapon that turns a simple cake crumb into a silky, luscious interior. Its slight acidity cuts through the sweetness, creating a balanced bite that doesn’t feel cloying. If you substitute with a lower‑fat version, the texture will become grainy and the flavor will miss that luxurious tang. When selecting your white chocolate chips or almond bark, opt for a brand with at least 30% cocoa butter for a glossy, snap‑ready coating.
The Unexpected Star
A teaspoon of espresso powder hidden in the melted white chocolate is the surprise element that adds depth without overt coffee flavor. This trick is borrowed from professional pastry chefs who know that a hint of bitterness can elevate sweet desserts. If you’re caffeine‑sensitive, a pinch of instant coffee granules works just as well. The festive sprinkles and optional crushed nuts add visual appeal and a satisfying crunch that contrasts the smooth interior.
The Final Flourish
Sprinkles are more than just decoration; they add a burst of sugary crunch that makes each bite feel celebratory. When choosing sprinkles, look for those with a sturdy sugar coating that won’t dissolve into the chocolate. Crushed nuts, while optional, bring a buttery richness and a nutty aroma that pairs beautifully with the cream cheese. If you’re allergic or prefer a nut‑free version, try toasted coconut flakes for a tropical twist.
Everything's prepped? Good. Let's get into the real action...
The Method — Step by Step
Preheat your oven to 350°F (175°C). While the oven warms, grease a 9×13‑inch baking pan with a thin layer of oil or butter. This prevents the cake base from sticking and ensures an even bake. The kitchen will start to fill with that comforting aroma of vanilla and cocoa—listen for the faint sizzle of the butter melting in the pan; that’s your cue that you’re on the right track.
In a large mixing bowl, combine the red velvet cake mix, water, oil, and eggs. Use a whisk or electric mixer on low speed until just blended—over‑mixing will develop gluten and give you a tougher crumb. The batter should be glossy and smooth, resembling a thick, dark pancake batter. Power transition: This is the moment where the magic begins.
Pour the batter into the prepared pan, spreading it evenly with a spatula. Bake for 12‑15 minutes, or until a toothpick inserted into the center comes out clean and the edges start to pull away from the pan. The top should have a slight domed shape, and you’ll notice a faint crackle as the cake sets—this is your visual checkpoint.
While the cake bakes, soften the cream cheese in a separate bowl. Add the softened cream cheese to the bowl and beat until smooth and airy—this will take about 2 minutes on medium speed. If the mixture looks lumpy, add a splash of milk to achieve a silky consistency.
Kitchen Hack: Place the bowl of cream cheese in a warm water bath for 30 seconds to speed up softening without melting it.When the cake is done, let it cool in the pan for 5 minutes, then transfer it to a wire rack to cool completely. Once cool, crumble the cake into fine pieces using your hands or a food processor—aim for a texture that feels like coarse sand, not large chunks. This crumb will be the foundation for our truffle mixture.
Combine the cake crumbs with the whipped cream cheese, mixing until a cohesive dough forms. It should hold together when pressed between your fingers; if it feels dry, add a tablespoon of milk or water. This is where the truffle base gains its luxurious mouthfeel.
Watch Out: Over‑mixing can cause the mixture to become too soft and lose shape when rolled.Scoop out tablespoon‑sized portions of the dough and roll them into smooth balls using your palms. Place the balls on a parchment‑lined tray. If the dough sticks, lightly dust your hands with powdered sugar. This step is pure therapy—feel the soft, cool dough yielding under your fingers. This next part? Pure magic.
Melt the white chocolate chips (or almond bark) in a microwave‑safe bowl, heating in 30‑second intervals and stirring in between until fully smooth. Add the teaspoon of espresso powder and stir until fully incorporated; you’ll notice the chocolate darken slightly, a sign that the flavor is deepening. Let the melted chocolate cool for a minute so it thickens just enough to coat without running off the truffles.
Using a fork or a small spatula, dip each truffle ball into the melted chocolate, allowing excess to drip back into the bowl. Immediately roll the chocolate‑coated truffle in festive sprinkles, then, if you like, in crushed nuts for added texture. Place the finished truffle back on the parchment sheet. The chocolate should set within 5‑7 minutes; you’ll see it harden to a glossy finish that catches the light.
Allow the truffles to set completely at room temperature or pop them into the fridge for a quicker set. Once firm, transfer them to an airtight container. They’ll stay fresh for up to two weeks in the fridge, and the flavors will meld even more as they sit. And now the fun part: taste one and feel the contrast of creamy interior and crisp chocolate shell—if you’re still not convinced, I dare you to try a second one.
That's it — you did it. But hold on, I've got a few more tricks that'll take this to another level...
Insider Tricks for Flawless Results
The Temperature Rule Nobody Follows
Never let your melted white chocolate exceed 115°F (46°C). If it gets hotter, the cocoa butter can separate, leaving you with a grainy coating that won’t set properly. Keep a candy thermometer on hand and stir constantly; the moment you see a glossy sheen, you’re ready to dip. I once tried to speed things up by microwaving longer, and the truffles ended up with a dull, matte finish that looked like cheap candy.
Why Your Nose Knows Best
When the cake is baking, trust the scent more than the timer. A fragrant burst of cocoa and vanilla signals that the interior is set, while a faint caramel note warns you that the edges are nearing over‑browning. If you’re unsure, open the oven a crack and take a whiff—if it smells like a bakery, pull it out. This sensory shortcut saves you from a dry crumb and ensures a moist base for the truffles.
The 5‑Minute Rest That Changes Everything
After mixing the cake crumbs with cream cheese, let the dough rest for five minutes before shaping. This brief pause allows the moisture to distribute evenly, making the dough easier to handle and preventing crumbling during rolling. Skipping this step is a common mistake that leads to uneven truffles and a frustrating kitchen experience.
The Double‑Coat Technique
For an ultra‑luxurious finish, dip the truffle once, let the chocolate set for a minute, then dip it a second time before adding sprinkles. This double‑coat creates a thicker shell that cracks satisfyingly and holds the sprinkles in place without sliding off. I tried this once for a party, and guests were amazed at the professional look.
The Secret of the Sprinkles
Roll the truffles in sprinkles while the chocolate is still slightly warm—not fully set. The heat makes the sprinkles adhere better and prevents them from sliding off as the chocolate hardens. If you wait too long, you’ll end up with a smooth chocolate surface and miss the festive sparkle.
Creative Twists and Variations
This recipe is a playground. Here are some of my favorite ways to switch things up:
Mocha Madness
Swap the white chocolate for dark chocolate and add an extra teaspoon of espresso powder. The result is a richer, slightly bitter truffle that pairs wonderfully with coffee lovers. Top with a dusting of cocoa powder for an elegant finish.
Citrus Burst
Add a tablespoon of orange zest to the cream cheese mixture and coat the truffles in white chocolate mixed with a few drops of orange extract. Finish with candied orange peel instead of sprinkles for a bright, fragrant twist.
Nutty Delight
Replace the crushed nuts with toasted pistachios or almonds, and use almond bark instead of white chocolate. The nutty flavor complements the red velvet beautifully and adds a sophisticated crunch.
Holiday Cheer
Mix in a pinch of ground cinnamon and nutmeg into the cake crumb, and coat the truffles with white chocolate tinted with a dash of green food coloring. Sprinkle with red and green non‑pareils for a festive look perfect for Christmas gatherings.
Vegan Velvet
Swap the cream cheese for a vegan cream cheese alternative, use a plant‑based white chocolate, and ensure the cake mix is egg‑free. The texture remains creamy, and the flavor stays true to the classic red velvet profile.
Storing and Bringing It Back to Life
Fridge Storage
Place the truffles in an airtight container lined with parchment paper. They will stay fresh for up to two weeks. Keep them in the coldest part of the fridge to avoid condensation, which can make the chocolate coating sticky.
Freezer Friendly
If you’ve made a massive batch, freeze the truffles on a tray for an hour, then transfer them to a zip‑top bag. They can be stored for up to three months. When you’re ready to enjoy them, let them thaw in the refrigerator for 30 minutes.
Best Reheating Method
To revive a chilled truffle, place it on a plate and microwave for 5‑7 seconds, or let it sit at room temperature for 10 minutes. Adding a tiny splash of water (about a teaspoon) to the chocolate before reheating creates a gentle steam that restores the glossy finish. This trick ensures the truffle tastes as fresh as the day it was made.