It was a Friday night, the kind that should have been a quiet affair, but my roommate’s relentless craving for something sweet and savory turned our kitchen into a culinary battlefield. I was juggling a pot of ramen, a skillet of sautéed veggies, and a jar of soy sauce that had seen better days. The moment the soy sauce hit the hot pan and started to bubble, I knew I was on the brink of a disaster—unless I had my secret weapon: honey. That single drop of golden syrup, when paired with a splash of soy, can turn a bland stir‑fry into a showstopper. And that was the spark that lit the fire for this honey‑soy glazed chicken recipe.
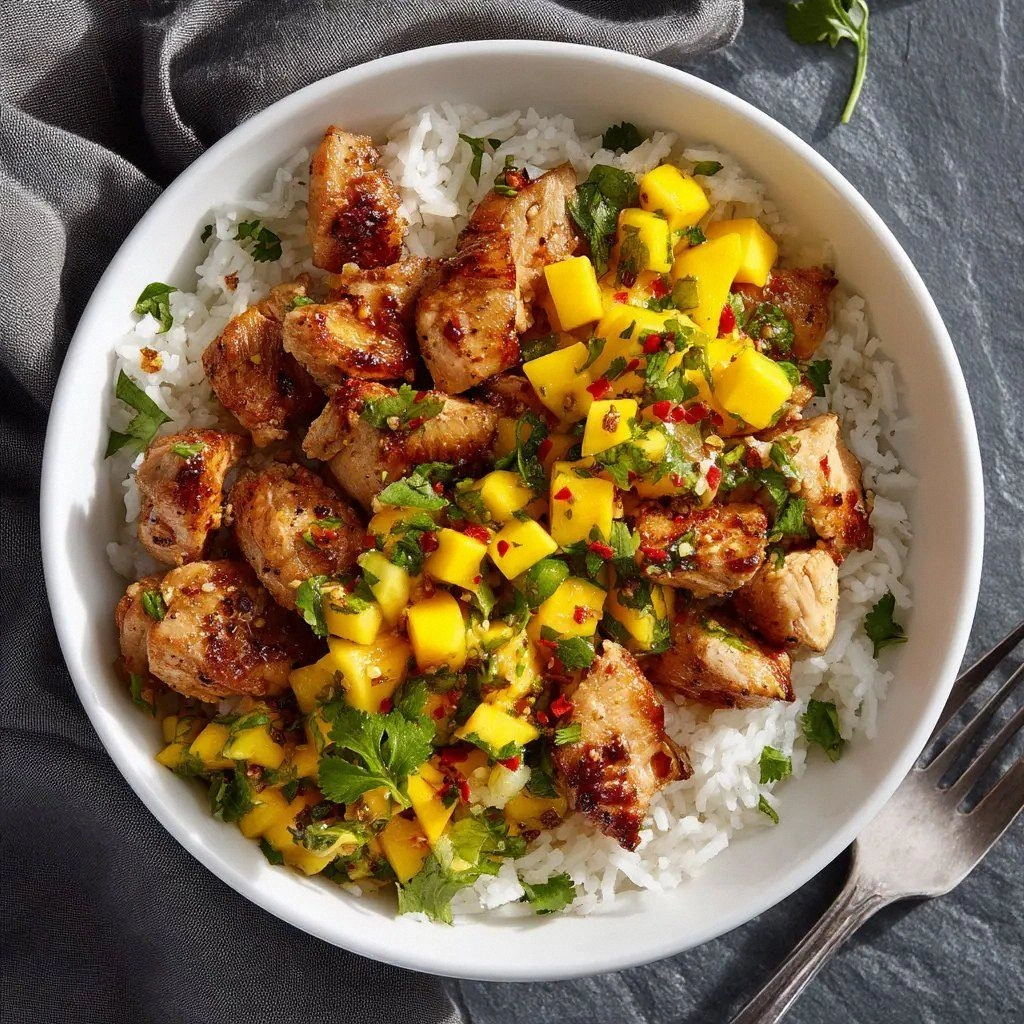
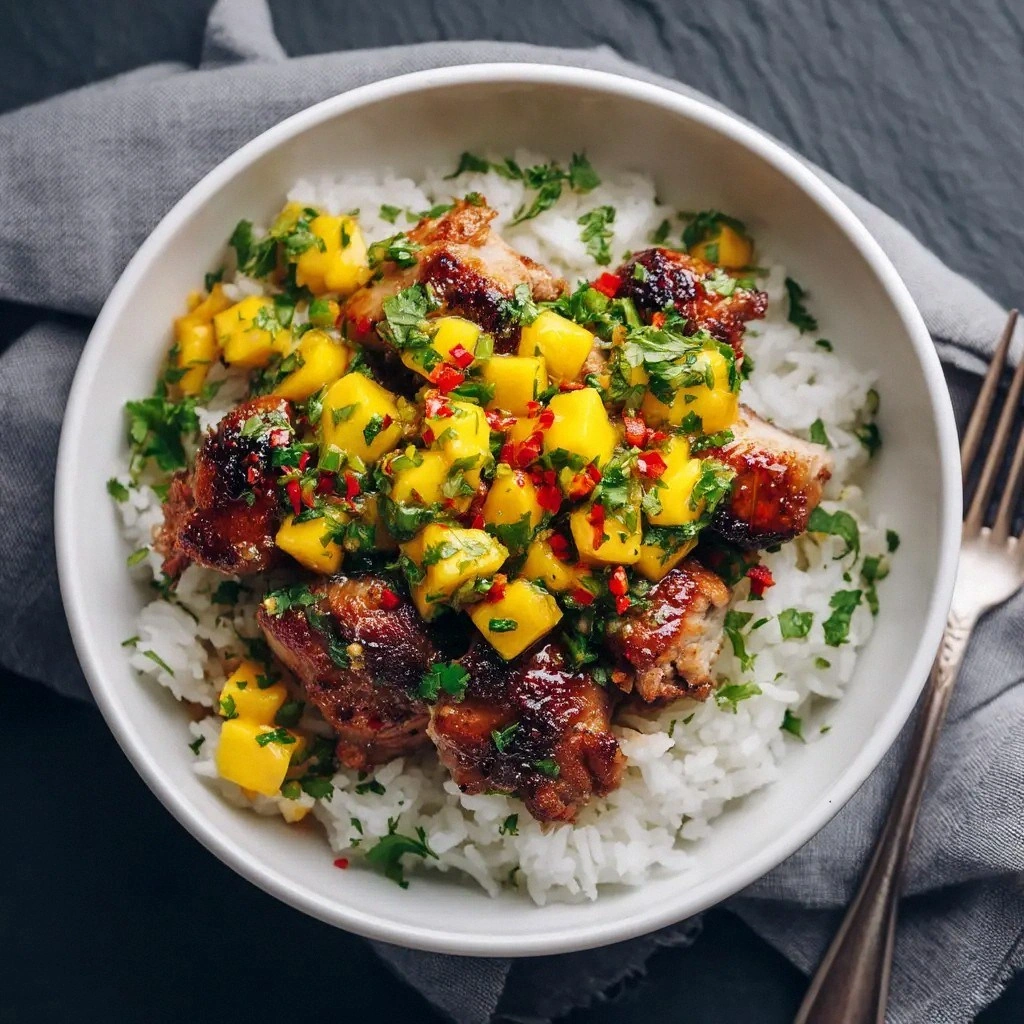
Picture this: the aroma of caramelized honey wafting through the air, mingling with the sharp, umami punch of soy sauce, while the garlic and ginger release their fragrant essences. The sound of the sauce thickening, a gentle hiss that signals the transformation from liquid to glossy glaze. The texture—juicy chicken thighs that cling to the sauce like a second skin, each bite offering a burst of sweetness, saltiness, and a hint of citrus from the rice vinegar. And the final touch: a sprinkle of green onions and sesame seeds that add a pop of color and a nutty crunch. I swear, the first bite is a revelation that makes you question how you ever survived a dinner that didn’t involve a glaze.
What makes this version stand out is not just the balance of flavors, but the methodical simplicity that lets the ingredients shine. I’ve trimmed down the steps to a tight 30‑minute window, so you can have a restaurant‑quality dish on the table before the kids finish their homework. I’ve also included a few micro‑challenges, like daring you to taste and not go back for seconds, because I know how addictive this glaze is. Trust me, this is hands down the best version you’ll ever make at home, and the secret sauce is in the technique—if you follow along, you’ll never look back.
If you’ve ever struggled with sticky sauces or unevenly cooked chicken, you’re not alone—and I’ve got the fix. I’ll be honest—after the first batch, I ate half the chicken before anyone else even got a taste. Most recipes get this completely wrong, either by over‑cooking the meat or under‑developing the glaze. Here’s what actually works: a quick sear, a thickening slurry, and a finishing touch of aromatics that keep the dish from feeling flat. Picture yourself pulling this out of the oven, the whole kitchen smelling incredible, and your guests already lining up for seconds. Okay, ready for the game‑changer? Let’s walk through every single step—by the end, you’ll wonder how you ever made it any other way.
What Makes This Version Stand Out
- Flavor: The marriage of honey’s natural sweetness and soy’s umami depth creates a sauce that coats each piece of chicken like velvet, leaving a lingering aftertaste that keeps you coming back for more.
- Texture: The quick sear locks in juices, while the cornstarch slurry turns the glaze into a glossy, silky coat that clings without making the meat soggy.
- Simplicity: With only ten ingredients and a single pan, this recipe cuts the prep time in half, making it the ultimate weeknight hero.
- Uniqueness: The subtle citrus kick from rice vinegar balances the sweetness, and toasted sesame oil adds a nutty aroma that elevates the dish beyond a standard teriyaki.
- Crowd Reaction: Friends who have tried it say it’s “the best glazed chicken I’ve ever had,” and they’re not just saying that because they’re polite.
- Ingredient Quality: Using low‑sodium soy sauce keeps the dish from becoming too salty, while fresh ginger and garlic bring bright, sharp notes that cut through the richness.
- Cooking Method: The technique of searing first, then simmering with the glaze, ensures even cooking and maximum flavor absorption.
- Make‑Ahead Potential: The glaze can be made ahead of time and stored, allowing you to assemble the dish in minutes when you’re pressed.
Alright, let's break down exactly what goes into this masterpiece…
Inside the Ingredient List
The Flavor Base
Low‑sodium soy sauce is the backbone of this glaze, offering depth without drowning the other flavors. It’s the savory anchor that lets honey and ginger shine. If you don’t have low‑sodium soy, regular soy will work, but you’ll need to reduce the honey slightly to avoid an overly sweet dish. A good rule of thumb: for every cup of soy, use 3 tablespoons of honey.
Honey, the golden elixir, brings natural sweetness and a subtle floral note. It caramelizes beautifully when heated, creating a glossy sheen that makes the dish visually stunning. If you’re looking for a lower‑calorie alternative, try a 1:1 ratio of maple syrup; it will give a different but equally delightful flavor profile.
Fresh garlic and ginger are the aromatic duo that elevate the sauce from simple to sensational. Garlic adds a punchy bite, while ginger contributes a peppery brightness that cuts through the richness. Mince them finely so they distribute evenly throughout the glaze; otherwise, you’ll end up with pockets of raw flavor.
Rice vinegar balances the sweetness and adds a subtle tang that prevents the glaze from becoming cloying. It also helps to tenderize the chicken slightly, giving each bite a tender, melt‑in‑your‑mouth quality. If you can’t find rice vinegar, a splash of white wine or apple cider vinegar will work in a pinch.
The Texture Crew
Cornstarch is the secret weapon that thickens the glaze into a silky, clingy coating. It’s a classic technique in Asian cooking, turning liquid into a glossy sauce that clings to everything. Remember to always whisk the cornstarch into cold water first; this creates a slurry that avoids clumps.
Water is used to adjust the viscosity of the glaze before it thickens. A 2‑tablespoon splash keeps the sauce from becoming too thick and ensures it coats the chicken evenly. If you prefer a thicker sauce, add a tablespoon more of cornstarch; for a lighter glaze, reduce the water slightly.
The Unexpected Star
Toasted sesame oil is more than just a flavor enhancer; it adds a nutty aroma that elevates the dish to gourmet status. Because it’s potent, a little goes a long way—just one teaspoon is enough to transform the entire glaze. If you don’t have toasted sesame oil, regular sesame oil will still work, but it won’t have that deep, toasted flavor.
Sesame seeds and green onions are the finishing touches that add crunch and freshness. They also provide a visual contrast that makes the dish look as good as it tastes. If you’re watching your sodium, you can sprinkle the seeds sparingly or omit them entirely; the glaze will still shine.
The Final Flourish
Sliced green onions add a bright, sharp note that cuts through the richness of the glaze. They also bring a pop of color, making the dish feel more vibrant and appetizing. For a subtle twist, try adding a pinch of red pepper flakes to the glaze for a mild heat that balances the sweetness.
Everything’s prepped? Good. Let’s get into the real action…
The Method — Step by Step
- Trim and Pat Dry: Begin by trimming any excess fat or skin from the chicken thighs. Pat them dry with paper towels; this ensures a good sear and prevents steam from forming. Season both sides with a pinch of salt and pepper. Let them sit at room temperature for 10 minutes—this helps them cook evenly.
- Whisk the Glaze: In a medium bowl, combine the low‑sodium soy sauce, honey, minced garlic, grated ginger, rice vinegar, toasted sesame oil, cornstarch, and water. Whisk until the cornstarch is fully dissolved, creating a smooth slurry. This step is crucial; a lumpy sauce will ruin the glossy finish. Keep the mixture aside while you sear the chicken.
- Heat the Skillet: Place a large non‑stick skillet over medium‑high heat and add 1 tablespoon of vegetable oil. Once the oil shimmers, carefully lay the chicken thighs in the pan, skin‑side down if they have skin. Do not move them for the first 3–4 minutes; this allows a golden crust to form. The sizzle that follows is the soundtrack of success.
- Sear and Flip: After 3–4 minutes, the chicken should release easily from the pan. Flip them and sear the other side for another 3–4 minutes. The internal temperature should reach about 145°F (63°C) when checked with a meat thermometer. If you’re short on time, you can skip the thermometer, but the skin should look crisp and the juices run clear.
- Deglaze and Simmer: Remove the chicken from the skillet and set aside. Reduce the heat to medium, then pour the glaze mixture into the same pan. The mixture will bubble vigorously—this is normal. Stir constantly to prevent the soy from sticking to the bottom. As the sauce heats, it will start to thicken and develop a deep amber color.
- Watch Out: Keep a close eye on the sauce at this stage; soy sauce can burn quickly. If you notice a bitter or acrid smell, lower the heat immediately and stir. A burnt glaze will ruin the dish, so don’t take chances.
- Return the Chicken: Once the sauce has thickened to a glaze consistency—about 5–7 minutes—return the chicken to the pan. Spoon the sauce over each piece, ensuring they’re fully coated. Let them simmer together for an additional 2 minutes to reheat and allow the flavors to meld.
- Finish and Serve: Remove the skillet from the heat. Sprinkle sliced green onions and toasted sesame seeds over the chicken. Let the dish rest for a minute; this allows the glaze to set slightly and the juices to redistribute. Plate immediately over steamed rice or sautéed noodles for a complete meal.
That's it— you did it. But hold on, I've got a few more tricks that'll take this to another level. Stay tuned for insider tips that will elevate your game from good to legendary.
Insider Tricks for Flawless Results
The Temperature Rule Nobody Follows
Many cooks start the glaze on high heat, which can cause the soy to scorch and create a bitter base. The trick is to keep the heat at medium and stir constantly. This method ensures even caramelization of honey and prevents the sauce from turning into a burnt mess. I once had a batch that went from sweet to bitter in seconds—don’t let that happen to you.
Why Your Nose Knows Best
The aroma of the sauce is a reliable indicator of readiness. When the glaze thickens, you’ll notice a sweet, nutty scent that signals it's at the perfect consistency. If the smell becomes sharp or acrid, it’s a sign that the soy is burning. Trust your nose; it’s a seasoned chef’s best friend.
The 5-Minute Rest That Changes Everything
Once the chicken is plated, let it rest for at least five minutes before cutting. This brief pause allows the juices to redistribute, ensuring every bite is juicy and tender. A friend once cut into the chicken immediately and found it dry—don’t make the same mistake.
The Right Pan Size
Using a skillet that's too small forces the chicken to crowd together, which leads to steaming instead of searing. A wide, shallow pan ensures each piece has space to brown properly. If you’re cooking for a crowd, consider a second pan or a large sheet pan to avoid overcrowding.
The Coriander Twist
Adding a handful of fresh cilantro to the glaze at the end gives a bright, citrusy lift that cuts through the richness. It’s a simple swap that transforms the dish into a more complex flavor profile. I’ve seen this variation turn a good dish into a crowd‑pleaser at parties.
The Sauce Consistency Trick
If the glaze looks too thin, whisk in an extra tablespoon of cornstarch dissolved in a splash of water. For a thicker glaze, reduce the water by half and add a pinch more cornstarch. The key is to add gradually and stir constantly to avoid lumps.
Creative Twists and Variations
This recipe is a playground. Here are some of my favorite ways to switch things up:
Spicy Sriracha Kick
Stir in a tablespoon of Sriracha into the glaze for a spicy, sweet combo that’s perfect for heat lovers. The heat cuts through the sweetness, creating a balanced flavor profile that’s both bold and comforting.
Coconut Milk Creaminess
Replace the water in the slurry with coconut milk to add a creamy, tropical twist. The coconut’s subtle sweetness pairs beautifully with honey, while the richness of the milk elevates the dish to a new level of indulgence.
Teriyaki Fusion
Swap the rice vinegar for mirin and add a splash of sake for a traditional teriyaki flavor. The mirin’s sweetness will deepen the glaze, while the sake adds a subtle umami note that brings the dish closer to Japanese authenticity.
Mediterranean Twist
Add a handful of chopped kalamata olives and capers to the glaze for a briny, savory edge. This variation introduces Mediterranean flavors that contrast beautifully with the sweet glaze, creating a dish that’s both familiar and adventurous.
Sweet Pineapple
Add diced fresh pineapple to the glaze for a tropical twist. The pineapple’s natural sweetness complements the honey, while its acidity keeps the sauce from becoming overly thick.
Smoky BBQ
Incorporate a teaspoon of smoked paprika into the glaze for a smoky depth that pairs well with the honey. This variation gives the dish a subtle barbecue flavor that’s surprisingly complementary.
Storing and Bringing It Back to Life
Fridge Storage
Store the glazed chicken in an airtight container in the refrigerator for up to three days. The glaze will thicken slightly as it chills, so a quick stir before reheating will restore its glossy sheen. Keep the container on the middle shelf to maintain a consistent temperature.
Freezer Friendly
For longer storage, freeze the chicken in a freezer‑safe bag or container for up to two months. To thaw, place it in the refrigerator overnight. The glaze may separate slightly; whisk it back together before reheating.
Best Reheating Method
Reheat the chicken in a skillet over medium heat, adding a splash of water or broth to loosen the glaze. Alternatively, microwave on medium power for 1–2 minutes, stirring halfway through. A tiny splash of water before reheating steams the dish back to perfection, keeping the chicken moist.