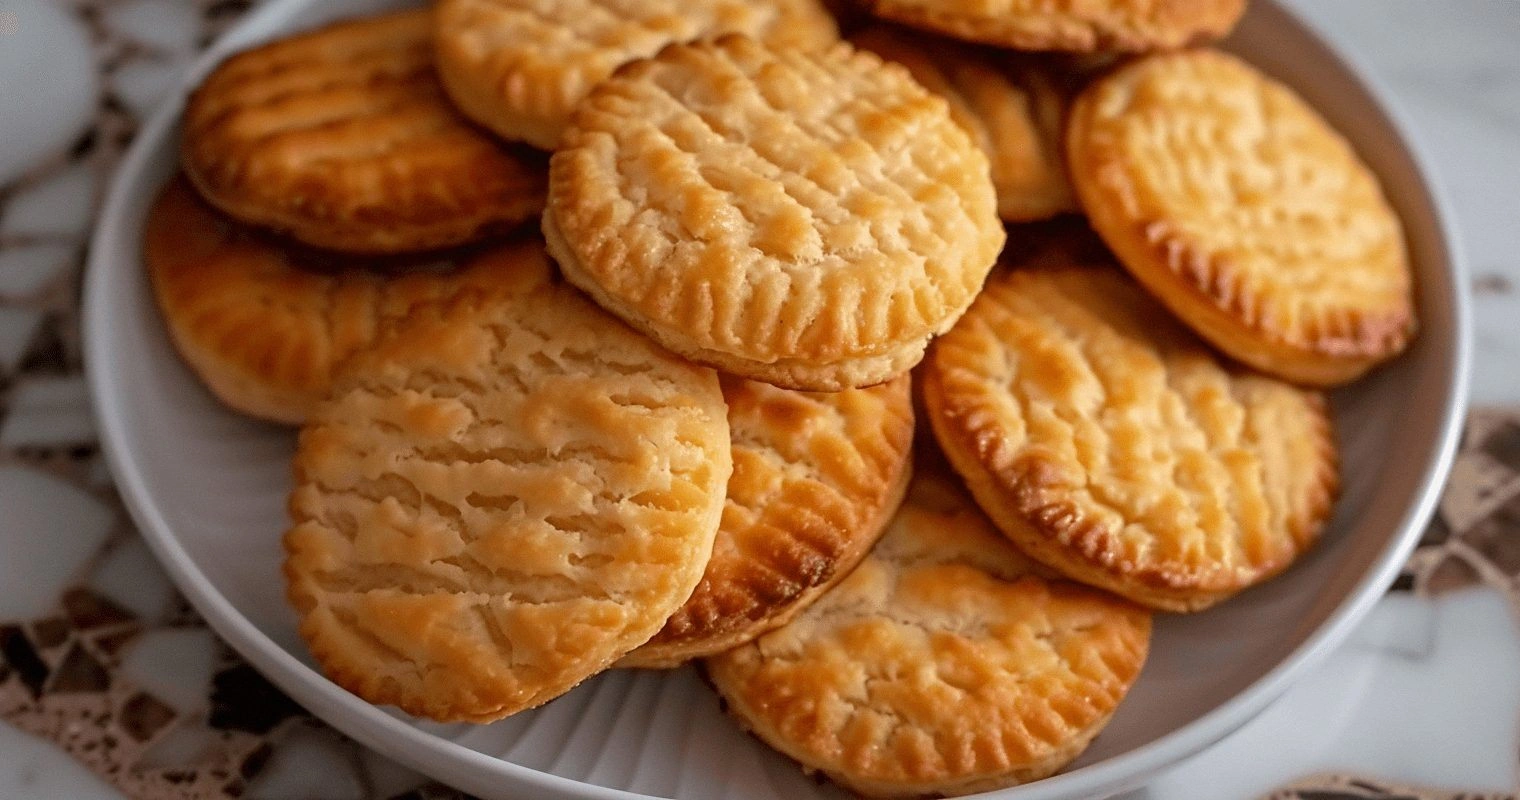
I remember the night my kitchen turned into a science experiment: a batch of vanilla cupcakes turned out more like a rubbery, unappetizing slab that even my cat refused to touch. That disaster sparked a craving for something sweet, colorful, and undeniably playful. I was determined to find a recipe that would not only rescue me from bland desserts but also bring a splash of joy to any gathering. The answer came in the form of a surprisingly simple, yet outrageously fun cookie that uses none of the usual suspects—flour, butter, eggs, and a dash of magic.
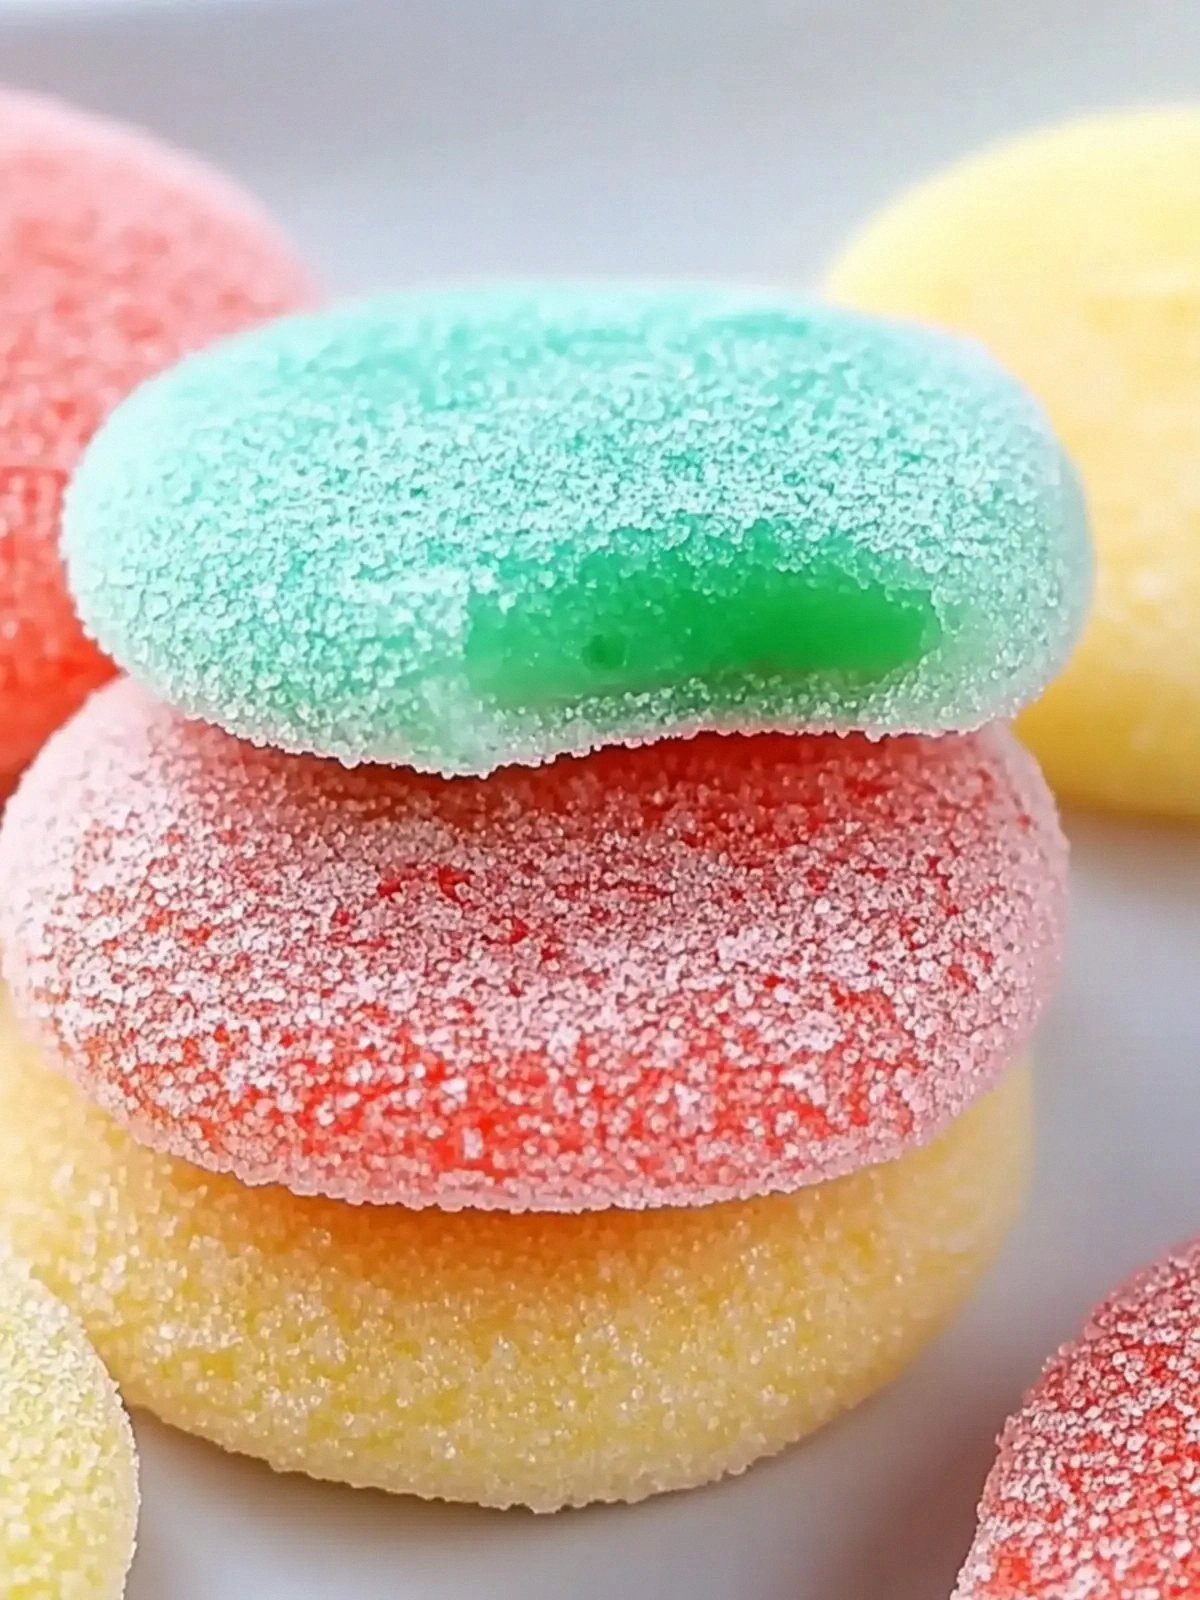
Picture this: a tray of golden, slightly puffy cookies, each speckled with bright, candy‑like shards of gelatin that melt in your mouth like confetti at a celebration. The aroma that fills the kitchen is a sweet, fruity perfume, hinting at the flavors of your favorite childhood candies, while the sound of the first bite is a satisfying crack, almost like breaking through a thin shell of nostalgia. The texture is a paradoxical blend of crunchy edges and a chewy, almost gummy center that lingers pleasantly on the palate. If you’ve ever felt the frustration of a cookie that falls apart, this one stays together, offering a reliable, repeatable delight.
What makes this version stand out? It’s the clever use of gelatin as both a sweetener and a texture enhancer, turning ordinary cookies into a carnival of flavors. The recipe’s simplicity is a revelation—just a handful of pantry staples and a couple of packages of Jello. The result is a cookie that looks like a piece of art, tastes like a candy bar, and feels like a treat you can’t resist sharing. I dare you to taste this and not go back for seconds. That’s the promise: a cookie that’s hands down the best version you’ll ever make at home.
Let me walk you through every single step—by the end, you’ll wonder how you ever made it any other way. The method is straightforward, but the little tricks we’ll sprinkle in will elevate the experience from good to unforgettable. If you’re ready for the game‑changer, let’s dive in.
What Makes This Version Stand Out
- Texture: The gelatin gives the cookies a unique chew that’s reminiscent of chewy candies, while the butter keeps them tender.
- Flavor: Each bite bursts with the fruit flavor of the gelatin, balanced by the subtle sweetness of sugar and the savory depth of butter.
- Color: The result is a rainbow of hues that makes the cookies look like edible fireworks.
- Ease: No fancy equipment or elaborate techniques—just a mixing bowl, an oven, and a handful of pantry staples.
- Versatility: Swap out the gelatin flavor or add chocolate chips for a new twist without compromising the base.
- Make‑ahead: The cookies hold up beautifully for up to a week in an airtight container.
Alright, let's break down exactly what goes into this masterpiece…
Inside the Ingredient List
The Flavor Base
Butter is the heart of any cookie, providing richness and a subtle caramel undertone. A 3/4 cup of unsalted butter melts into a silky base that coats every bite. If you’re looking for a dairy-free version, coconut butter works wonderfully, though it will alter the flavor profile slightly. Skipping butter would result in a dry, crumbly cookie that lacks the luscious mouthfeel we’re after.
The Texture Crew
Granulated sugar dissolves into the butter, creating a smooth batter that’s easy to work with. The sugar also caramelizes slightly during baking, adding a hint of depth. If you replace it with brown sugar, you’ll get a more robust, molasses‑like sweetness, but the cookies will be slightly denser. The egg acts as a binder, holding the mixture together and adding a delicate lift to the crumb.
The Unexpected Star
Gelatin, in the form of two 3‑oz packages of Jello, is the secret weapon that gives these cookies their signature chew. When dissolved in boiling water and mixed into the batter, it sets into a translucent, gummy matrix. If you omit gelatin, the cookies become ordinary, lacking the playful texture that makes them stand out. A fun twist: try using a flavored gelatin that’s not typically paired with cookies—think lime or peach—for a surprising twist.
The Final Flourish
Baking powder and a pinch of salt are the final touches that lift the cookies and balance the sweetness. Baking powder ensures a light rise, while the salt sharpens the overall flavor. If you’re gluten‑free, you can substitute the all‑purpose flour with a 1:1 blend of oat and rice flour. Remember, skipping the salt will leave the cookies flat and overly sweet.
Everything's prepped? Good. Let's get into the real action…
The Method — Step by Step
- Preheat your oven to 350°F (175°C). Line a baking sheet with a silicone mat or parchment paper. The high heat will ensure a quick rise, while the mat keeps the gelatin shards from sticking.
- In a medium saucepan, bring 1 cup of water to a rolling boil. Add the two 3‑oz packages of Jello and stir until fully dissolved. The mixture should become translucent and slightly thick.
- While the gelatin is cooling, cream the 3/4 cup of unsalted butter with 1 cup of granulated sugar in a large bowl until pale and fluffy. The butter should be at room temperature for optimal creaming.
- Beat in the egg, one at a time, ensuring each is fully incorporated before adding the next. This step creates a smooth, cohesive batter that will hold the gelatin shards.
- Sift together 2 1/2 cups of all‑purpose flour, 1 tsp baking powder, and 1/4 tsp salt. Add the dry ingredients to the wet mixture, mixing until just combined. Over‑mixing can lead to tough cookies.
- Gently fold in the cooled gelatin mixture, ensuring even distribution. The batter will look a bit glossy but that’s normal and adds to the final shine.
- Drop rounded tablespoonfuls of dough onto the prepared baking sheet, spacing them 2 inches apart. The cookies will spread slightly, creating a perfect bite‑sized shape.
- Bake for 12–15 minutes, or until the edges are just turning golden. The center should still look slightly pale; the gelatin will set as they cool.
- Remove from the oven and let the cookies cool on the sheet for 5 minutes. Transfer them to a wire rack to cool completely, preventing the bottom from becoming soggy.
- Once cooled, store the cookies in an airtight container at room temperature for up to 5 days, or refrigerate for up to a week. For a crispier texture, place them in the fridge for 30 minutes before serving.
That’s it — you did it. But hold on, I've got a few more tricks that'll take this to another level…
Insider Tricks for Flawless Results
The Temperature Rule Nobody Follows
Many bakers bake at 375°F, but that high temperature can cause the gelatin shards to melt too quickly, resulting in a gooey, uneven crumb. Stick to 350°F for a balanced rise and a consistent texture. I’ve found that baking at 350°F gives a golden top while keeping the center chewy.
Why Your Nose Knows Best
Before you pull the cookies out of the oven, trust your nose. A faint, sweet aroma indicates that the sugar is caramelizing just right. If you smell nothing, the cookies might not be fully cooked and could stay raw inside.
The 5‑Minute Rest That Changes Everything
Letting the cookies rest on the baking sheet for 5 minutes after baking allows the gelatin to set properly. This short pause ensures the chewy texture doesn’t collapse when you transfer them to a rack. Skipping this step often results in a slightly gummy bite.
Use Room‑Temperature Eggs
Room‑temperature eggs blend more smoothly into the batter, preventing lumps. If you’re in a hurry, a quick 5‑minute soak in warm water can bring the egg up to temperature. This small tweak saves time and improves the final crumb.
Cooling Technique for Crisp Edges
After the cookies finish baking, place a parchment‑lined tray on a cooling rack. The airflow will crisp the edges without drying out the center. I’ve found this method keeps the cookies from becoming soggy, especially in humid climates.
Creative Twists and Variations
This recipe is a playground. Here are some of my favorite ways to switch things up:
Chocolate‑Covered Jello Cookies
Dip the cooled cookies in melted dark chocolate and sprinkle with sea salt. The chocolate adds richness, while the sea salt cuts through the sweetness, creating a sophisticated flavor profile.
Peanut Butter Swirl
Fold in a tablespoon of creamy peanut butter into the batter before baking. The nutty flavor pairs beautifully with the fruity gelatin, and the swirl adds a visual pop.
Almond Joy Variation
Replace the gelatin with coconut‑flavored Jello and sprinkle toasted shredded coconut on top before baking. The result is a tropical, chewy treat reminiscent of an almond joy bar.
Citrus Burst
Use a lemon or orange flavored gelatin and zest a bit of the fruit into the batter. The bright citrus notes elevate the cookies, making them perfect for a summer gathering.
Mini Cookie Sandwiches
Bake the cookies as usual, then sandwich a spoonful of whipped cream or flavored frosting between two cookies. These mini sandwiches are perfect for parties and add an extra layer of indulgence.
Storing and Bringing It Back to Life
Fridge Storage
Place the cookies in a single layer on a plate, cover with plastic wrap, and store in the refrigerator for up to a week. The cold environment preserves the chewy center and prevents the gelatin from softening too quickly.
Freezer Friendly
For longer storage, wrap each cookie individually in parchment paper and place them in a freezer bag. They can be frozen for up to three months. Thaw at room temperature for 30 minutes before serving.
Best Reheating Method
To revive the cookies’ freshness, place them on a baking sheet and heat at 300°F for 5 minutes. Add a tiny splash of water to the dough before reheating to create steam, which brings back the chewy texture.