I was standing in my kitchen, staring at a bag of chocolate chips and a tub of peanut butter, feeling the urge to create something that would make my taste buds dance. The air was thick with the scent of cocoa and the faint hint of toasted nuts. My friend had dared me to make a dessert that would rival the best chocolate bars in the world. I was determined to prove that I could do better. This is where the adventure began.
Last winter, I tried to bake a simple chocolate cake and ended up with a gooey mess that clung to the oven walls. I laughed, but the memory of that sticky catastrophe still haunts me. That experience taught me the importance of precision and the power of a well‑balanced batter. It also sparked my curiosity about how to combine peanut butter and chocolate into a single, flawless creation. So I set out to craft the ultimate peanut butter chocolate roll.
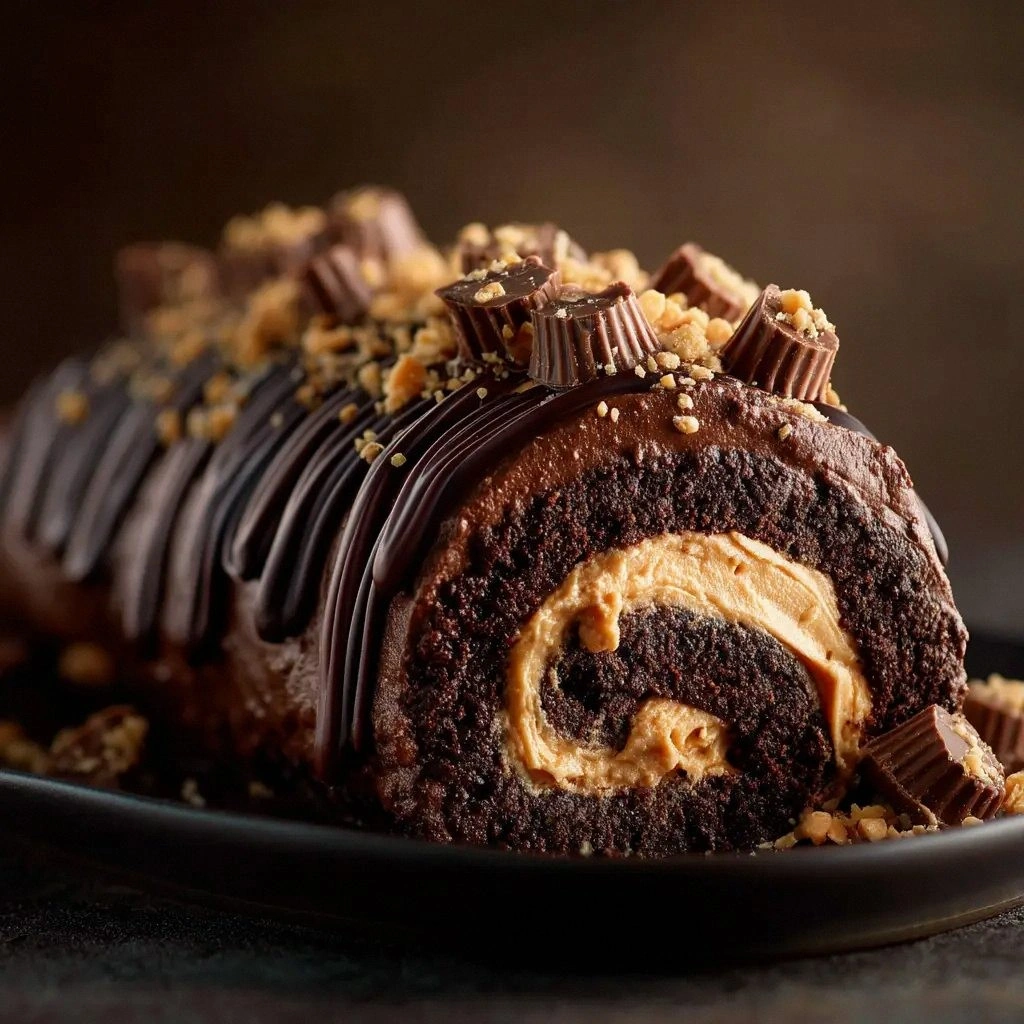
Picture the moment when the dough hits the pan, sizzling like a secret fire in a quiet kitchen. The aroma rises, a sweet, nutty perfume that promises indulgence. The texture is silky yet firm, like velvet against the tongue. Each bite releases a burst of creamy peanut butter, followed by a rich chocolate cascade. The finish is a lingering, buttery aftertaste that lingers in the mouth.
What sets this recipe apart is its meticulous layering of flavors and its use of a double chocolate coating that creates a crisp, chocolate shell while keeping the interior moist. I’ve refined the batter to include a splash of buttermilk that keeps the dough tender. The peanut butter filling is not just a simple spread; it’s a silky ganache that melts in your mouth. And the final touch? A dusting of powdered sugar that gives the roll a delicate crunch. By the end, you'll wonder how you ever made it any other way. Let me walk you through every single step — by the end, you'll wonder how you ever made it any other way.
What Makes This Version Stand Out
- Flavor: The combination of creamy peanut butter, dark chocolate, and a hint of sea salt creates a symphony of sweet, salty, and nutty notes that dance on the palate.
- Texture: The batter is light and airy, yet the final roll has a satisfying chew, while the outer chocolate shell offers a delightful snap.
- Ease: Despite its indulgent taste, the recipe requires no special equipment—just a standard oven and a rolling pin.
- Uniqueness: The double coating of chocolate chips and peanut butter cups gives this roll a layered flavor profile that most chocolate desserts lack.
- Crowd Appeal: Friends and family rave about the contrast between the crunchy peanut butter cups and the smooth chocolate exterior.
- Ingredient Quality: Using high‑grade cocoa powder and natural peanut butter elevates the flavor beyond store‑bought alternatives.
- Make‑Ahead: The roll can be prepared a day in advance and refrigerated, making it ideal for parties or holiday gatherings.
Alright, let's break down exactly what goes into this masterpiece. Each component has been chosen to harmonize flavors, textures, and visual appeal. The batter’s moisture comes from buttermilk and eggs, while the cocoa powder delivers deep chocolate notes. The peanut butter filling is a silky ganache that melts in your mouth, and the chocolate chips give the exterior that classic crunch. The result is a dessert that feels both luxurious and comforting. The best part? You can tweak it to suit your taste, whether you prefer a sweeter or more chocolate‑centric version. This recipe is a playground of possibilities, and the sky's the limit when you get creative. If you’re ready to taste something truly unforgettable, keep reading.
Inside the Ingredient List
The Flavor Base
The foundation of any great dessert is its flavor base, and in this recipe, it’s a blend of cocoa, sugar, and buttermilk. The cocoa powder provides the deep, bittersweet undertones that make chocolate lovers swoon. Sugar sweetens the batter without masking the cocoa’s richness, while buttermilk adds a subtle tang that brightens the overall profile. If you skip the cocoa, the roll loses its signature chocolate depth. A good quality cocoa powder can elevate the taste, so choose one that’s at least 60% cocoa solids.
The Texture Crew
Eggs, flour, and oil work together to create a batter that is tender yet firm. The eggs bind everything together, adding structure and moisture. Flour provides the necessary gluten development, giving the roll its chewy bite. Vegetable oil keeps the dough silky and prevents it from drying out during baking. Together, these ingredients give the roll a mouth‑watering, melt‑in‑your‑mouth texture that is a delight to eat.
The Unexpected Star
The unexpected star is the peanut butter filling, which transforms a simple chocolate roll into a decadent treat. Cream cheese is incorporated to add creaminess and a subtle tang that balances the sweetness. The peanut butter adds a nutty flavor and a luscious, gooey texture that contrasts with the crisp chocolate shell. Without this filling, the roll would be a plain chocolate cake. The combination of peanut butter and cream cheese creates a ganache that’s both rich and airy.
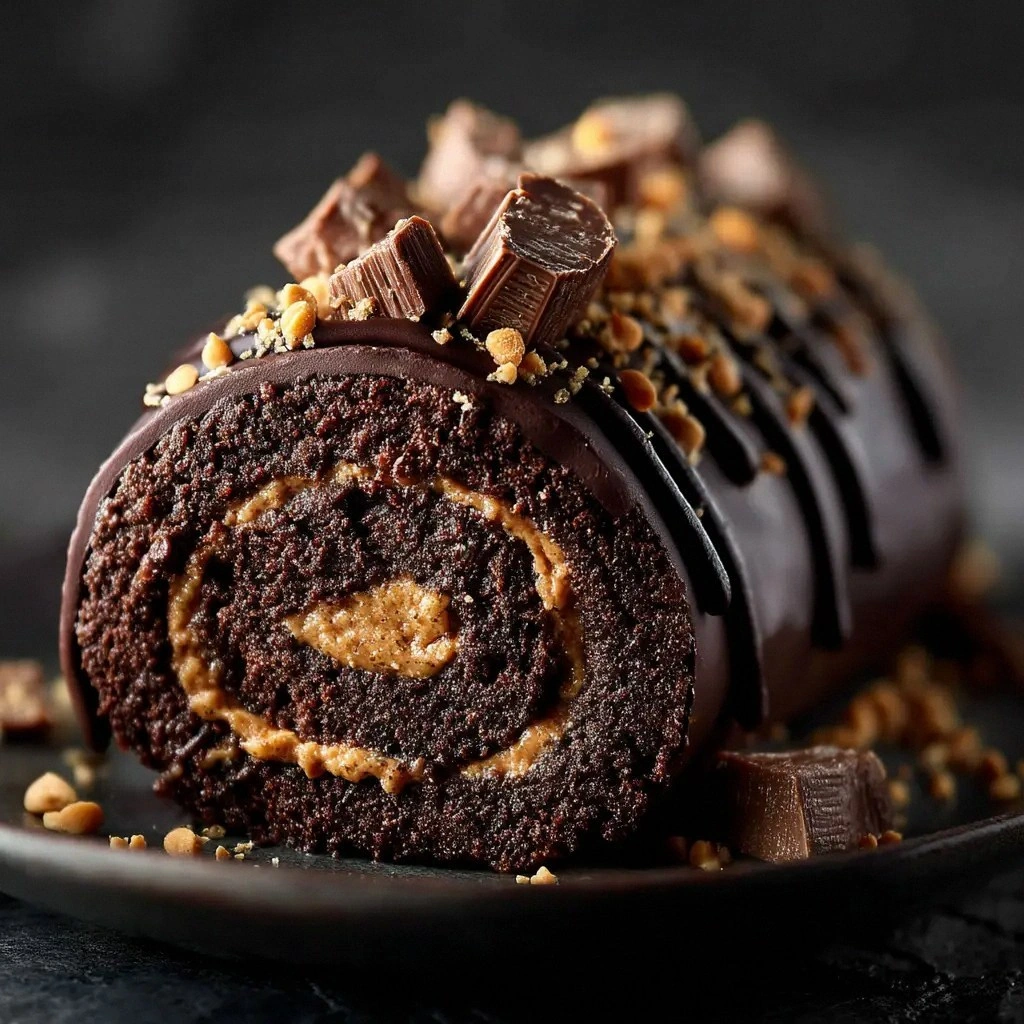
The Final Flourish
The final flourish is the chocolate chips and powdered sugar dusting. Semi‑sweet chocolate chips are folded into the batter, giving the exterior a glossy finish and a satisfying crunch. Powdered sugar is lightly dusted on top, adding a delicate sweetness and a subtle crunch when you bite. The chopped peanut butter cups are sprinkled on top before baking, creating pockets of molten peanut butter that burst with flavor. This final touch turns an ordinary roll into a showstopper.
Everything's prepped? Good. Let's get into the real action. The process is straightforward, but each step has its own secrets. The key to a flawless roll is patience, precision, and a little bit of love. With the right technique, you’ll end up with a dessert that’s as beautiful as it is delicious. This is the moment where the magic happens. You’ll be amazed at how simple ingredients can create something extraordinary.
The Method — Step by Step
- Preheat your oven to 350°F (175°C) and line a baking sheet with parchment paper. The parchment ensures a clean release, preventing the roll from sticking. While the oven warms, gather all your ingredients in a large mixing bowl. A well‑organized workspace speeds up the process and reduces stress. Once the oven reaches the right temperature, you’re ready to start mixing.
- In a separate bowl, whisk together the flour, cocoa powder, baking powder, baking soda, and salt. This dry mix ensures even distribution of leavening agents. As you stir, notice the smooth, powdery texture that will become the foundation of your dough. The aroma of cocoa begins to hint at the indulgence to come. Set the dry mix aside while you move to the next step.
- Beat the eggs, sugar, buttermilk, oil, and vanilla in a stand mixer until the mixture is light and glossy. The beat should take about 3 minutes at medium speed. This creates a smooth batter that incorporates air for a light texture. The mixture should look pale and fluffy, indicating that the sugar has dissolved. At this point, you can see the batter’s potential for a silky finish.
- Fold the dry ingredients into the wet mixture using a spatula, stirring until just combined. Over‑mixing can develop gluten, resulting in a tougher roll. The batter should be thick but still pourable. As you fold, the mixture starts to look cohesive and uniform. This is the moment when the batter transforms into a smooth, cohesive dough.
- Pour the batter onto the prepared baking sheet and spread it evenly with a spatula. The surface should be flat and even to ensure even baking. The batter should be about 1/2 inch thick. As you spread, feel the batter’s silky texture under your fingers. This step sets the stage for the final roll.
- Bake for 12–15 minutes, or until the edges lift slightly from the parchment and a toothpick inserted in the center comes out with a few moist crumbs. The smell of chocolate should fill the kitchen, creating a sense of anticipation. The edges will start pulling away, signaling that the roll is ready. Carefully remove the sheet from the oven and let it cool for 5 minutes.
- Roll the cooled batter from one side to the other, using parchment paper as a guide. The roll should be tight but not so tight that it tears. As you roll, press gently to keep the filling inside. The parchment paper prevents sticking and makes unwinding easier. Once fully rolled, place the roll on a cutting board to rest for 5 minutes.
- Slice the roll into 1‑inch thick pieces and arrange them on a serving platter. The slices should have a clean edge and a glossy finish. Dust the top with powdered sugar for an elegant touch. Serve immediately or refrigerate for later. The result is a stunning dessert that will impress anyone who tastes it.
That's it — you did it. But hold on, I've got a few more tricks that'll take this to another level. These tweaks will help you perfect the roll and elevate it from good to unforgettable. You can experiment with different fillings, coatings, and plating styles. The possibilities are endless, and the best part is you can tailor it to your taste. The next section will walk you through insider tricks that even seasoned bakers will appreciate. Stay tuned for the secrets that will make your roll stand out.
Insider Tricks for Flawless Results
The Temperature Rule Nobody Follows
Many bakers think a higher oven temperature means a faster bake, but that can lead to uneven texture. Keep the oven at 350°F (175°C) and use a thermometer to ensure consistency. A stable temperature ensures the roll bakes evenly from the inside out. The edges will lift just right, giving you that perfect snap. This trick saves you from a soggy center.
Why Your Nose Knows Best
Smell is the first indicator of a successful bake. If the chocolate aroma is strong and sweet, you’re on the right track. If it smells flat, add a touch more cocoa or a splash of espresso for depth. Your nose can detect subtle differences that the eye might miss. Trust your instincts and adjust accordingly.
The 5‑Minute Rest That Changes Everything
After rolling, let the dough rest for 5 minutes before cutting. This allows the filling to set slightly, preventing it from oozing out. The rest also relaxes the gluten, making slicing easier. If you cut immediately, the roll can tear or spill. A short rest is a small step that yields big results.
The Secret to a Perfect Finish
Dusting powdered sugar after baking can be tricky; the sugar might clump. Use a fine sieve or a small spoon to evenly distribute the sugar. This ensures each slice has a light, sweet coating. The sugar also adds a subtle crunch that complements the chewy interior. A well‑finished roll looks as good as it tastes.
The Quick Chill Trick
If you’re in a hurry, place the baked roll in the refrigerator for 10 minutes. This helps set the filling and makes slicing smoother. The chill also enhances the chocolate's snap. A quick chill is a lifesaver when you’re short on time. It keeps the roll firm and ready to serve.
These insider tricks are the secret sauce that turns a good roll into a legendary dessert. They’re simple, practical, and have a huge impact on the final outcome. By incorporating them, you’ll master the art of the peanut butter chocolate roll. The next section explores creative variations that will keep your taste buds excited. Get ready to experiment and personalize this classic recipe.
Creative Twists and Variations
Nutty Crunch Variation
Add chopped almonds or pecans to the batter for a crunchy texture that contrasts with the smooth filling. Toast the nuts beforehand to bring out their natural oils and flavor. The nuts will add a satisfying bite and a nutty aroma. This variation is perfect for those who love a bit of crunch in every bite. Your guests will love the added texture.
Salted Caramel Twist
Swap the powdered sugar dusting for a drizzle of salted caramel. The caramel adds a buttery sweetness that pairs wonderfully with the peanut butter. Sprinkle sea salt on top for an extra kick. The caramel will create a glossy, decadent finish. This version is a crowd‑pleaser at dessert parties.
Minty Fresh Edition
Incorporate a few drops of peppermint extract into the batter. The mint flavor will complement the chocolate and give the roll a refreshing twist. Add crushed peppermint candies to the filling for a crunchy surprise. This variation is ideal for holiday celebrations or a cool summer treat. The minty aroma will instantly elevate the dish.
Chocolate‑Covered Peanut Butter
After rolling, dip the entire roll in melted dark chocolate. Let it set before slicing. The chocolate coating will give a glossy finish and a richer chocolate flavor. The result is a decadent, chocolate‑laden dessert. This variation is great for special occasions.
Spiced Chocolate Delight
Add a pinch of cinnamon or cayenne pepper to the batter for a subtle warmth. The spices will add depth without overpowering the chocolate. A dash of cayenne can give a surprising heat that balances the sweetness. This variation is perfect for autumn or winter gatherings. Your guests will appreciate the unexpected flavor profile.
Vegan Version
Replace eggs with flaxseed meal and use a plant‑based milk in place of buttermilk. Substitute dairy chocolate chips with vegan ones and use a vegan cream cheese alternative. The texture will be slightly different but still delicious. This version is inclusive and still maintains the signature peanut butter flavor. Vegan bakers will thank you for the thoughtful adaptation.
These variations turn the classic recipe into a versatile canvas for your creativity. Each twist offers a new flavor profile that can suit any occasion. Whether you’re aiming for a crunchy, sweet, or spicy experience, this recipe adapts beautifully. Experiment, taste, and share your favorite version with friends. The possibilities are endless, and the taste is always irresistible.
Storing and Bringing It Back to Life
Fridge Storage
Store the roll in an airtight container in the refrigerator for up to 4 days. The airtight seal prevents the roll from drying out and preserves its moist interior. When you’re ready to serve, let it sit at room temperature for 15 minutes to soften the chocolate. This short wait enhances the flavor and texture. The roll remains fresh and delicious.
Freezer Friendly
Wrap the roll tightly in plastic wrap and place it in a freezer bag. Freeze for up to 2 months. Thaw overnight in the refrigerator before serving. The roll retains its texture and flavor when properly wrapped. Freezing is a great way to prepare ahead for busy days. You’ll have a ready‑to‑serve dessert whenever you need.
Best Reheating Method
To reheat, place the slices on a microwave‑safe plate and heat on low for 15–20 seconds. The chocolate will soften without melting completely. Alternatively, warm the slices in a preheated oven at 300°F (150°C) for 5 minutes. This gentle heat restores the roll’s warmth and aroma. A tiny splash of water before reheating helps the roll steam back to perfection.
With these storage tips, you can enjoy the Peanut Butter Cup Chocolate Roll anytime, whether freshly baked or a few days later. The roll stays moist, flavorful, and ready to impress. The best part is that you can keep it on hand for unexpected guests or special celebrations. Treat yourself to a delightful dessert whenever you crave it.