I still remember the night I accidentally turned my kitchen into a citrusy, peppered battlefield. A neighbor’s pizza delivery had me craving something bright, something that could cut through the lingering grease on my countertop. I grabbed a chicken breast, a lemon, a handful of black pepper, and a pan that had seen better days, and the result was nothing short of a culinary revelation. The sizzling hiss that erupted as the meat met the hot surface was like a trumpet announcing the arrival of summer in the middle of winter. That single moment of flavor—tangy lemon, sharp pepper, and buttery richness—changed the way I think about quick dinners.
Picture this: a golden, slightly charred exterior that cracks open with a satisfying pop, revealing a juicy interior that practically melts in your mouth. The aroma alone—zesty citrus, roasted pepper, and a whisper of garlic—fills the room before you even taste it. When you take that first bite, the lemon’s brightness dances against the savory depth of the pepper, while the butter and olive oil create a silky coating that clings to the meat like a velvet glove. Every chew is a harmonious blend of crunch and succulence, a reminder that simplicity can be the most seductive of flavors. I dare you to taste this and not go back for seconds.
What makes this version of lemon‑pepper chicken stand out is the deliberate layering of flavors and textures, the careful balance of acidity and heat, and the use of high‑quality ingredients that elevate each bite. Most recipes get this completely wrong by over‑cooking the chicken or using too much lemon juice, resulting in a dry, sour mess. Here, the technique preserves moisture while the lemon’s zest and juice create a bright, almost citrusy glaze that clings to the meat. The pepper isn’t just a seasoning; it’s a partner in flavor, adding depth and a subtle heat that lingers without overwhelming. This is hands down the best version you'll ever make at home.
I’ll be honest—after preparing this dish for the first time, I ate half the batch before anyone else got a chance to try it. The rest of the family begged for seconds, and the kitchen smelled like a summer garden. The secret? A quick sear, a splash of lemon, and a touch of butter that coats the chicken in a silky, flavorful sheen. If you've ever struggled with chicken that turns out dry or bland, you're not alone—this recipe is the fix you've been waiting for. And now the fun part: let me walk you through every single step—by the end, you'll wonder how you ever made it any other way.
What Makes This Version Stand Out
- Flavor: The bright citrus notes cut through the richness of the butter and olive oil, creating a balanced taste that lingers on the palate.
- Texture: A crisp, caramelized exterior meets a tender, juicy interior—each bite is a contrast of crunch and melt.
- Ease: No complicated marinades or multi‑step processes; everything happens in one pan.
- Versatility: Works beautifully with rice, roasted veggies, or a fresh salad—no matter the side, it steals the show.
- Ingredient Quality: Using fresh lemons and high‑grade olive oil makes the difference between ordinary and extraordinary.
- Crowd Appeal: The bold lemon‑pepper combo is a crowd‑pleaser at family dinners and casual gatherings alike.
- Time Efficiency: Prep in 15 minutes, cook in 25, total 40—perfect for busy weeknights.
- Make‑Ahead Friendly: The dish can be prepared ahead and reheated without losing flavor or moisture.
Inside the Ingredient List
The Flavor Base
Olive oil and butter form the foundation of this dish, creating a luscious coating that locks in moisture while adding depth. Olive oil brings a subtle fruitiness that complements the lemon, while butter adds a silky mouthfeel and a gentle caramelization. If you’re watching calories, you can reduce the butter by half, but the flavor payoff is significant. Skipping either fat will leave the chicken dry and bland.
The Citrus Star
Freshly squeezed lemon juice and grated lemon zest are the showstoppers. The juice provides bright acidity that cuts through the richness, while the zest delivers aromatic oils that cling to the surface. A lemon with a bright green rind ensures the most vibrant flavor; a dull yellow lemon will taste flat. If you’re out of fresh lemons, a splash of lemon extract can work, but the zest is irreplaceable.
The Pepper Power
Black pepper isn’t just a seasoning; it’s a flavor vehicle that adds subtle heat and depth. Use freshly ground pepper for maximum aroma—pre‑ground pepper loses its potency quickly. The pepper’s bitterness balances the lemon’s sweetness, creating a harmonious profile. If you prefer a milder kick, reduce the amount or use white pepper for a cleaner finish.
The Supporting Cast
Garlic, thyme, and a splash of chicken broth round out the ensemble, adding savory undertones that anchor the bright flavors. Minced garlic brings a punch that lingers on the palate; thyme offers a subtle herbal note that complements the citrus. The broth keeps the chicken moist and adds a savory depth that balances the acidity. If you’re vegan, replace the broth with vegetable stock and omit the butter.
Everything's prepped? Good. Let's get into the real action.
The Method — Step by Step
- Pat the chicken breasts dry with paper towels—this step is crucial for a good sear. A dry surface prevents steaming and allows the fats to brown properly. If the chicken is wet, the pan will splash and the coating won’t set. This is the moment of truth: you’re setting the stage for the flavor explosion that follows.
- Season both sides generously with sea salt and freshly ground black pepper. The pepper’s aroma is the first hint of what’s to come. Make sure to press the seasoning into the meat so it adheres during cooking. This simple act locks in moisture and flavor.
- Heat the olive oil in a heavy‑bottom skillet over medium‑high heat until shimmering but not smoking. A hot pan is essential for a crisp crust. If the oil starts to smoke, lower the heat slightly. This step sets the temperature for the entire cooking process.
- Add the chicken breasts to the skillet, skin side down if applicable, and sear for 4–5 minutes until a golden crust forms. Flip only once to avoid tearing the surface. The sizzling sound is a cue that the Maillard reaction is working its magic. This is where texture meets flavor.
- Reduce the heat to medium, add the butter, minced garlic, and thyme. Let the butter melt completely, then stir to combine. The garlic infuses the butter with a warm, aromatic base that permeates the chicken. This step builds a flavor foundation that the lemon will later highlight.
- Pour in the freshly squeezed lemon juice and splash the chicken broth, scraping the browned bits from the bottom of the pan. These bits are packed with flavor; don’t discard them. The liquid creates steam that helps keep the chicken moist. Watch for the liquid to reduce slightly, forming a glaze.
- Add the lemon zest, honey (if using), and garlic powder. Stir until the zest is evenly distributed, coating each piece. The honey balances the acidity with a subtle sweetness, creating a glaze that clings to the chicken. This is the moment when the dish truly comes together.
- Cover the skillet with a lid and let the chicken simmer for 8–10 minutes, or until the internal temperature reaches 165°F (74°C). Keep the heat low enough to prevent the liquid from evaporating too quickly. The lid traps steam, ensuring the meat stays juicy.
- Remove the lid, increase the heat to medium‑high, and let the sauce reduce for an additional 3–4 minutes until it thickens into a glossy glaze. The reduction intensifies the lemon and pepper flavors while creating a sauce that coats the chicken. The edges will start pulling away from the pan, signaling readiness.
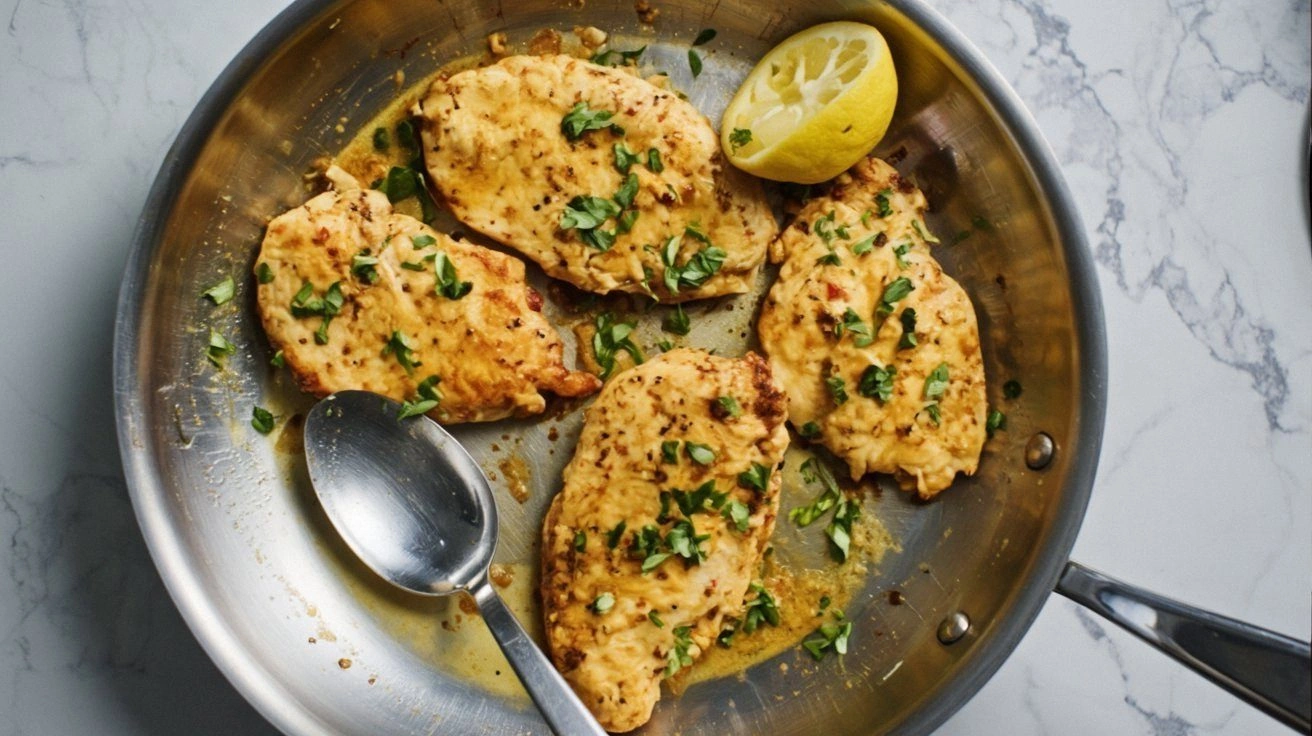
- Plate the chicken breasts, spoon the remaining sauce over the top, and garnish with a few fresh thyme sprigs and a wedge of lemon. The final touch of fresh herb adds a burst of color and aroma. Serve immediately to enjoy the contrast of textures while the sauce is still glossy.
That's it—you did it. But hold on, I've got a few more tricks that'll take this to another level.
Insider Tricks for Flawless Results
The Temperature Rule Nobody Follows
Maintaining the right heat is the secret to a perfect crust. If the pan is too hot, the exterior will burn while the interior remains undercooked. Conversely, too low a temperature results in a soggy, steamed surface. Use a thermometer to monitor the pan; aim for 375°F (190°C) when searing. This small adjustment can elevate the dish from good to unforgettable.
Why Your Nose Knows Best
Before you even taste the chicken, let your nose do the work. The aroma of lemon and pepper is the first indicator of flavor balance. If it smells overly acidic, add a touch more butter or honey. If it’s too buttery, a splash of lemon juice will cut through the richness. Your nose is a reliable guide to tweak the dish in real time.
The 5-Minute Rest That Changes Everything
Once the chicken is done, let it rest on a cutting board for exactly five minutes. This allows the juices to redistribute, ensuring each bite stays moist. The rest also lets the flavors meld, so the glaze adheres better to the surface. Skipping this step can leave the chicken dry and unbalanced.
The Perfect Pan
A heavy‑bottom skillet, whether stainless steel or cast iron, distributes heat evenly and prevents hot spots. A non‑stick pan might seem convenient, but it often fails to produce the desired caramelization. If you’re using a non‑stick surface, preheat it longer and use a higher heat setting to achieve a similar crust.
The Secret Ingredient Swap
If you’re in the mood for a smoky twist, add a pinch of smoked paprika before the lemon juice. This subtle addition adds depth without overpowering the citrus. A friend tried skipping the paprika once—let's just say the dish was a bit plain. The paprika brings a new dimension that pairs beautifully with the pepper.
Creative Twists and Variations
This recipe is a playground. Here are some of my favorite ways to switch things up:
Spicy Cajun Kick
Swap the black pepper for a Cajun spice blend and add a pinch of cayenne. The result is a bold, smoky heat that pairs well with a side of creamy coleslaw. This variation is perfect for those who love a little spice in their dinner.
Herb‑Infused Citrus
Replace thyme with fresh rosemary and add a splash of white wine to the sauce. The rosemary adds an earthy aroma while the wine deepens the citrus profile. Serve over a bed of quinoa for a protein‑rich meal.
Sweet‑Spicy Glaze
Introduce a tablespoon of sriracha and a teaspoon of maple syrup into the glaze. This sweet‑spicy combination creates a caramelized coating that sticks to the chicken. Pair with a simple cucumber salad for a balanced plate.
Mediterranean Flair
Add diced sun‑dried tomatoes and capers to the sauce. The briny capers and sweet tomatoes bring a Mediterranean twist that complements the lemon. Serve with a side of couscous for a complete meal.
Low‑Carb Version
Omit the honey and replace the chicken broth with a splash of chicken stock. Serve over sautéed spinach and zucchini noodles for a keto‑friendly option. The dish remains flavorful without the carb load.
Vegan Adaptation
Swap the chicken for thick slices of portobello mushroom or seitan. Use vegan butter and a plant‑based broth. This version retains the bright citrus and peppery notes while staying plant‑based.
Storing and Bringing It Back to Life
Fridge Storage
Cool the chicken to room temperature before refrigerating. Store in an airtight container for up to 3 days. The glaze will thicken slightly, but a quick stir will restore its glossy sheen. Keep the chicken away from strong‑smelling foods to preserve its aroma.
Freezer Friendly
Wrap the cooked chicken in parchment paper and then in foil to prevent freezer burn. Freeze for up to 2 months. Thaw overnight in the fridge before reheating. The texture remains juicy if you follow the reheating steps.
Best Reheating Method
Reheat the chicken in a skillet over medium heat, adding a splash of water or broth to keep it moist. Once the internal temperature reaches 165°F (74°C), remove from heat. A tiny splash of water before reheating steams the chicken back to perfection, preventing dryness.