I was halfway through a late‑night pizza binge when the kitchen exploded into a symphony of sizzling and steam. The smell of onions and garlic was so intense that I nearly had to put on a mask. That was the moment I realized that my humble ground beef could be elevated into something that would make my friends ask for a second helping. The truth is, I was craving a Philly cheesesteak, but I didn’t have the time or the fancy steak to make the classic version. So I dove into my pantry and started experimenting.
Picture this: a pan heated to perfection, a splash of olive oil, and the aroma of onions caramelizing like caramelized sugar. The heat rises, the garlic releases its subtle sweetness, and the beef starts to brown in a glorious brown crust. Every sound is a promise of flavor—sizzling, popping, and the occasional hiss that says, “I’m ready.” The kitchen becomes a stage, and the ingredients perform a duet that sings to your senses. The anticipation builds as the cheese begins to melt, forming a creamy ribbon that will drape over the meat.
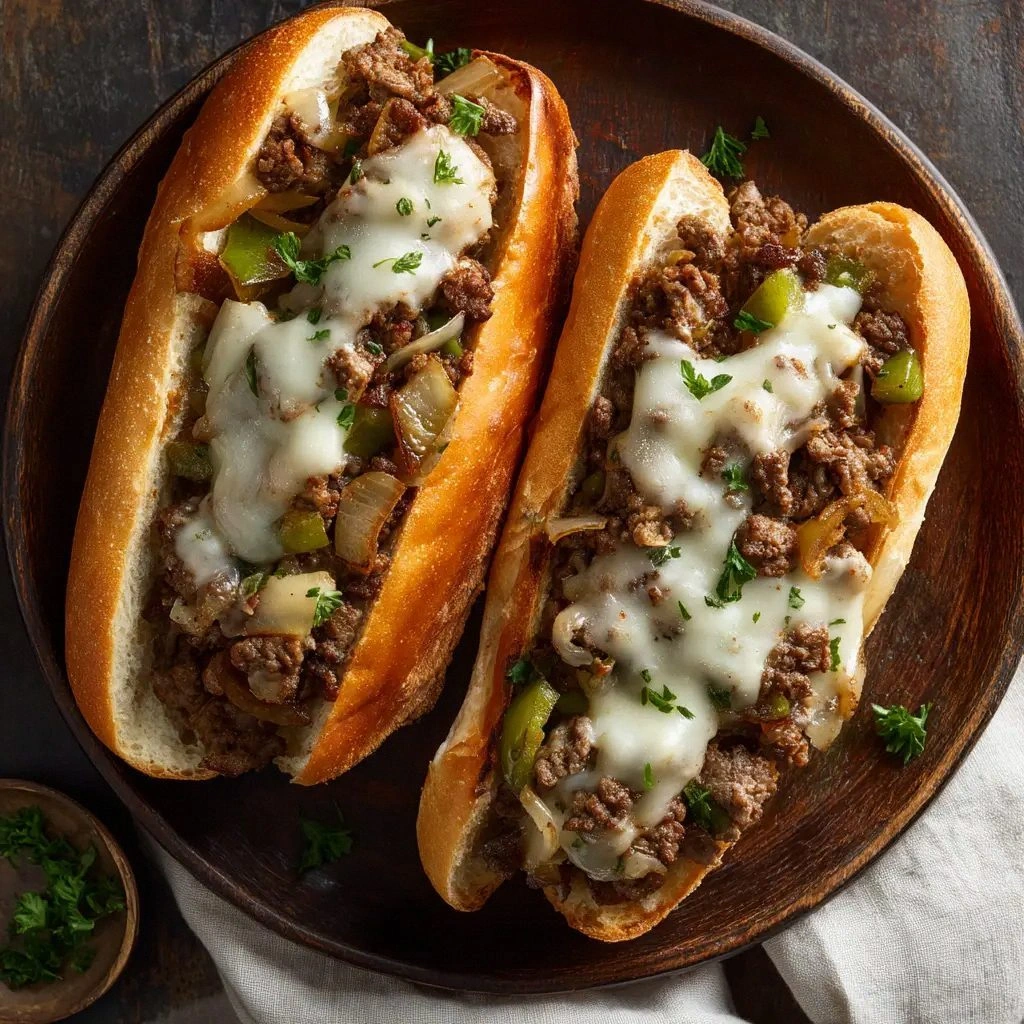
What sets this version apart from the endless variations you see on Pinterest is the simplicity and the boldness of flavor. I kept the ingredients minimal, letting each one shine without the distraction of excessive sauces or complex techniques. The result is a dish that feels authentic, hearty, and utterly comforting. The beef is seasoned with just the right amount of Worcestershire, salt, and pepper, allowing the natural umami to take center stage. And the cheese—12 slices of provolone—creates a gooey, melty finish that feels like a hug in every bite.
But here’s the twist that will make you say, “I dare you to taste this and not go back for seconds.” Instead of the traditional thinly sliced steak, I used ground beef, which keeps the dish quick and accessible. The ground beef absorbs the flavors of the onions, peppers, and garlic, delivering a texture that is both comforting and surprisingly close to the classic chew. This approach also means you can make it in a single pan, saving time and cleanup. If you’ve ever struggled with the classic Philly cheesesteak because of its time or the need for a grill, this is the solution you’ve been waiting for.
I’ll be honest—after the first bite, I ate half the batch before anyone else got a chance to try it. The combination of savory beef, sweet onions, crisp bell pepper, and molten provolone is a flavor explosion that will have your taste buds dancing. The cheese melts into the meat like a silky ribbon, coating every morsel with rich, creamy depth. The crunch of the onions adds a satisfying bite that balances the softness of the meat. And the aroma—oh, that aroma—fills the kitchen and makes everyone want to come in for a second help.
Picture yourself pulling this out of the oven, the whole kitchen smelling incredible, and the plates lined up like a row of mini hoagie rolls ready for devouring. I promise you, this is hands down the best version you’ll ever make at home. If you’ve ever struggled with making a Philly cheesesteak that is both quick and delicious, you’re not alone—and I’ve got the fix. Stay with me here—this is worth it. Let me walk you through every single step—by the end, you’ll wonder how you ever made it any other way.
What Makes This Version Stand Out
- Taste: The beef’s natural umami is amplified by a simple blend of Worcestershire, salt, and pepper, creating a savory backbone that sings with every bite. The caramelized onions add a subtle sweetness, while the bell pepper provides a crisp, fresh counterpoint. Together, they form a flavor profile that feels both familiar and exciting.
- Texture: The ground beef’s coarse grind holds onto the onions and peppers, offering a hearty bite that’s still tender. The provolone’s creamy melt coats each morsel, giving the sandwich a silky finish. The hoagie rolls are toasted just enough to stay soft inside while gaining a slight crunch on the outside.
- Simplicity: With only ten ingredients, you can whip up this sandwich in less than 45 minutes. No fancy sauces or elaborate prep work—just a single pan and a few quick steps. It’s the perfect balance between gourmet flavor and everyday convenience.
- Uniqueness: By substituting ground beef for thinly sliced steak, the dish becomes approachable for anyone, even those who don’t own a grill. The cheese choice—provolone—adds a subtle nutty depth that sets this version apart from the classic mozzarella‑based recipes.
- Crowd Reaction: Friends who’ve tried the traditional Philly cheesesteak are amazed at how this version delivers the same mouth‑watering experience with less fuss. The combination of gooey cheese, savory beef, and crunchy vegetables has become a new favorite at gatherings.
- Ingredient Quality: Using fresh, high‑quality produce and a good cut of ground beef ensures that every bite is packed with flavor. The single tablespoon of olive oil is enough to give the meat a rich, glossy finish without overpowering the dish.
- Make‑Ahead Potential: Once the filling is cooked, you can refrigerate or freeze it, then reheat it before assembling the sandwich. This makes it an ideal dish for meal prep or for feeding a crowd on a busy night.
Inside the Ingredient List
The Flavor Base
Olive oil is the silent hero that creates a non‑stick surface, allowing the onions and garlic to develop a golden crust without burning. A tablespoon is enough to coat the pan, but using too much can make the filling greasy. If you’re watching calories, a teaspoon of olive oil or a splash of vegetable oil works just as well.
The Worcestershire sauce is the secret to that deep, savory undertone that mimics the classic Philly cheesesteak. It’s a fermented condiment that brings a subtle tang and a hint of sweetness. If you’re allergic to anchovies, look for a vegan Worcestershire or a dash of soy sauce to keep the umami alive.
Salt, pepper, and garlic powder form the seasoning backbone. Salt is essential for bringing out the beef’s flavor, while black pepper adds a mild heat. Garlic powder offers a consistent, mellow garlic flavor that blends seamlessly with the fresh cloves. If you prefer a spicier kick, a pinch of cayenne or smoked paprika will add a smoky warmth.
The Texture Crew
Ground beef is the star of the show. Its coarse grind retains the juices and holds onto the onions and peppers, creating a moist, flavorful bite. A 1.5‑lb portion is ideal for four servings, giving you a generous amount of meat for each sandwich. If you’re looking for a leaner option, choose a 90/10 blend, but be prepared to add a splash of broth to keep it from drying out.
Yellow onion and green bell pepper are the crisp, sweet companions that balance the richness of the beef. The onion’s caramelized sugars add depth, while the bell pepper’s bright crunch keeps the sandwich from feeling heavy. If you’re in a hurry, you can use pre‑sliced onions and peppers from the grocery store; just be sure they’re fresh to maintain that bright flavor.
The Unexpected Star
Provolone cheese is the creamy, nutty twist that sets this version apart from the traditional mozzarella. Its slightly sharp flavor cuts through the richness of the beef and provides a melt that’s both smooth and velvety. If you can’t find provolone, a mild cheddar or a blend of provolone and mozzarella will work nicely.
The Final Flourish
Hoagie rolls are the vessel that holds it all together. Choose a sturdy, lightly crusted roll that can hold the juicy filling without falling apart. A fresh bakery roll will add a buttery flavor, while a pre‑toasted roll speeds up assembly. If you’re a fan of extra crunch, lightly butter the rolls before toasting them on the skillet.
Everything’s prepped? Good. Let’s get into the real action, where the magic truly happens.

The Method — Step by Step
- Heat a large skillet over medium‑high heat until it shimmers. Add the tablespoon of olive oil and swirl to coat. The oil should ripple but not smoke—this signals the pan is ready for the beef. Let the pan heat up for about 30 seconds before adding the meat. Watch the surface; it should sizzle immediately, indicating the pan is hot enough.
- Add the ground beef in a single layer, breaking it up with a spatula. Don’t crowd the pan; if the beef is too dense, it will steam instead of sear. Cook for 3–4 minutes until the edges brown, then stir and continue cooking until fully browned and no pink remains. The beef should release its juices and then begin to caramelize, forming a golden crust.
- Now it’s time for the aromatics. Push the beef to one side of the pan and add the olive oil again if needed. Toss in the sliced onion and bell pepper, then season with 1 tsp salt, 0.5 tsp black pepper, 0.5 tsp garlic powder, and a splash of Worcestershire sauce. Sauté for 5–7 minutes until the vegetables soften and the onions are translucent, letting the flavors meld together. The mixture should smell like a savory, caramelized promise.
- Add the minced garlic to the pan, stirring quickly to avoid burning. Garlic cooks fast, so give it just 30 seconds—too long and it’ll turn bitter. The garlic’s aroma should mingle with the onions, creating a fragrant base. Let the mixture cook for another minute, then stir to combine everything evenly.
- Lower the heat to medium and add the 1 tbsp Worcestershire sauce. This is the moment where the umami deepens; watch as the sauce coats the beef and veggies, creating a glossy sheen. Stir well and let the mixture simmer for 2–3 minutes, allowing the flavors to marry. The mixture should look slightly sticky but still retain some texture.
- Now it’s cheese time. Divide the 12 slices of provolone evenly among the 6 hoagie rolls, placing them on top of the hot filling. The residual heat will melt the cheese into silky ribbons that run down the sides. If you want an extra gooey layer, add a few extra slices of cheese before the rolls close.
- Close each roll carefully, pressing down to ensure the cheese is evenly distributed. If you prefer a crispy crust, place the sandwiches back in the skillet for 1–2 minutes, pressing gently with a spatula. The cheese will bubble and the rolls will toast to a golden finish. This step is optional but adds a delightful crunch.
- Serve immediately, letting the steam rise to greet your guests. The first bite should be a harmonious blend of savory meat, sweet onions, crisp peppers, and molten provolone. Each chew releases a burst of flavor that makes the sandwich unforgettable. If you’re serving a crowd, keep the sandwiches warm on a low‑heat oven or a slow burner.
That’s it — you did it. But hold on, I’ve got a few more tricks that will take this to another level. These insider tips will help you avoid common pitfalls and elevate the flavor profile even further.
Insider Tricks for Flawless Results
The Temperature Rule Nobody Follows
Many cooks assume that medium heat is sufficient, but the secret is to start high and then reduce. By searing the beef at medium‑high, you lock in juices and create a caramelized crust that adds depth. Once the beef is browned, lower the heat to let the flavors meld without overcooking the vegetables.
Why Your Nose Knows Best
When the onions and peppers begin to caramelize, the aroma should shift from raw to sweet. If you still smell raw vegetables, the pan isn’t hot enough. Trust your nose as a guide; a sweet, buttery scent signals that the veggies are ready.
The 5‑Minute Rest That Changes Everything
After cooking the filling, let it rest for five minutes before adding the cheese. This pause allows the juices to redistribute, making the meat more tender and the mixture less watery. It also gives the flavors a chance to settle, resulting in a richer taste.
Add a Splash of Beef Broth for Extra Juiciness
If you find the mixture drying out, add a tablespoon of beef broth or water. The liquid should be minimal—just enough to keep the veggies moist. This trick is especially handy when you’re using leaner ground beef.
Keep the Rolls Warm Until Serving
To prevent the rolls from becoming soggy, toast them on a skillet or in a toaster oven before adding the filling. Warm rolls absorb less moisture, keeping the sandwich crisp. If you’re prepping ahead, wrap the toasted rolls in foil to retain heat.
Creative Twists and Variations
Spicy Jalapeño Kick
Add sliced jalapeños to the skillet with the onions for a fiery punch. The heat pairs well with the creamy provolone, creating a dynamic flavor profile. Perfect for those who love a little heat in their sandwich.
Mushroom & Thyme Upgrade
Replace the bell pepper with sliced mushrooms and add fresh thyme leaves. The earthy mushrooms deepen the savory notes, while thyme offers a fragrant aroma. This version is ideal for mushroom lovers and adds a sophisticated twist.
Smoky Chipotle Flavor
Incorporate a teaspoon of chipotle in adobo sauce to the beef mixture. The smoky heat complements the sweetness of the onions, creating a complex taste. Great for those who enjoy a smoky, bold flavor.
Cheese Swap: Swiss & Cheddar Blend
Swap provolone for a mix of Swiss and sharp cheddar. The Swiss adds a mild, nutty flavor, while cheddar brings a sharp bite. This blend provides a richer, more layered cheese experience.
Vegetarian Version with Tempeh
Use crumbled tempeh instead of ground beef for a plant‑based alternative. Season it with the same spices and cook until golden. The tempeh’s firm texture holds up well with the cheese and vegetables.
Storing and Bringing It Back to Life
Fridge Storage
Store the cooked filling in an airtight container in the refrigerator for up to 3 days. Keep the rolls separate to prevent them from becoming soggy. When ready to serve, reheat the filling in a skillet until hot and then assemble the sandwiches.
Freezer Friendly
Freeze the cooked filling in a freezer‑safe container for up to 2 weeks. Thaw overnight in the refrigerator before reheating. The beef will retain its flavor, and the onions and peppers will stay tender.
Best Reheating Method
Reheat the filling in a skillet over medium heat, adding a splash of water or broth to keep it moist. Once hot, quickly assemble the sandwiches to maintain the rolls’ crispness. A quick 5‑minute oven bake at 350°F can also revive the cheese’s gooeyness.