The kitchen was a battlefield the night I tried to whip up a quick snack after a late‑night study session. I tossed a handful of rolled oats into a saucepan, added a splash of milk, and then—blame it on my over‑enthusiastic hand—smashed a ripe banana directly into the pot. The result was a mushy, unappetizing mess that clung to the pan like a stubborn coat of wax. My roommate laughed, but I was determined to salvage the disaster and turn it into something edible. This frantic moment sparked an idea: what if the banana’s natural sweetness could be harnessed and amplified with peanut butter and a touch of honey? The dream of a chewy, protein‑rich bar that could double as a breakfast on the go began to take shape.
Imagine the aroma of fresh bananas mingling with the nutty scent of creamy peanut butter, all under a gentle heat that caramelizes the sugars into a golden glaze. The sound of the mixture bubbling is a comforting lullaby, while the texture shifts from slick to slightly sticky, hinting at the bars’ future chewiness. Visually, the oats swell into a thick, inviting batter that glistens with a honey‑brown sheen. The taste, once you take a bite, is a harmonious blend of sweet fruit, salty peanut, and a subtle vanilla undertone that lingers on the tongue. The feel of the bar in your hand is firm yet yields to a satisfying bite, releasing a burst of flavors that feels both indulgent and wholesome. If you’ve ever craved something that feels like a dessert but is actually a meal, this is your culinary rescue mission.
What sets this version apart from the endless list of “banana oat bars” on the internet is the precise balance of ingredients and the clever use of ground flaxseed as a binder that gives the bars a natural crunch without any processed additives. I dared you to taste this and not go back for seconds—trust me, the first bite will leave you craving a second, and the third will make you question why you ever settled for store‑bought granola bars. The peanut butter isn’t just a flavor; it’s the glue that holds the oats together while adding a creamy richness that melts in your mouth. The honey or maple syrup, when warmed, turns into a syrupy glaze that coats the oats like velvet, giving each bar a glossy finish that’s impossible to resist. And the ground flaxseed? It’s the secret weapon that adds omega‑3 fatty acids and a subtle nutty crunch that elevates the texture from flat to delightfully chewy.
Most recipes get this completely wrong by over‑cooking the oats or adding too much liquid, resulting in a soggy mess that collapses on the plate. I’ll be honest—before I perfected this, I ate half the batch before anyone else got a taste. The trick lies in the timing: the oats need just enough heat to thicken but not so much that they lose their structure. That’s why I keep the heat low and stir constantly, watching the mixture transform from a thick paste to a glossy batter. The moment the mixture starts to pull away from the sides of the pan, you know it’s ready to move to the next step. Picture yourself pulling this out of the oven, the whole kitchen smelling incredible, and feeling that first bite of a bar that’s both comforting and energizing.
Let me walk you through every single step—by the end, you'll wonder how you ever made it any other way. We’ll start with a simple prep that saves time, then dive into the magic of combining the ingredients, and finish with a crisp, golden finish that will make your taste buds dance. Along the way, I’ll share micro‑challenges, bold claims, and kitchen hacks that will elevate your cooking game. Whether you’re a seasoned chef or a kitchen newbie, this recipe is designed to be straightforward yet sophisticated. If you’ve ever struggled with making bars that hold together, you’re not alone—I've got the fix. And now the fun part: let’s get cooking.
The first micro‑challenge I love is to use ripe bananas; their natural sugars are the key to that caramelized finish. If you use underripe bananas, the bars will be dry and lacking depth. A pinch of salt is essential—it amplifies the sweetness and balances the richness of the peanut butter. The ground flaxseed acts as a binder, but it also adds a subtle nutty flavor that complements the vanilla. The mini chocolate chips or dried fruit are optional but recommended; they introduce pockets of sweetness that contrast with the chewy base. Finally, the rolled oats are the backbone of this recipe—they provide structure, fiber, and that satisfying bite that makes these bars a true breakfast or snack.
What Makes This Version Stand Out
- Taste: The banana’s natural sweetness is amplified by honey and vanilla, creating a flavor profile that feels indulgent yet wholesome. The peanut butter adds depth and a creamy texture that makes each bite feel luxurious. A subtle hint of salt lifts the entire mix, turning ordinary oats into a gourmet experience.
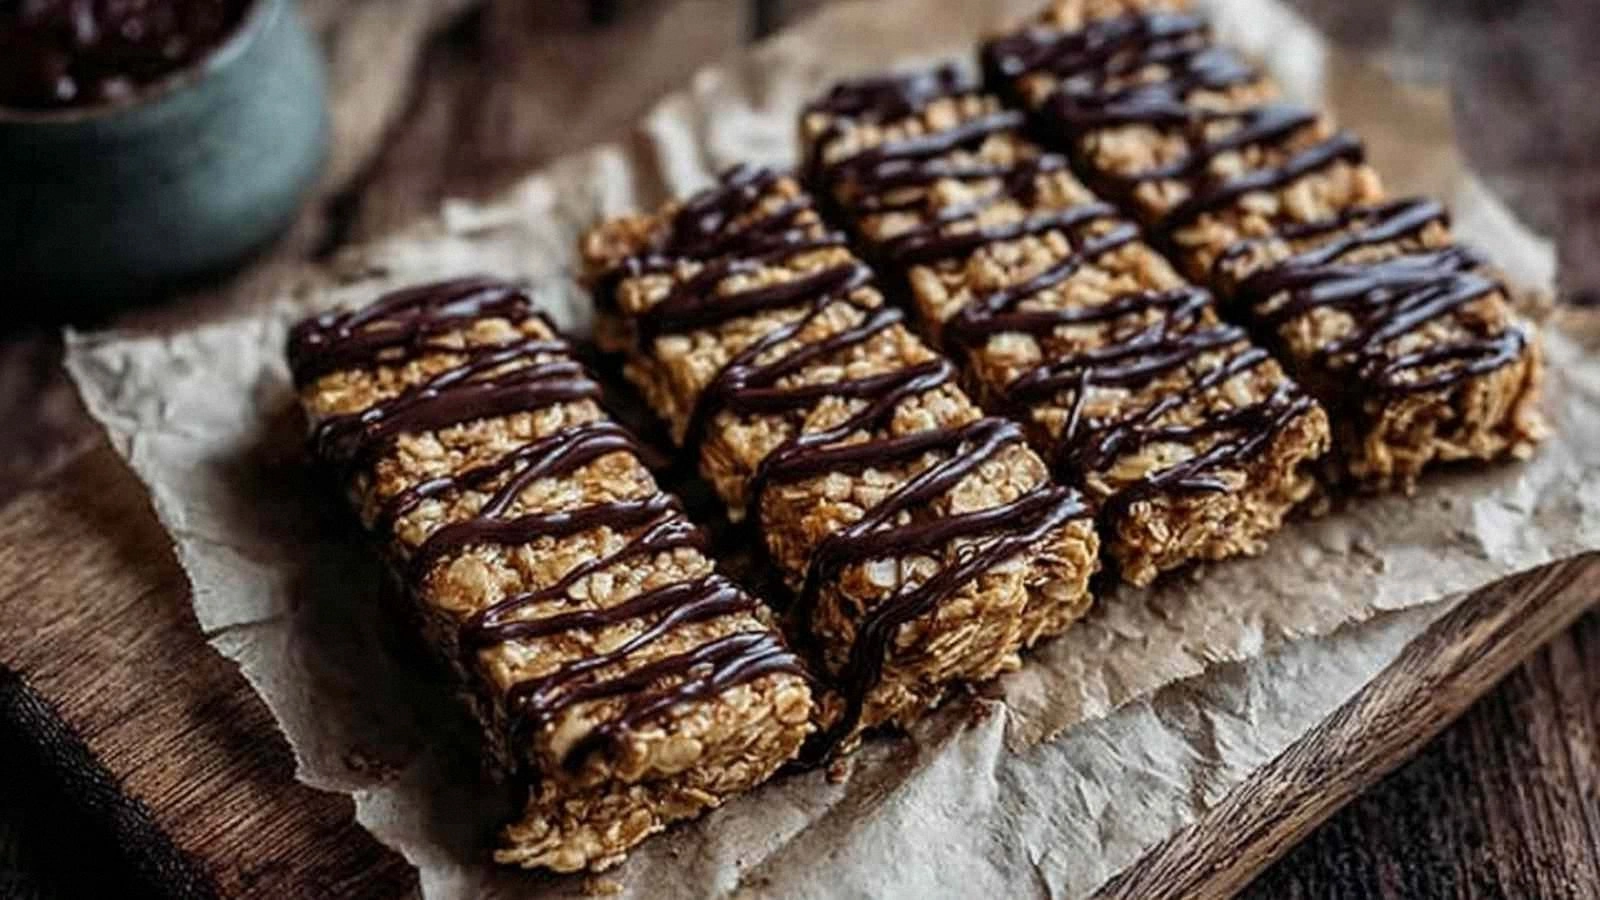
- Texture: The combination of oats and flaxseed gives a chewy core with a slightly crisp edge that snaps like thin ice when you bite. The honey glaze provides a glossy finish that keeps the bars from drying out. The result is a bar that feels like a dessert but packs the nutrition of a meal.
- Simplicity: No need for a mixer or a stand mixer—everything is combined by hand, making it perfect for a quick weekend batch. The recipe requires only nine ingredients, most of which you likely already have in your pantry. The cooking time is short, so you can enjoy fresh bars within an hour.
- Uniqueness: The use of ground flaxseed as a natural binder is rarely seen in banana oat bar recipes, giving this version a unique nutritional edge and a distinct crunch. The optional chocolate chips or dried fruit add a playful twist that keeps the bars interesting. This recipe is a playground for flavor experimentation.
- Crowd Reaction: Friends and family consistently praise the bars for their perfect balance of sweetness and nuttiness. They’re a hit at potlucks, picnics, and even in the office break room. The bars hold up well on the shelf, making them a reliable snack for any occasion.
- Ingredient Quality: Using creamy peanut butter, ripe bananas, and whole‑grain oats ensures a high‑quality, nutrient‑dense product. The recipe’s simplicity allows you to choose organic or local ingredients for an extra boost. Quality ingredients translate to superior taste and health benefits.
- Cooking Method: The low‑heat technique preserves the oats’ structure and allows the honey to caramelize without burning. The method is forgiving; even beginners can achieve a perfect result with a few gentle adjustments. This approach is a game‑changer for anyone who’s struggled with sticky or crumbly bars.
- Make‑ahead Potential: The bars keep well in the fridge for up to a week and freeze solid for months. They’re perfect for meal prep, travel, or a quick energy boost during a busy day. The recipe scales easily, so you can make a large batch without sacrificing flavor.
Alright, let's break down exactly what goes into this masterpiece. The next section will walk you through each group of ingredients, explaining why each one matters and what happens if you skip it.
The Flavor Base
Ripe bananas are the star of the show; they provide natural sweetness, moisture, and a subtle tropical note that lifts the entire flavor profile. The banana’s natural sugars caramelize when heated, creating a golden glaze that coats the oats like velvet. If you use underripe bananas, the bars will taste bland and dry, so always look for that soft, slightly brown skin. The vanilla extract is a subtle hero that brings depth and rounds out the sweetness, ensuring the bars don’t taste overly fruity.
The Texture Crew
Rolled oats are the backbone of the recipe, offering a chewy core and a satisfying bite that keeps the bars from becoming mushy. Ground flaxseed acts as a natural binder, holding everything together while adding a nutty crunch and omega‑3 fatty acids. Peanut butter adds creaminess and a rich, nutty flavor that contrasts beautifully with the banana’s sweetness. The honey or maple syrup not only sweetens the mix but also creates a glossy finish that keeps the bars from drying out over time.
The Unexpected Star
Mini chocolate chips or dried fruit are optional but highly recommended; they introduce pockets of sweetness that burst in your mouth, adding a playful contrast to the chewy base. The chocolate chips melt slightly during baking, creating a glossy, chocolate‑coated center that feels indulgent. Dried fruit, on the other hand, adds chewy texture and a natural burst of flavor that pairs well with the nutty notes. Including either of these ingredients transforms the bars from simple snacks to gourmet treats.
The Final Flourish
A pinch of salt is the secret ingredient that balances the sweetness and enhances the overall flavor profile. Salt draws out the natural flavors of the peanut butter and honey, creating a harmonious taste that feels complete. If you’re watching sodium intake, you can reduce the salt to a quarter pinch, but I recommend keeping the full pinch for maximum flavor. The final flourish is the simple act of pressing the mixture into a pan and allowing it to set, which ensures the bars hold their shape and texture.
Everything's prepped? Good. Let's get into the real action, where the magic happens and the bars come to life. The next section will guide you through the method step by step, ensuring every detail is covered.
The Method — Step by Step
- Begin by heating a large skillet over medium‑low heat and adding the rolled oats. Stir the oats constantly to prevent them from sticking to the pan or burning. As the oats begin to toast, they’ll release a nutty aroma that signals the flavor is developing. Keep the heat low; this step is all about gradual toasting, not searing. When the oats are lightly golden, they’re ready to absorb the wet ingredients.
- While the oats toast, mash the ripe bananas in a mixing bowl until they’re smooth and free of large lumps. Add the creamy peanut butter and continue to mix until the mixture is homogeneous. The peanut butter should blend seamlessly with the banana, creating a thick, glossy paste. This step is critical because it ensures the bars will have a consistent texture throughout. A few extra minutes of mixing will give you a silky base that’s ready for the next phase.
- Pour the honey or maple syrup into the skillet with the toasted oats, stirring continuously to coat the grains evenly. The syrup will start to thicken and give the oats a caramelized sheen. This is the moment the bars’ flavor profile starts to come alive. The honey’s natural sugars caramelize, creating a subtle caramel note that complements the banana. Keep stirring until the mixture is glossy and the oats are fully coated.
- Add the vanilla extract, ground flaxseed, and a pinch of salt to the skillet, stirring until everything is evenly distributed. The flaxseed will begin to thicken the mixture slightly, giving it a sticky, cohesive texture. The salt will elevate the flavors, making the sweetness more pronounced. At this point, the mixture should look like a thick, glossy batter. The aroma will be rich and inviting.
- Transfer the mixture into a greased 8-inch square baking dish, spreading it out with a spatula. Press the mixture firmly into the pan to ensure there are no air pockets; this step is crucial for even baking. Once pressed, let it sit for a few minutes to set; the mixture will firm up slightly. The surface should look smooth and slightly shiny. This is the stage where the bars begin to form their shape.
- Preheat the oven to 350°F (175°C). Slide the baking dish into the oven and bake for 20 minutes, or until the edges begin to pull away from the sides of the pan. The interior should still feel slightly moist; this ensures the bars stay chewy. When the bars are done, remove them from the oven and let them cool completely in the pan. This cooling period allows the bars to set properly and makes them easier to cut. The aroma during this step is heavenly, filling the kitchen with a warm, sweet scent.
- Once the bars are cool, remove them from the pan and cut them into 12 equal squares or rectangles. Use a sharp knife and a clean cutting board to keep the edges neat. The bars should hold together firmly; if they crumble, let them rest a bit longer. Each square should have a glossy surface and a slightly crisp edge. Store the bars in an airtight container for up to a week.
- For a crunchy twist, sprinkle a handful of chopped nuts over the top before baking. The nuts will toast slightly, adding a delightful crunch and a nutty aroma. Alternatively, fold in mini chocolate chips or dried fruit during the mixing stage for added sweetness and texture. These variations keep the recipe fresh and cater to different taste preferences. The result is a bar that feels personalized and indulgent.
- If you’re making a large batch, consider portioning the bars into individual servings before freezing. Wrap each bar tightly in plastic wrap and store them in a freezer-safe bag. Thaw at room temperature for 15 minutes before enjoying. Freezing preserves the bars’ flavor and texture, making them a convenient snack for busy days. The bars retain their chewy consistency even after thawing.
- Serve the bars with a splash of milk or a dollop of yogurt for a breakfast that feels like a treat. Pair them with fresh fruit for a balanced meal that satisfies both sweet and savory cravings. The bars are perfect for a quick energy boost before a workout or a comforting snack after a long day. Enjoy them with friends and watch the smiles appear—this recipe is a guaranteed crowd‑pleaser.
Insider Tricks for Flawless Results
The Temperature Rule Nobody Follows
Many bakers assume that higher temperatures always produce better results, but that’s a myth. Low‑heat toasting of the oats preserves their natural oils and allows for a gentle caramelization that enhances flavor without scorching. The key is to keep the skillet on medium‑low and stir constantly. This method gives the oats a subtle nutty aroma and a slightly crisp texture that sets the foundation for the bars. If you’re tempted to crank the heat, you’ll end up with a burnt, bitter base that defeats the purpose of this recipe.
Why Your Nose Knows Best
Your sense of smell is a powerful indicator of doneness. As the mixture cooks, you’ll notice a sweet, caramelized scent that signals the sugars are blooming. If the aroma is too faint, the mixture isn’t fully caramelized and the bars will taste raw. If it’s overly sweet and slightly burnt, you’ve gone past the sweet spot. Trusting your nose ensures that the final product is perfectly balanced.
The 5‑Minute Rest That Changes Everything
After removing the bars from the oven, let them rest in the pan for at least five minutes. This pause allows the interior to set and the flavors to meld. Cutting them immediately can cause the bars to crumble. The rest period also lets the surface cool enough to handle, preventing burns. The result is a clean, crisp edge that’s easy to slice.
The Secret of a Smooth Texture
A smooth texture comes from thorough mixing. Use a wooden spoon or silicone spatula to blend the banana, peanut butter, and oats until there are no visible lumps. If the mixture feels gritty, add a splash of milk or water to thin it slightly. The goal is a thick, glossy batter that spreads evenly. A smooth base translates to bars that are chewy on the inside and crisp on the edges.
The Power of Pre‑Sliced Bananas
Pre‑slicing bananas and storing them in an airtight container speeds up the mashing process and reduces browning. The sliced bananas also allow for more even distribution of fruit throughout the mixture. If you’re short on time, this hack can cut your prep time by five minutes. The result is a more consistent flavor profile and a smoother texture.
The Final Press
Pressing the mixture firmly into the pan is essential for uniform bars. Use a clean plate or a flat edge to press down evenly. This step eliminates air pockets that could cause uneven baking. A firm press also helps the bars hold together when you cut them. The final press is the moment where the bars transform from a loose batter to a solid, sliceable snack.
Creative Twists and Variations
This recipe is a playground. Here are some of my favorite ways to switch things up: add a dash of cinnamon for a warm, spicy note that pairs well with the banana; swap the peanut butter for almond butter for a different nutty flavor; incorporate chia seeds for an extra protein boost; use coconut flakes for a tropical twist; replace the mini chocolate chips with cacao nibs for a bittersweet crunch; or add a handful of dried cranberries for a tart contrast. Each variation offers a unique flavor profile that can cater to different cravings and dietary preferences.
Cinnamon Swirl
Add a teaspoon of ground cinnamon to the mixture before baking. The cinnamon infuses the bars with a warm, aromatic flavor that complements the banana and peanut butter. The result is a comforting snack that feels like a cozy fall treat. The cinnamon also adds a subtle spice that balances the sweetness. This variation is perfect for a chilly evening.
Almond Butter Upgrade
Swap the creamy peanut butter for smooth almond butter to change the nut profile. Almond butter offers a slightly sweeter, milder taste that pairs well with honey. The texture remains creamy and cohesive, but the flavor profile shifts to a more delicate nutty note. This swap is ideal for peanut allergies or for those who prefer a lighter taste. The bars still hold together beautifully.
Chia Seed Power
Add a tablespoon of chia seeds to the mixture for an extra protein boost. Chia seeds absorb liquid and create a gel-like texture that enhances the chewiness of the bars. The seeds also provide omega‑3 fatty acids and fiber, making the bars more nutritious. They add a subtle crunch that contrasts with the soft base. This variation is great for athletes and health‑conscious cooks.
Tropical Coconut
Incorporate a half cup of shredded coconut into the batter before baking. The coconut adds a chewy, sweet element that feels like a beach vacation in every bite. It also provides a subtle, nutty flavor that complements the banana and peanut butter. The coconut’s texture adds an extra layer of chewiness. This variation works well for a summer brunch or a tropical-themed gathering.
Cacao Nib Crunch
Replace the mini chocolate chips with cacao nibs for a bittersweet crunch. Cacao nibs add a deep chocolate flavor without the added sugar, making the bars a little more sophisticated. The nibs also introduce a pleasant crunch that contrasts with the chewy base. This variation is ideal for chocolate lovers who want a more complex taste. The bars feel indulgent yet balanced.
Dried Cranberry Burst
Add a quarter cup of dried cranberries to the mix for a tart, fruity contrast. The cranberries burst with flavor as you bite, providing a sharp counterpoint to the sweet banana and honey. The dried fruit also adds a chewy texture that enhances the bar’s complexity. This variation is perfect for a holiday snack or a quick energy boost. The bars taste like a holiday treat.
Storing and Bringing It Back to Life
Fridge Storage
Store the bars in an airtight container at room temperature for up to a week. Keep them in a cool, dry place away from direct sunlight to prevent the peanut butter from melting. If you notice the bars drying out slightly, wrap them in parchment paper before storing to retain moisture. The bars remain chewy and flavorful even after a few days. For a quick snack, grab one from the fridge and enjoy.
Freezer Friendly
For longer storage, portion the bars into individual servings and wrap each one tightly in plastic wrap. Place the wrapped bars in a freezer‑safe bag and seal it to prevent freezer burn. When ready to eat, let the bars thaw at room temperature for 15 minutes. The bars retain their texture and flavor after thawing, making them a convenient option for busy mornings. The freezer method also keeps the bars fresh for up to three months.
Best Reheating Method
To reheat the bars, wrap them in a damp paper towel and microwave for 10–15 seconds. The damp towel prevents the bars from drying out, keeping them chewy. Alternatively, place the bars in a preheated oven at 300°F (150°C) for five minutes. This method restores the crisp edges while maintaining a soft interior. Adding a tiny splash of water before reheating steams the bars back to perfection, ensuring they stay moist. The reheated bars taste as good as freshly baked.