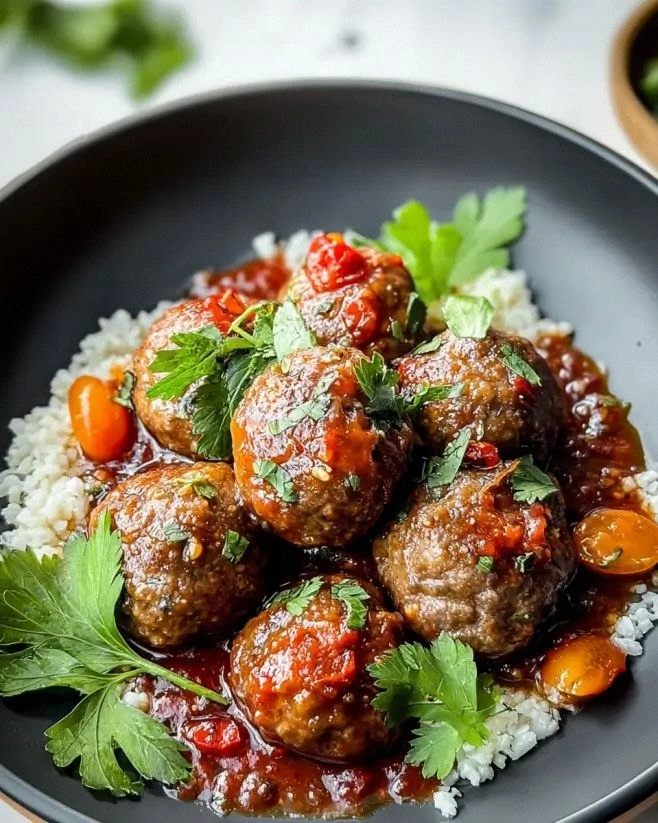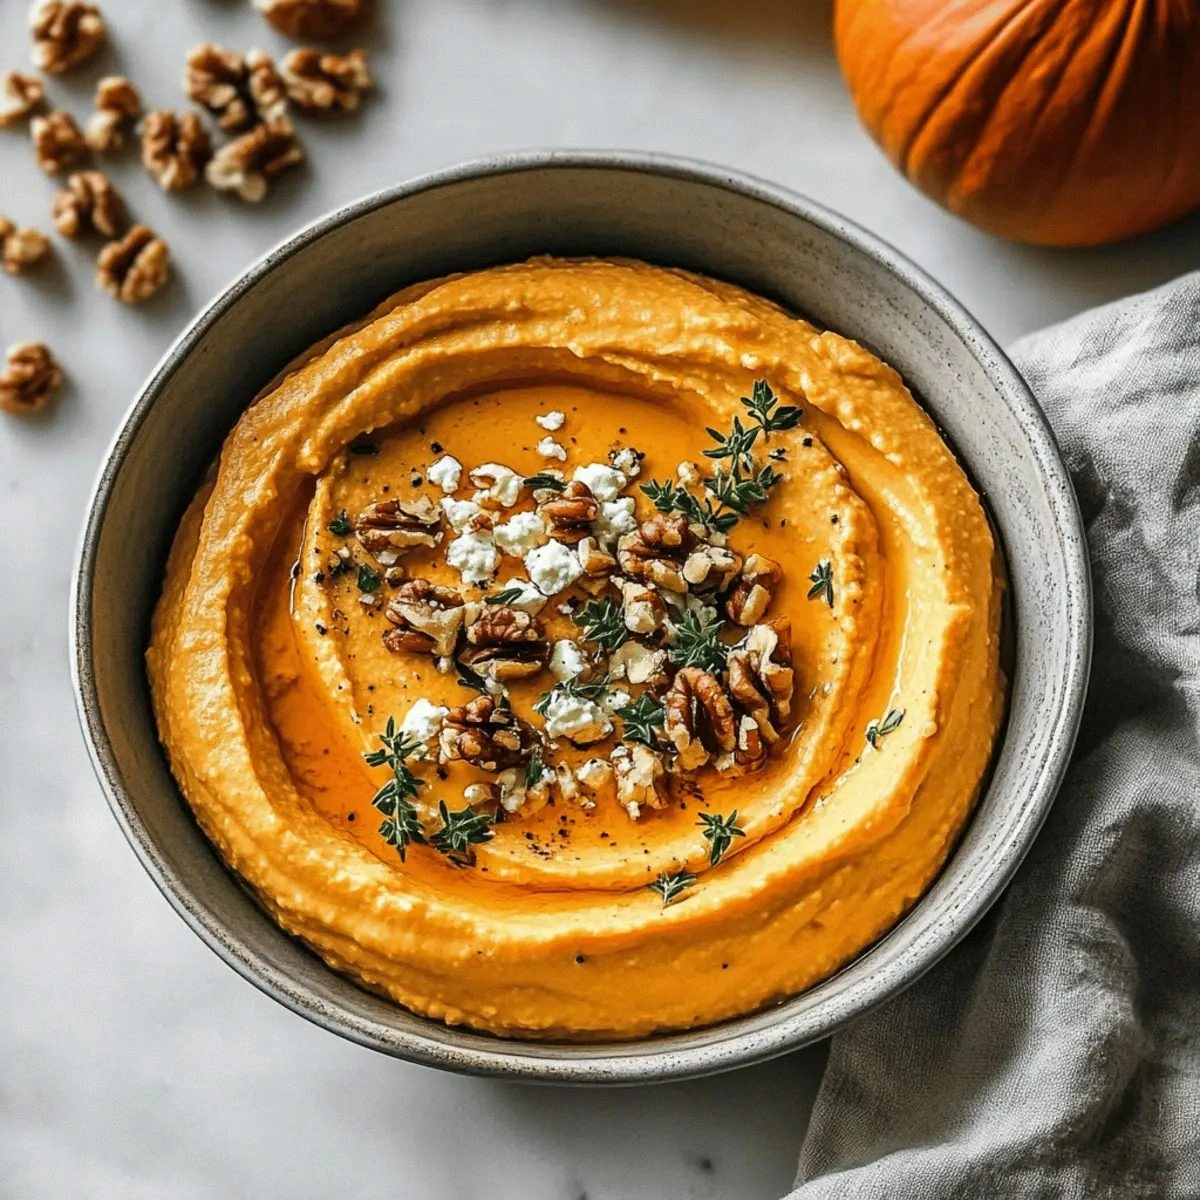
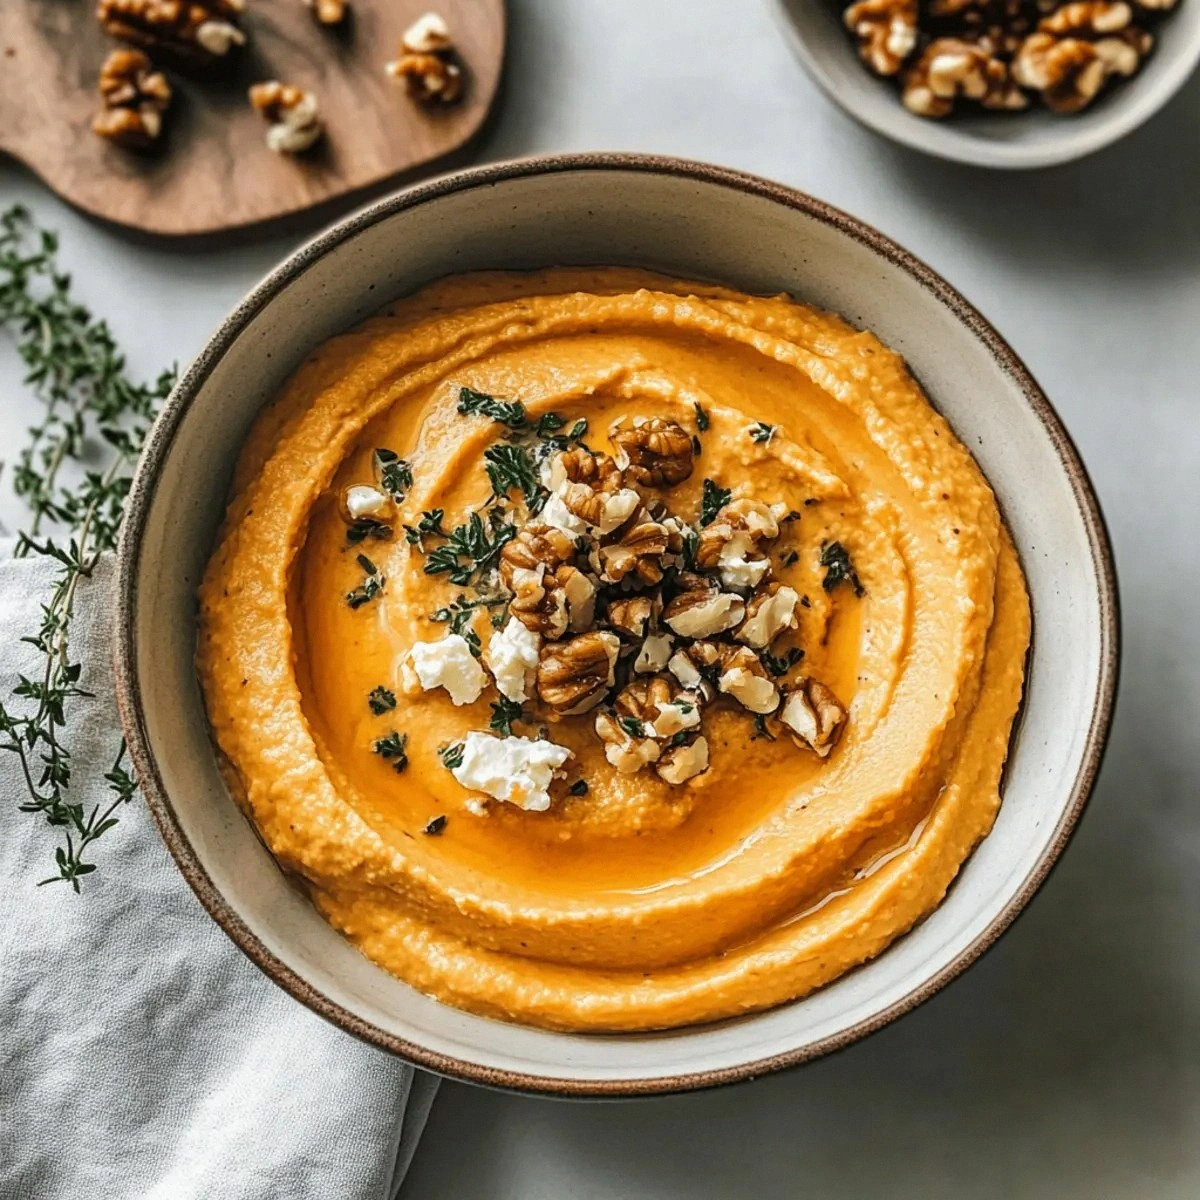
I still remember the first time I tried to impress my future mother-in-law with a "sophisticated" fall appetizer. I ambitiously attempted some overcomplicated pumpkin soufflé that deflated faster than my ego when she politely asked if it was supposed to resemble a savory hockey puck. Fast forward through three years of recipe testing, countless dinner parties, and one particularly memorable Friendsgiving where this dip disappeared in under five minutes while my famous main course sat ignored — this creamy pumpkin whipped feta dip became my redemption arc. The kitchen smelled like autumn had thrown a party and invited all the cozy spices, while the dip itself looked like sunshine captured in a bowl, all golden and inviting with those beautiful swirls of orange and white.
But here's where most pumpkin dips go completely wrong — they taste like someone blended a pumpkin pie with cream cheese and called it a day. You know exactly what I'm talking about, that cloying sweetness that makes you feel like you're eating dessert before dinner while somehow still being bland? This version flips the script entirely. We're talking about a dip that's got the earthy depth of real pumpkin, the tangy punch of good feta, and a texture so luxurious it feels like you're scooping up clouds. The honey adds just enough sweetness to make the pumpkin sing, while the thyme brings this incredible herbaceous note that makes people close their eyes and sigh when they taste it.
What really sets this apart is the technique that most recipes completely miss — we're not just mixing ingredients, we're creating an emulsion that transforms humble components into something restaurant-worthy. The Greek yogurt provides this incredible tang and body, while the feta gets whipped into the silkiest consistency that makes people ask if there's secretly cream in there. And those toasted walnuts on top? They're not just for decoration — they provide that crucial textural contrast that keeps you coming back for "just one more scoop" until suddenly the bowl's empty and you're scraping the sides with pita chips like a raccoon digging through a dumpster.
Picture yourself pulling this out at your next gathering, the bowl still slightly chilled from the fridge, those toasted walnuts glistening with a light drizzle of honey, and the whole thing looking like autumn in edible form. Your friends will gather around, skeptical at first because they've been burned by bad pumpkin dips before, but one taste and suddenly everyone's crowding closer, asking for the recipe, making inappropriate guttural sounds of approval. Trust me on this — I've seen it happen too many times to count. Let me walk you through every single step — by the end, you'll wonder how you ever made it any other way.
What Makes This Version Stand Out
Silky-Smooth Texture: Most pumpkin dips are either grainy from poorly blended ingredients or weirdly dense from too much cream cheese. This version achieves a cloud-like consistency by whipping the feta first until it's practically liquid, then slowly incorporating the other elements. The result is so smooth it practically pours onto your cracker, yet it holds its shape like a mousse.
Perfectly Balanced Sweetness: We've all suffered through those pumpkin dips that taste like someone melted down a Yankee Candle. Here, the honey provides just enough sweetness to highlight the pumpkin's natural sugars without overwhelming the savory elements. It's like the difference between a well-balanced cocktail and drinking straight syrup.
Herbaceous Complexity: The thyme isn't just a garnish — it's a game-changer that adds this incredible earthy, slightly floral note that makes the pumpkin taste more like pumpkin. Most recipes skip herbs entirely, leaving you with a one-dimensional sweet dip. This version tastes like fall in the best possible way, not like a spice rack exploded.
Restaurant-Quality Technique: The secret lies in the order of operations. Whip the feta with some of the yogurt first to create a stable base, then slowly stream in the pumpkin while the food processor runs. This creates an emulsion that won't break or separate, staying perfect for days in the fridge.
Crowd-Pleasing Adaptability: Whether you're serving it to adventurous foodies or picky relatives, this dip hits that sweet spot of familiar yet exciting. Kids love the gentle sweetness, while adults appreciate the sophisticated flavor layering. I've served it at everything from toddler birthday parties to wine nights, and it always disappears.
Make-Ahead Magic: Unlike those dips that turn sad and watery after a few hours, this one actually improves as the flavors meld. Make it up to three days ahead, and it'll taste even better when you serve it. The texture stays perfect, and the flavors become more complex and married.
Ingredient Quality Flexibility: While premium ingredients shine, this recipe forgives budget choices beautifully. Generic feta works great, canned pumpkin is actually preferred over fresh, and regular honey does the job. The technique matters more than the price tag on your ingredients.
Alright, let's break down exactly what goes into this masterpiece...
Inside the Ingredient List
The Flavor Base
The feta cheese isn't just providing saltiness — it's the backbone that carries all the other flavors. When you whip it properly, it transforms from those crumbly chunks into this incredible creamy base that has way more complexity than cream cheese ever could. The tanginess cuts through the pumpkin's earthiness, creating this beautiful balance that keeps you coming back for more. Don't even think about using pre-crumbled feta in plastic tubs — it has anti-caking agents that prevent it from whipping smooth. Buy the block packed in brine, drain it well, and let it come to room temperature first.
Pumpkin puree is where most recipes go wrong by using too much or the wrong kind. We're using exactly one cup — enough to make the dip taste like autumn without turning it into baby food. Canned pumpkin is actually better than fresh here because it has consistent moisture content and that deep, concentrated flavor. Make sure you're getting pure pumpkin puree, not pumpkin pie filling, or you'll end up with a spice bomb that tastes like regret. The orange color should be vibrant but not neon — if it looks like traffic cones, find a different brand.
The Texture Crew
Greek yogurt is our secret weapon for achieving that incredibly light yet rich texture. The live cultures add this subtle tang that makes the dip taste more sophisticated than something you'd find at a grocery store. Full-fat is non-negotiable here — reduced-fat versions have stabilizers that can break the emulsion and leave you with a grainy mess. The protein in the yogurt also helps stabilize the dip, keeping it smooth even after a day in the fridge. If you can find it, Greek yogurt made with sheep's milk adds an extra layer of complexity that plays beautifully with the feta.
The Unexpected Star
Two tablespoons of honey might not sound like much, but it's the bridge between all the other flavors. The floral sweetness enhances the pumpkin's natural sugars while taming the feta's assertiveness. Clover honey works perfectly fine, but if you want to get fancy, orange blossom honey adds this incredible citrus note that makes the thyme pop. Warm the honey slightly before adding it — cold honey can cause the emulsion to break, and you'll spend ten minutes trying to fix a curdled mess while your guests wonder what's taking so long.
The Final Flourish
Black pepper might seem like an afterthought, but it's crucial for adding depth and a subtle heat that makes all the other flavors more vibrant. Freshly ground is worth the extra thirty seconds — pre-ground pepper tastes like sawdust and won't give you that gentle warmth. The walnuts aren't just for crunch — their slight bitterness balances the honey's sweetness and adds this incredible toasty note when you warm them slightly in a dry pan. Chop them yourself instead of buying pre-chopped — they oxidize and turn rancid quickly once cut, and nothing ruins a perfect dip like stale nuts.
Everything's prepped? Good. Let's get into the real action...
The Method — Step by Step
- Start by breaking your room-temperature feta into large chunks and dropping them into your food processor. Let it run for a full two minutes — longer than you think necessary — until the cheese transforms from crumbly bits into what looks like a thick paste. Scrape down the sides twice during this process, because the feta tends to ride up the sides like it's trying to escape. This initial whipping is crucial — it's where we break down the protein structure so it can accept all the other ingredients without turning grainy. The sound will change from a chunky thud to a smooth whir, and that's your cue that you're ready for the next step.
- Add half the Greek yogurt and continue processing for another minute. The mixture should look like thick cake batter at this point, and when you stop the processor, it should slowly flow off the blade rather than sticking in clumps. If it seems too thick and isn't moving freely, add a tablespoon of water — just enough to get things flowing. Resist the urge to add more yogurt yet, because we're building an emulsion, and adding too much liquid too fast will break it. The mixture should taste intensely of feta but feel surprisingly smooth on your tongue.
- Now for the game-changer moment — with the processor running, slowly stream in the pumpkin puree through the feed tube. Don't dump it all in at once, or you'll overwhelm the emulsion and end up with a broken, separated mess. Think of it like making mayonnaise — you're forcing oil and water to become friends through patience and steady blending. The mixture will immediately turn a beautiful orange color and thicken slightly as the pumpkin incorporates. This should take about 30 seconds of steady streaming, and the sound will change again as the mixture becomes lighter and airier.
- Stop the processor and add the honey, thyme, and black pepper all at once. Process for another 30 seconds to fully incorporate, scraping down the sides once to ensure even distribution. The honey will make the mixture slightly looser, which is exactly what we want — it'll thicken slightly as it chills. Taste it now, and adjust the seasoning if needed. It should taste balanced — not too sweet, not too tangy, with the thyme providing a pleasant herbal note that makes you think of autumn walks through crunchy leaves.
- Transfer the dip to a serving bowl, cover with plastic wrap pressed directly onto the surface to prevent a skin from forming, and refrigerate for at least two hours. This chilling time isn't just about temperature — it's when the magic happens. The flavors meld and marry, the texture firms up to the perfect consistency, and the whole thing transforms from good to absolutely incredible. You can rush this step if you must, but you'll be missing out on the full experience. The dip will keep for up to five days, though I've never seen it last more than two.
- While the dip chills, toast your walnuts. Heat a dry skillet over medium heat and add the chopped nuts. Stir constantly for 3-4 minutes until they smell toasty and have darkened slightly. Don't walk away — nuts go from perfect to burnt faster than you can say "pumpkin spice." The toasting deepens their flavor and adds this incredible warmth that makes the whole dish taste more expensive than it is. Let them cool completely before using, or they'll make the dip oily.
- When you're ready to serve, remove the dip from the fridge 15 minutes early to take the chill off. Garnish with the toasted walnuts, a drizzle of honey, and maybe some extra thyme leaves if you're feeling fancy. Serve with warm pita chips, sliced apples, or those fancy crackers that cost more than a small appliance. The contrast between the cool, creamy dip and warm accompaniments is absolutely worth the extra effort.
- That's it — you did it. But hold on, I've got a few more tricks that'll take this to another level...
Insider Tricks for Flawless Results
The Temperature Rule Nobody Follows
Here's the thing that separates amateur cooks from the pros — temperature matters more than you'd think. Cold feta straight from the fridge won't whip properly, leaving you with a grainy texture no matter how long you process it. Let it sit out for at least an hour before starting, or better yet, plan ahead and take it out when you wake up. The same goes for the Greek yogurt — room temperature ingredients emulsify better and faster, giving you that restaurant-quality smoothness. I keep a sticky note on my fridge that says "take out feta" whenever I plan to make this, because forgetting means either waiting or settling for inferior results.
Why Your Nose Knows Best
The toasting step isn't just about flavor — it's about aroma, and aroma is everything in this dip. When those walnuts hit the hot pan, they release oils that contain hundreds of volatile compounds. These compounds don't just make your kitchen smell amazing — they prime your palate for what's coming, making the dip taste more complex and layered. Don't rush this step, and don't skip it even if you're using "pre-toasted" nuts from the store. Fresh toasting makes everything taste more alive, more vibrant, more like something you'd pay $12 for at a trendy wine bar.
The 5-Minute Rest That Changes Everything
After you finish processing but before you chill the dip, let it sit in the food processor bowl for five minutes. This brief rest allows the air incorporated during whipping to settle slightly, preventing the dip from deflating and becoming dense in the fridge. It's like the difference between a fluffy mousse and a heavy pudding. During this time, the proteins relax, the emulsion stabilizes, and the texture becomes more luxurious. Use these five minutes to wash the dishes you've dirtied — by the time you're done, the dip is ready for its transformation in the fridge.
The Garnish Game
Those walnuts on top aren't just for show — they're strategic. Place them in a loose spiral starting from the center, leaving some areas uncovered so people can see the beautiful orange color underneath. This creates visual interest and ensures every scoop gets some crunch without overwhelming the delicate texture. The honey drizzle should be thin and artistic, not a heavy pour that makes the top sticky. Warm the honey for five seconds in the microwave so it flows in a thin stream — you're going for Jackson Pollock, not kindergarten art project.
Creative Twists and Variations
This recipe is a playground. Here are some of my favorite ways to switch things up:
The Mediterranean Vacation
Swap the honey for pomegranate molasses and add a teaspoon of za'atar along with the thyme. The molasses adds this incredible tangy-sweet depth that makes the pumpkin taste almost wine-like. Top with toasted pine nuts instead of walnuts and finish with a sprinkle of sumac for a beautiful purple-pink color contrast. Serve with warm pita bread and watch people who claim they don't like pumpkin change their minds faster than you can say "opposite marriage."
The Sweet Heat Version
Add a tablespoon of harissa paste when you add the pumpkin — it provides this incredible warmth that builds slowly without overwhelming the other flavors. Use hot honey instead of regular honey, and swap the walnuts for toasted pepitas. The result is a dip that tastes like autumn in Morocco, with layers of heat that make your tongue tingle pleasantly. My spice-loving friends demolish this version while reaching for more wine, claiming it pairs perfectly with a crisp Riesling.
The Everything Bagel Remix
Replace the thyme with everything bagel seasoning (but make your own — the store-bought stuff is mostly salt and disappointment). The sesame seeds add this incredible nuttiness that plays beautifully with the pumpkin, while the dried garlic and onion provide savory depth. Top with everything-seasoned pita chips broken into scoop-sized pieces, creating this meta-everything experience that'll have brunch lovers weeping with joy.
The Fancy Dinner Party Edition
Use goat cheese instead of feta for a more sophisticated tang, and add a tablespoon of white truffle oil along with the pumpkin. It's outrageously expensive and completely worth it — the earthy truffle notes make the pumpkin taste more like pumpkin, if that makes sense. Serve in individual small glasses with a single walnut half on top of each, like you're at a restaurant that charges $18 for "deconstructed pumpkin experiences." Your guests will feel fancy and sophisticated while licking the glasses clean.
The Dessert Dip Transformation
Add a quarter cup of maple syrup instead of honey, double the amount of pumpkin, and fold in a cup of whipped cream at the very end. The result is like pumpkin pie filling's sophisticated cousin — light, airy, and perfect for dipping apple slices or graham crackers. Dust the top with cinnamon and serve with a side of caramel sauce for dipping. Kids go absolutely feral for this version, and adults pretend they're only having a little while going back for thirds.
The Savory Umami Bomb
Add a tablespoon of white miso paste when processing the feta — it disappears into the dip but adds this incredible umami depth that makes the whole thing taste more complex and interesting. Use smoked walnuts instead of regular ones, and add a few drops of liquid smoke. The result tastes like autumn around a campfire, with layers of savory complexity that make vegetarian guests ask if there's secretly bacon in there.
Storing and Bringing It Back to Life
Fridge Storage
This dip is incredibly forgiving when it comes to storage — it actually gets better after a day in the fridge as the flavors meld and deepen. Transfer to an airtight container, press plastic wrap directly onto the surface to prevent oxidation, and it'll keep for up to five days. The texture might firm up slightly, but that's easily fixed by letting it sit at room temperature for fifteen minutes before serving. Don't store it with the walnuts on top — they'll get soggy and sad. Keep those in a separate container and add them fresh when you're ready to serve.
Freezer Friendly
Surprisingly, this dip freezes beautifully — the high fat content from the feta and yogurt prevents ice crystals from forming. Freeze in portion-sized containers for up to two months, leaving about half an inch of space at the top for expansion. Thaw overnight in the fridge, then let it come to room temperature for thirty minutes before serving. The texture might be slightly looser after freezing, but a quick whisk brings it right back. I've been known to make triple batches and freeze them in individual containers for emergency entertaining situations.
Best Reheating Method
Here's the thing — you don't actually reheat this dip. It's meant to be served chilled or at room temperature. But if you've over-chilled it and it's too firm to scoop, microwave it for 8-10 seconds at 50% power, just enough to take the chill off. Any more than that and you'll break the emulsion, turning your luxurious dip into a grainy mess. Stir gently after microwaving, and add a tiny splash of water if it seems too thick. The walnuts should always be added fresh — their crunch is crucial to the experience.