I was standing in the middle of a kitchen disaster, a sizzling pan of overcooked taco filling, a bag of flour that had somehow turned into a sticky, unappealing mess. The air smelled of burnt onions and a faint hint of paprika that had been forgotten. My friends had dared me to whip up something that would turn this catastrophe into a culinary triumph, and I was ready to prove that a taco cup could be the hero of any gathering. I’m not just talking about a taco; this is a mini, cheesy, ready‑to‑eat wonder that turns ordinary ingredients into a symphony of crunch, melt, and spice.
Picture this: a crisp, golden crust that snaps like brittle paper, a molten cheddar core that oozes with every bite, and a savory filling that sings with the bright punch of lime and cilantro. The moment you lift one of these cups, the aroma of toasted corn chips, fresh cilantro, and warm melted cheese fills the room—like a warm hug that invites you to dig in. The texture is a dance of crunch and goo, the flavor a bold, comforting hug of Mexican street food. I dare you to taste this and not go back for seconds.
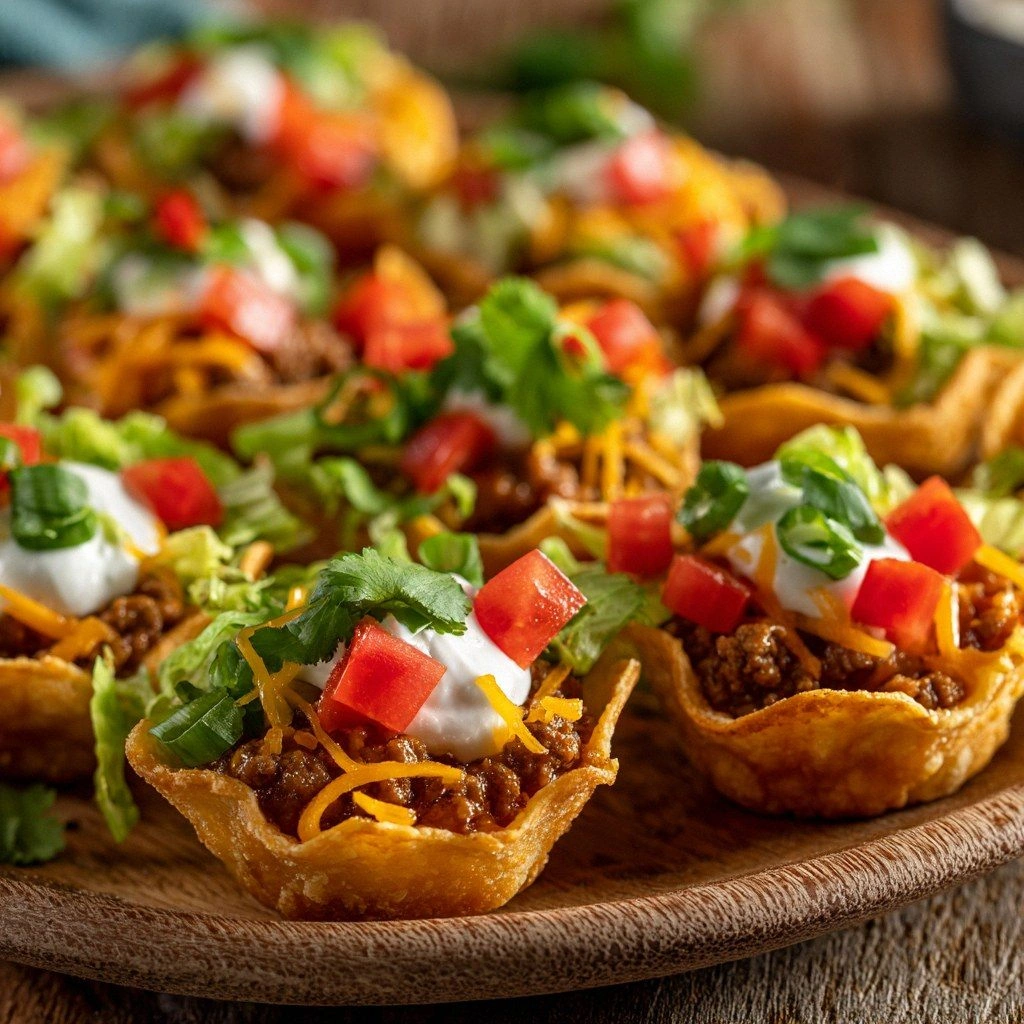
What sets this version apart from the countless “taco cup” recipes out there is the meticulous layering of flavors and the use of a secret ingredient that turns a simple cup into a crowd‑pleaser: crushed tortilla chips that form the base and add a subtle crunch that’s impossible to ignore. The cheese isn’t just shredded; it’s a blend of cheddar and Monterey Jack, creating a melt that’s both creamy and slightly nutty. The filling is a quick sauté of seasoned ground beef with diced onions, tomatoes, and a splash of lime that brightens everything. The result? A handheld bite that feels like a miniature taco, but with the convenience of a ready‑to‑eat snack that’s still full of personality.
By the end of this post, you’ll be wondering how you ever made taco cups the “normal” way. I’ve distilled the process into clear steps, sprinkled in a few micro‑challenges to keep you on your toes, and included insider tricks that guarantee a flawless outcome. Let me walk you through every single step — by the end, you’ll wonder how you ever made it any other way.
What Makes This Version Stand Out
- Flavor: The blend of cheddar and Monterey Jack gives a creamy, slightly nutty richness that pairs perfectly with the zesty lime. The taco seasoning is balanced, not overpowering, and the fresh cilantro adds a burst of green that cuts through the richness.
- Texture: The crushed tortilla chips create a crunchy base that contrasts with the soft, buttery crust and the molten cheese center. The filling’s sautéed onions and tomatoes keep the cups from becoming soggy.
- Ease: Every step takes less than ten minutes from start to finish, and the assembly is so simple you’ll have more time to enjoy the aroma.
- Uniqueness: The addition of a lime‑infused filling and a crushed‑chip crust sets this recipe apart from the usual flour‑based taco cups.
- Crowd Reaction: These cups are the life of any party; they’re bite‑size, cheesy, and they come with that satisfying crunch that people can’t resist. I’ve seen people line up for seconds after the first batch.
- Ingredient Quality: Using fresh, high‑quality cheese and a good taco seasoning makes all the difference; the difference is obvious in the flavor depth.
- Cooking Method: The pan‑baking technique locks in moisture, giving you a crisp exterior without overcooking the filling.
- Make‑ahead Potential: These cups keep well in the fridge for up to 48 hours and can be reheated in the oven or microwave without losing their crunch.
Alright, let's break down exactly what goes into this masterpiece...
Inside the Ingredient List
The Flour Foundation
The base of any good taco cup starts with a simple flour mixture. The flour provides structure, the baking powder gives lift, and the salt balances the flavors. If you skip the baking powder, the cups will be dense and doughy. If you want a gluten‑free version, swap the all‑purpose flour for a 1:1 blend of rice and cornstarch. Choosing high‑protein flour can give a chewier crust, but for a lighter bite, keep it standard.
The Butter Touch
Cold butter cut into cubes and blended into the flour creates a flaky, buttery crust that crisps beautifully in the pan. The butter also adds a rich, savory depth that contrasts with the bright lime. If you’re avoiding dairy, a small amount of coconut oil will work, though the flavor profile will shift slightly. Remember: cold butter is the secret; if it’s too soft, you’ll end up with a greasy crust.
The Cheese Blend
Cheddar is the star, but a splash of Monterey Jack or pepper jack adds creaminess and a subtle peppery kick. The cheeses should be shredded finely so they melt evenly. If you don’t have a cheese blend, a single sharp cheddar will still work; just be sure to shred it thinly to avoid a chunky texture. Cheese is the heart of the cup; don’t skip it.
The Secret Crushed Chip Layer
Crushed tortilla chips form the base that gives the cups their signature crunch. The chips should be crushed to a fine, sand‑like consistency, which helps them hold together during baking. If you can’t find pre‑crushed chips, use a food processor or a bag and a rolling pin. This layer also adds a subtle corn flavor that ties everything together.
The Tangy Filling
Ground beef is the most common filling, but turkey or even a plant‑based crumble will work. Sauté the meat with diced onions and tomatoes until it’s browned and fragrant. Sprinkle in taco seasoning, then finish with a splash of lime juice to brighten the dish. The lime not only adds flavor but also helps keep the filling from drying out during baking.
If you’re looking for a vegetarian twist, replace the meat with sautéed black beans, corn, and diced bell peppers, and add a bit more lime for zest.
Everything's prepped? Good. Let's get into the real action...
The Method — Step by Step
- Preheat your oven to 375°F (190°C). Grease a mini muffin tin or line it with paper liners. The pan’s heat will give the cups a golden crust. The oven should be fully preheated before you start; otherwise the cups will rise unevenly.
- In a large bowl, whisk together 2 cups of all‑purpose flour, 1 tsp baking powder, and 1 tsp salt. The dry mix is the foundation of your crust, so don’t rush this step. The flour should feel silky and free of lumps.
- Add 1/2 cup cold, cubed unsalted butter to the flour mixture. Use a pastry cutter or your fingers to blend the butter until the mixture resembles coarse crumbs. The butter should be cold; if it melts, the cups will be greasy.
- Pour in 3/4 cup milk and 1 large egg, then stir until a dough forms. The dough should be soft but not sticky. If it’s too dry, add a splash more milk; if it’s too wet, add a teaspoon of flour.
- Take a tablespoon of the dough and press it into the bottom of each muffin cup, forming a 1/4‑inch thick crust. The crust should be even; uneven crusts can lead to uneven cooking.
- Heat a skillet over medium heat. Add 1/2 lb ground beef, breaking it up with a spatula. Cook until browned, about 5 minutes. Drain excess fat to keep the cups from getting soggy.
- Stir in 1/4 cup diced onions, 1/4 cup diced tomatoes, and 1 tbsp taco seasoning. Cook for an additional 2 minutes until the onions soften. Add 1 tbsp chopped cilantro and 1 lime, juiced. This is the moment of truth—if it smells toasty and fresh, you’re on track.
- Spoon the meat mixture into each crust, filling them about 3/4 full. Sprinkle 1 cup shredded cheddar and Monterey Jack cheese over the top. The cheese should cover the filling but not spill over the edges.
- Bake for 20–25 minutes, or until the edges are golden and the cheese is bubbly. The cups should emit a tantalizing aroma—like a warm, cheesy fiesta.
- Let the cups cool in the tin for 5 minutes before transferring to a wire rack. The cooling time locks in the crunch and prevents the cheese from seeping into the crust.
That's it — you did it. But hold on, I've got a few more tricks that'll take this to another level. These little tweaks will elevate the flavor profile, improve the texture, and make your taco cups truly unforgettable.
Insider Tricks for Flawless Results
The Temperature Rule Nobody Follows
Many people bake at 350°F, but 375°F is the sweet spot that ensures a crisp crust without overcooking the filling. The higher temperature gives the cheese a perfect golden bubble. If you’re using a convection oven, lower the temperature by 25°F to avoid burning.
Why Your Nose Knows Best
Smell the filling as it cooks. If it starts to smell like burnt onions, lower the heat. A bright, citrusy scent from the lime indicates the right balance of acidity and heat. Trust your nose; it’s the best judge of flavor.
The 5‑Minute Rest That Changes Everything
After baking, let the cups sit in the tin for exactly five minutes. This short rest allows the cheese to set slightly, preventing it from sliding off when you pick them up. It also lets the crust firm up a touch, giving you that satisfying crunch.
The Crumb Layer Trick
If you want a crunchier base, press a thin layer of crushed tortilla chips onto the bottom of each cup before adding the dough. This layer adds an extra crunch and a subtle corn flavor that pairs beautifully with the taco seasoning.
The Fresh Herb Finish
Just before serving, sprinkle a handful of fresh cilantro over the top. The herb’s bright green color and fresh flavor add a visual pop and a burst of freshness that cuts through the richness.
Creative Twists and Variations
This recipe is a playground. Here are some of my favorite ways to switch things up:
Spicy Chipotle Burst
Swap the taco seasoning for chipotle‑in‑adobo seasoning, and add a teaspoon of adobo sauce to the filling. The smoky heat will give the cups a deep, smoky flavor that pairs well with a dollop of sour cream.
Veggie‑Only Fiesta
Replace the ground beef with a mixture of black beans, corn, diced bell peppers, and onions. Add a pinch of cumin and a splash of lime. The result is a hearty, plant‑based cup that’s still cheesy and satisfying.
Mediterranean Twist
Use feta cheese instead of cheddar, add chopped kalamata olives, and sprinkle oregano on top. The salty feta and olives give a Mediterranean vibe that’s surprisingly complementary to the taco base.
Breakfast Taco Cups
Swap the ground beef for scrambled eggs, add diced ham or bacon, and top with shredded cheddar. Serve with a side of salsa and a squeeze of lime for a breakfast‑style taco cup that’s perfect for brunch.
Cheesy Pepperoni Bites
Add diced pepperoni to the filling and use pepper jack cheese. The pepperoni’s smoky flavor adds a pizza‑like element that kids and adults alike love.
Storing and Bringing It Back to Life
Fridge Storage
Store the cooled cups in an airtight container in the refrigerator for up to 48 hours. The crust will stay firm, and the filling will stay moist. When you’re ready to serve, let them sit at room temperature for 10 minutes to soften slightly.
Freezer Friendly
Wrap each cup individually in plastic wrap and place them in a freezer bag. They’ll keep for up to 3 months. When you’re ready to reheat, pop them in the oven at 350°F for 10 minutes or microwave for 45 seconds, then let rest for a minute.
Best Reheating Method
The oven is your best friend for reheating. Preheat to 350°F, place the cups on a baking sheet, and bake for 8–10 minutes until the cheese is bubbly again. Add a tiny splash of water before reheating to keep the filling from drying out; the steam will restore moisture.