I still remember the first time I made a dump cake. It was one of those frantic weeknights when the in-laws announced they were "just five minutes away," and my pantry looked like a game of culinary Jenga. I had a dusty box of yellow cake mix, a brick of cream cheese I'd forgotten to return to the fridge, and a can of strawberry pie filling that had been eyeing me judgmentally since last Thanksgiving. In a moment of sweet desperation, I dumped everything into a baking dish, muttered a small prayer to the dessert gods, and shoved it into the oven. Twenty-five minutes later, the kitchen smelled like a strawberry field had collided with a cheesecake cloud, and the resulting dessert was so outrageously good that my mother-in-law asked for the recipe three times. I never confessed it was a panic-born accident.
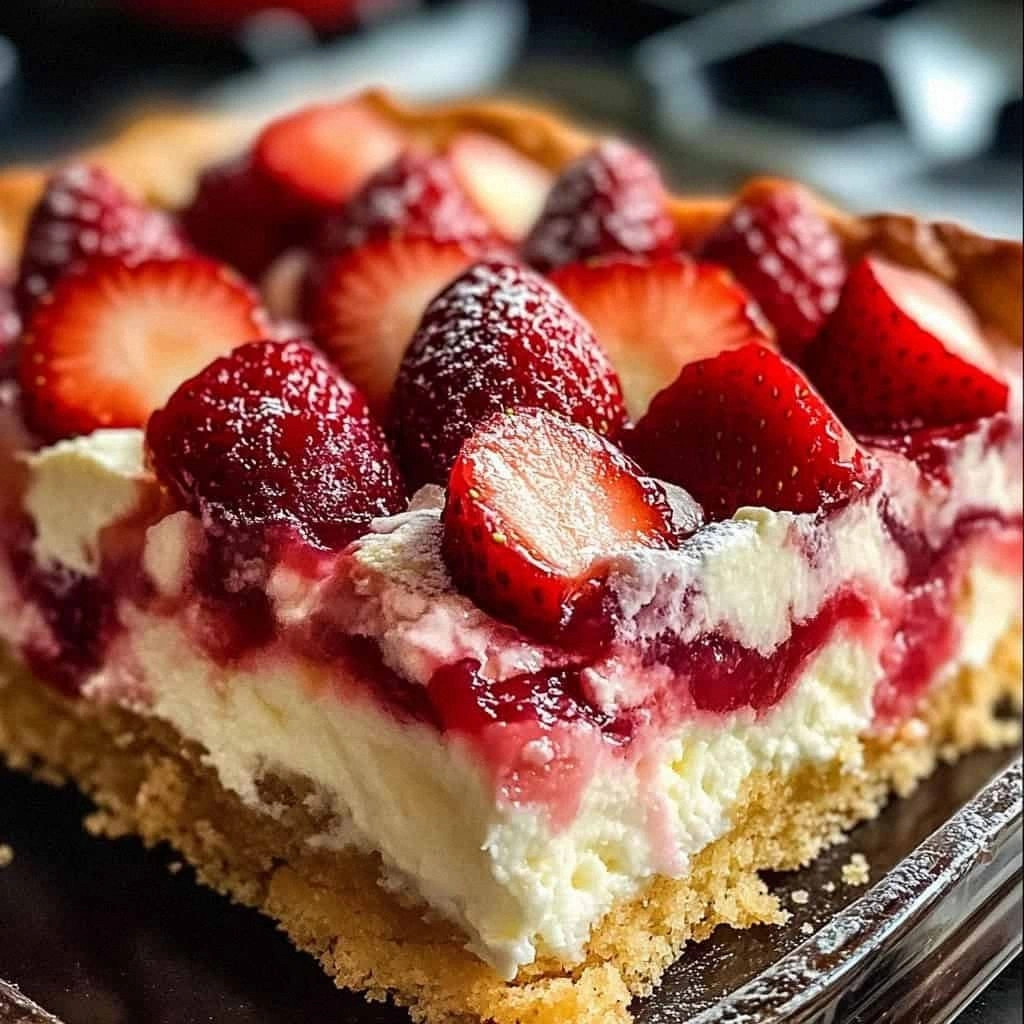
Since that fateful evening, I've tinkered, tweaked, and taste-tested my way to what I boldly call the ultimate strawberry cheesecake dump cake. Picture this: a buttery, golden crust that shatters like thin ice under your fork, giving way to a creamy cheesecake layer that tastes as though it spent hours in a water bath (spoiler: it didn't), all crowned with a glossy halo of strawberry pie filling that bubbles and caramelizes at the edges. The first bite is a textural roller coaster—crispy, creamy, jammy—followed by a wave of nostalgic comfort that makes you close your eyes involuntarily. I dare you to taste this and not go back for seconds. Actually, I double-dog dare you, because I myself have polished off half a pan while standing at the counter "just to make sure it's cooled enough for guests."
Most recipes get this completely wrong. They either over-complicate the process (I'm looking at you, water-bath enthusiasts) or they leave you with a gummy, overly sweet mess that tastes like regret and artificial strawberry. The magic of this version lies in respecting each component: the cake mix becomes a toasty, buttery streusel; the cream cheese turns into a tangy, silky layer; the strawberry filling intensifies into spoon-coating bliss. If you've ever struggled with dry edges, soggy bottoms, or that weird curdled texture that happens when cream cheese meets high heat, you're not alone—and I've got the fix. Stay with me here—this is worth it.
Okay, ready for the game-changer? We're going to use the cake mix in its raw, sandy state—no whisking, no eggs, no additional liquid—to create a shortbread-like crust that drinks up melted butter and bakes into crispy perfection. Meanwhile, the cream cheese gets a quick fluff with sugar and vanilla before it marbles with the strawberries, creating pockets of tangy cheesecake in every bite. Picture yourself pulling this out of the oven, the whole kitchen smelling like a summer fair, your spoon sliding through layers like a hot knife through nostalgia. Let me walk you through every single step—by the end, you'll wonder how you ever made it any other way.
What Makes This Version Stand Out
This isn't just another dump-and-bake dessert; it's the dump cake that dump cakes aspire to be. Below are the non-negotiables that separate the legendary from the merely edible.
- Flavor Depth: We're sneaking vanilla into the cream cheese layer, which amplifies the strawberry notes and gives the whole dessert a boutique-bakery aroma. One whiff and people will assume you spent the afternoon macerating berries.
- Texture Tightrope: The cake mix stays dry on top, absorbing butter and morphing into a crunchy, cookie-like lid that contrasts wildly with the silky cheesecake and jammy fruit. Most recipes add extra liquid and end up with sad, spongy patches.
- Speed Demon: From pantry raid to oven door, you're looking at under ten minutes of active work. I timed myself once—seven minutes, forty-three seconds, and that included wrestling the cream cheese out of its foil.
- Crowd Gasps: Bring this to a potluck and watch the collective jaw drop when you confess it took fewer ingredients than a bowl of cereal. I've seen people elbow each other out of the buffet line for corner pieces.
- Ingredient Integrity: We're using real cream cheese, real butter, and real pie filling—no whipped topping folded into the bake, no margarine shortcuts. Quality in, glory out.
- Make-Ahead Magic: Assemble it the night before, cover tightly, and refrigerate unbaked. When guests arrive, slide it into the oven; dessert stress solved, hostess impresses.
Alright, let's break down exactly what goes into this masterpiece, starting with the unsung heroes hiding in your pantry.
Inside the Ingredient List
The Flavor Base
The yellow cake mix isn't just a convenience item—it's a pre-blended ratio of flour, sugar, and leavening that took food scientists months to perfect. When it meets hot butter, the sugar caramelizes and the flour toasts, creating a flavor reminiscent of buttery shortbread crossed with golden sugar cookie. Skip the bargain-bin brands if you can; the alchemy works best when the mix contains real vanilla bean flecks. If all you have is white cake mix, it'll work, but you'll miss the subtle caramel notes that yellow mix brings to the party.
The Texture Crew
Cream cheese is the Beyoncé of this dessert; everything else is backup dancers. Make sure it's fully softened—cold cream cheese refuses to blend smoothly and bakes into chalky lumps. I leave mine on the counter for at least two hours, but if you're impatient, unwrap it, cube it, and let it sit in a zip-top bag submerged in warm water for ten minutes. The granulated sugar isn't just for sweetness; it helps loosen the cream cheese further, acting like tiny ball bearings that whip air into the mixture for a lighter layer.
The Unexpected Star
Here comes the twist: frozen whipped topping stirred in AFTER baking. The cool, cloud-like topping contrasts with the warm cake, creating that hot-cold thrill you get from molten lava cakes. Thaw it completely first—ice crystals will weep all over your beautiful layers. If you're a homemade purist, you could whip heavy cream with a touch of powdered sugar, but the store-bought stuff holds its peaks for hours on a buffet table.
The Final Flourish
Strawberry pie filling does the heavy lifting so you don't have to hull, macerate, or reduce anything. Look for a can where the berries remain whole, swimming in glossy syrup rather than broken down into baby food. You want those jammy hunks that burst on your tongue. Feel free to swap in cherry or blueberry, but strawberry hits that nostalgic note that makes people say, "This tastes like summer at my grandma's."
Everything's prepped? Good. Let's get into the real action.

The Method — Step by Step
- Preheat your oven to 350°F (175°C). Don't trust the thermostat—place an inexpensive oven thermometer on the center rack. I once rented an apartment where the dial was off by a blistering 45°F, and my first dump cake emerged burnt on the edges and raw in the middle. While the oven comes to temp, position a rack one notch above center. This encourages the top to bronze without over-baking the cheesecake layer.
- Grease a 9×13-inch baking dish with a thin film of butter or non-stick spray. I swipe the wrapper of my still-cold butter stick around the pan; it gives just enough fat to prevent sticking and adds flavor. Dump cakes are notorious for welding themselves to corners, so don't skip this seemingly neurotic step. Tilt the dish under the light to catch any ungreased spots—those glossy gaps are future you's tears.
- Open the can of strawberry pie filling and give it a gentle stir. This redistributes the syrup so you won't hit a cloyingly sweet pocket. Use a rubber spatula to scrape every last crimson thread into the dish, spreading it into an even layer that kisses the perimeter. Those bare edges are flavor deserts, and nobody wants a mouthful of plain cake mix.
- In a medium bowl, beat the softened cream cheese with the granulated sugar and vanilla extract until the mixture looks like fluffy clouds tinged with specks of vanilla bean. Resist the urge to add an egg; we're creating a cheesecake layer that firms but stays creamy, not a soufflé that collapses. Stop occasionally to scrape the sides—lumps are the enemy of elegance.
- Dollop the cream cheese mixture over the strawberries in large spoonfuls. Think of it like dropping soft ice cream onto hot pie; you want distinct islands that will marble into the fruit as they heat. Don't swirl yet—let the oven do the artistic blending. The contrast of white against ruby is your first visual promise that something magical is underway.
- Rip open the cake mix and sprinkle it evenly across the surface, pretending you're flouring a bakery workbench. Shake the pan gently to fill gaps, but don't press down—keep it airy. The goal is a blanket of dry mix, not a packed foundation. Lumps in the mix are fine; they'll become buttery nuggets later.
- Melt the half-cup of butter until it's just liquid but not screaming hot. I microwave in 20-second bursts; water evaporation concentrates milk solids, giving a richer taste. Drizzle the butter slowly, tracing a grid pattern so every inch of cake mix gets a shiny baptism. Where puddles form, use a fork to fluff the mix; saturated spots bake into doughy patches.
- Slide the dish onto that awaiting rack and bake for 30–35 minutes. At the 25-minute mark, rotate the pan 180 degrees for even browning. The top should look like a patchwork of toasted gold and deeper amber, with strawberry syrup bubbling up like lava around the edges. Your kitchen will smell like a strawberry shortbread carnival—this is the moment of truth.
- Cool on a wire rack for 15 minutes. I know, I know—patience is painful—but the filling needs to set or you'll serve strawberry soup. The cake mix will continue crisping from residual heat, transforming into that coveted shattering lid. If you hear faint crackling, that's the soundtrack of success.
- Just before serving, spread the thawed whipped topping over the warm cake. The heat will melt the very bottom layer of topping, fusing it into a cool, mousse-like icing. Garnish with fresh strawberry halves if you're feeling fancy, or simply hand everyone a spoon and watch the communal swoon happen.
That's it—you did it. But hold on, I've got a few more tricks that'll take this to another level...
Insider Tricks for Flawless Results
The Temperature Rule Nobody Follows
Room-temperature dairy is non-negotiable. Cold cream cheese refuses to blend smoothly, leaving you with white pebbles that stay intact even after baking. I leave dairy on the counter overnight; if you forget, submerge the sealed package in body-temperature water for 15 minutes. Test by gently pressing the center—it should feel like a memory-foam pillow, not a hockey puck.
Why Your Nose Knows Best
Ignore the timer and trust your olfactory senses. When the aroma of toasted butter and caramelized sugar drifts into the living room, the dessert is roughly three minutes from perfect. Open the oven door a crack; if a warm strawberry breeze greets you, grab those mitts. A friend tried skipping this step once—let's just say it didn't end well, and her smoke alarm now has trust issues.
The 5-Minute Rest That Changes Everything
After baking, tent the dish loosely with foil for five minutes. The gentle steam loosens any fruit bits glued to the edge, making serving neat squares a breeze. Remove the foil and continue cooling for ten more minutes. This dual-phase rest prevents the dreaded topping slide, where your whipped cream sails off like a dairy iceberg the moment you scoop.
The Crunch Booster
For extra shatter, scatter a handful of crushed graham crackers over the cake mix before drizzling butter. They toast into nutty, honey-scented shards that echo the cheesecake theme. Pulse five crackers in a zip-top bag with a rolling pin; you want pea-sized rubble, not dust.
Flavor Insurance
Add a whisper of citrus zest—about half a teaspoon of lemon or orange—to the cream cheese. The bright oils amplify the strawberries and make the overall profile taste fresher, even though everything came from cans and boxes. Micro-plane is your friend here; avoid the bitter white pith.
Creative Twists and Variations
This recipe is a playground. Here are some of my favorite ways to switch things up:
Peach Cobbler Dump Cake
Swap the strawberry pie filling for peach and add a half-teaspoon of cinnamon to the cake mix. The spice rides shotgun with the buttery crust, evoking county-fair peach dumplings. Southern friends will swear you slow-cooked fresh peaches with a biscuit top.
Chocolate-Raspberry Indulgence
Use chocolate cake mix and raspberry pie filling, then stir two tablespoons of cocoa powder into the cream cheese. The result is a black-forest-meets-New-York-cheesecake mash-up that tastes dangerously gourmet. Top with chocolate shavings for maximum drama.
Tropical Sunset Version
Replace the strawberry with pineapple-coconut fruit topping and add a tablespoon of rum extract to the cream cheese. Serve with a sprinkle of toasted coconut. Close your eyes and you'll hear steel drums even if it's sleeting outside.
Peanut Butter Cup Remix
Keep the strawberry layer but beat a quarter-cup of creamy peanut butter into the cream cheese. The PB-strawberry combo tastes like a fluffernutter sandwich went on a tropical vacation. Kids will worship you; adults will pretend they're eating it "for the kids."
Salted Caramel Apple
Use apple pie filling, drizzle caramel sauce over the cream cheese layer, and finish with a pinch of flaky salt on top. The salt amplifies the caramel and tames the sweetness, delivering that trendy salted-candle-shop vibe without the twenty-dollar price tag.
Berry Trifecta
Mix half strawberry and half blueberry pie filling for a patriotic swirl. Add lemon zest to the cream cheese to keep the flavors vivid. Perfect for summer barbecues where you want dessert to look themed without wrestling fresh berries into submission.
Storing and Bringing It Back to Life
Fridge Storage
Cover the completely cooled baking dish with a tight double layer of plastic wrap, pressing it directly onto the surface to prevent the whipped topping from absorbing fridge odors. It will keep for up to four days, though the topping deflates slightly. For optimal texture, store the topping separately in an airtight container and re-slather just before serving.
Freezer Friendly
Cut the cooled cake into squares, wrap each in plastic wrap followed by foil, and freeze for up to two months. Thaw overnight in the fridge, then refresh in a 300°F oven for ten minutes to re-crisp the crust before adding fresh whipped topping. The texture won't be quite as shattering, but the flavors remain surprisingly intact.
Best Reheating Method
Individual squares reheat like a dream in the air-fryer: 350°F for 4 minutes yields a hot, crunchy lid and molten fruit. If you don't have an air-fryer, use a toaster oven set to toast mode; the direct heat revives the crust better than a microwave ever could. Add a tiny splash of water on the plate before reheating—it steams back to perfection and prevents rubbery edges.