Picture this: I’m standing in a kitchen that smells like burnt sugar and forgotten onions, the kind of disaster that makes you question every recipe you’ve ever trusted. I had just finished a last‑minute dinner for a group of friends who demanded something “extra” and “hot.” The only thing left was a half‑sized chicken breast and a jar of honey that had seen better days. I was about to throw the whole thing away when a burst of inspiration hit—why not turn that honey into a glaze, coat the chicken in a Nashville‑style spice rub, and bake it till it’s crisp on the outside and juicy on the inside? The result? A sandwich that’s as bold as a drum solo and as comforting as a hug from a grandma who knows how to handle heat.
The first bite was a symphony of textures: the crackling crunch of the panko coating, the buttery sweetness of the honey glaze, and the tender, melt‑in‑your‑mouth chicken that practically sang in the bowl. The aroma—smoky paprika mingling with the caramelized honey—was so intoxicating that even my cat seemed to pause mid‑pounce. Sound? The sizzling of the pan as the butter melted and the glaze thickened, a gentle hiss that promised flavor. Taste? A fiery kick balanced by a sweet, almost buttery finish that left a lingering warmth on the tongue. Feel? The sandwich’s weight, the satisfying heft of a perfectly toasted bun, the crispness of fresh iceberg lettuce that added a refreshing bite.
What sets this version apart from the countless “Nashville hot chicken” recipes you’ll find online is the meticulous layering of flavors and textures. I didn’t just toss the chicken in a spice mix; I built a flavor base that starts with a dry rub, moves through a wet coating, and culminates in a glaze that glistens like honeyed amber. The result is a sandwich that doesn’t just taste hot—it feels hot. It’s a dish that invites a second bite, a third, a whole plate of fries, and then a round of “I dare you to taste this and not go back for seconds.”
And here’s the kicker: the secret sauce isn’t just the honey glaze. It’s the way the chicken is prepared—floured, egg‑dipped, panko‑coated—before it hits the oven at a blistering 425°F. That temperature is the key to achieving a crust that shatters like thin ice, while the interior remains moist and flavorful. The result is a sandwich that’s hands down the best version you’ll ever make at home. I’m not exaggerating; this is a game‑changer that will have your friends asking, “Where did you learn that?”
Picture yourself pulling this out of the oven, the whole kitchen smelling incredible, the steam rising from the honey glaze like a sweet cloud. The anticipation builds, the aroma fills the room, and then you cut into that golden crust—crack, crunch, a burst of heat. That’s the moment I want you to experience. If you’ve ever struggled with a Nashville hot chicken sandwich that ends up soggy or bland, you’re not alone—and I’ve got the fix. Stay with me here—this is worth it.
What Makes This Version Stand Out
- Flavor Depth: The combination of smoked paprika, turmeric, and garlic powder creates a complex, earthy base that sets the tone before the heat kicks in.
- Crisp Texture: The panko breadcrumb coating, brushed with a buttery honey glaze, turns the chicken into a crunchy, melt‑in‑your‑mouth experience.
- Heat Balance: Cayenne pepper provides a steady, sustained heat, while the honey glaze tempers the spice, giving a smooth finish.
- Simple Assembly: With just a few ingredients and a single oven, you can whip up a gourmet sandwich in under 45 minutes.
- Crowd‑Pleaser: Whether it’s a family dinner or a backyard grill, this sandwich has the wow factor that turns casual eaters into superfans.
- Make‑Ahead Friendly: The chicken can be baked ahead and reheated without losing its crispness, making it perfect for busy schedules.
- Ingredient Quality: Using fresh, high‑quality chicken and real honey elevates the dish from ordinary to extraordinary.
- Visual Appeal: The glossy honey glaze and vibrant red of the cayenne create an Instagram‑ready look that’s as good to eat as it is to photograph.
Alright, let’s break down exactly what goes into this masterpiece…
Inside the Ingredient List
The Flavor Base
The dry rub is the heart of this sandwich. Combining smoked paprika, turmeric, garlic powder, salt, and black pepper creates a savory foundation that’s both earthy and slightly sweet. Each spice contributes a unique layer: paprika for smokiness, turmeric for a subtle warmth, and garlic powder for depth. If you skip any, the flavor profile becomes thin and one‑dimensional. For a vegetarian version, simply use a plant‑based chicken substitute and keep the rub the same.
The Texture Crew
Panko breadcrumbs are the secret to that perfect crunch. They’re light, airy, and absorb less oil than regular breadcrumbs, giving a crisp, airy bite that shatters like thin ice. When mixed with a light coat of flour and a quick egg dip, the panko clings beautifully, forming a golden shell. If you can’t find panko, try crushed cornflakes or breadcrumbs seasoned with a pinch of salt for a similar effect.
The Unexpected Star
Honey isn’t just a sweetener; it’s a glaze that caramelizes under heat, creating a glossy finish that locks in moisture. The honey’s natural sugars also help the butter melt into a silky coating that coats the chicken evenly. If you’re watching calories, a drizzle of maple syrup can replace honey, though the flavor will shift slightly toward a richer, slightly woody note.
The Final Flourish
Buttermilk ranch is the creamy counterpoint that balances the heat. It’s thick enough to cling to the lettuce and chicken without dripping, and the tangy buttermilk cuts through the richness of the honey glaze. If you prefer a lighter option, swap it for a plain yogurt sauce or a simple mayo‑based spread. Remember, the sauce should be cold so it doesn’t melt the crispy coating.
Everything's prepped? Good. Let's get into the real action…
The Method — Step by Step
- Preheat and Prep: Set your oven to 425°F (220°C) and line a baking sheet with parchment paper. While the oven warms, cut the chicken breasts into even, bite‑sized pieces. This ensures uniform cooking and a consistent bite. I’ve found that a quick pat with paper towels removes excess moisture, helping the coating adhere better.
- Create the Dry Rub: In a shallow bowl, whisk together 1 cup all‑purpose flour, ½ tablespoon garlic powder, ½ teaspoon turmeric, 1 teaspoon smoked paprika, ¾ teaspoon salt, and ¼ teaspoon black pepper. The flour not only seasons but also forms a base layer that holds the egg and panko together. If you’re craving extra flavor, a splash of lemon zest can brighten the mix.
- Set Up the Dredging Station: Place the dry rub in one bowl, a second bowl with 2 large eggs lightly beaten, and a third bowl with 1 cup panko breadcrumbs. This classic three‑step coating process locks in moisture and gives the chicken a crisp shell that doesn’t crumble. The order matters: flour first, egg second, panko third.
- Coat the Chicken: Dip each chicken piece first into the flour, shaking off any excess. Then plunge into the beaten eggs, letting the liquid run off, and finally roll in the panko. For an extra crunch, press the panko onto the surface with your fingers. This step is crucial for that “shatter‑like‑ice” texture that makes each bite memorable.
- Prepare the Honey‑Butter Glaze: In a small saucepan over medium heat, melt ½ cup unsalted butter. Add ¼ cup honey, 1 teaspoon cayenne pepper, and 1 teaspoon smoked paprika. Stir continuously until the mixture is silky and the honey is fully incorporated. The glaze should bubble gently but not boil; if it starts to smoke, lower the heat immediately.
- Brush the Glaze: Use a pastry brush to coat each chicken piece evenly with the honey‑butter glaze. The glaze should coat the surface like a fine glaze on pottery, giving a shiny finish that caramelizes in the oven. If you’re a fan of extra sweetness, brush a second layer after the first bake.
- Bake to Perfection: Slide the sheet into the preheated oven and bake for 20–25 minutes, flipping halfway through. The chicken is done when it reaches an internal temperature of 165°F (74°C) and the coating is a deep golden brown. The scent of honey caramelizing should fill the kitchen, a signal that you’re close to culinary bliss.
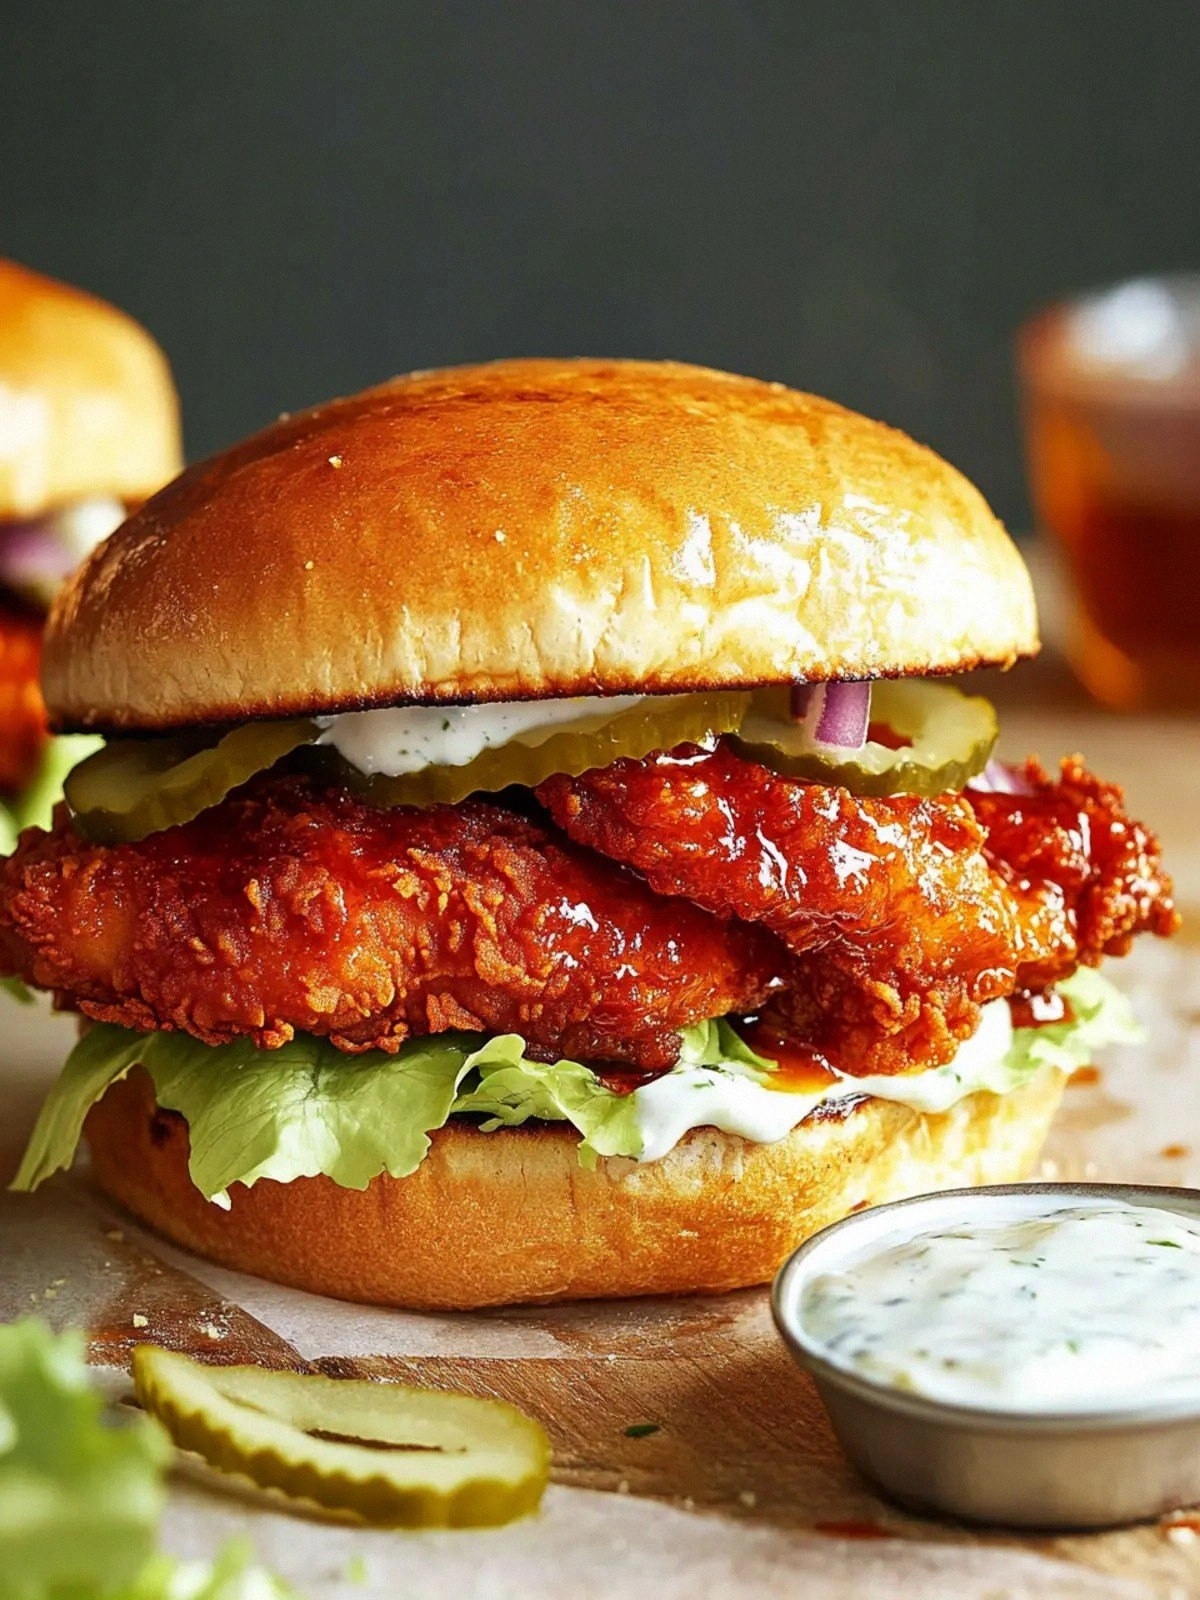
- Assemble the Sandwich: While the chicken finishes, toast the 4 burger buns lightly in a skillet or oven. Spread ½ cup buttermilk ranch on the inside of each bun, pile on 2 cups shredded iceberg lettuce, add the hot chicken, and top with another bun. The crunch of the lettuce contrasts with the tender chicken, and the ranch cools the heat just enough to make the sandwich balanced.
- Serve Immediately: Plate the sandwiches while still hot. The contrast of the warm, crispy chicken against the cold ranch and crisp lettuce creates a satisfying sensory experience. Pair with a side of sweet potato fries or a simple green salad to round out the meal.
That's it — you did it. But hold on, I've got a few more tricks that'll take this to another level…
Insider Tricks for Flawless Results
The Temperature Rule Nobody Follows
Many cooks set the oven too low, resulting in soggy chicken. Keep the temperature high at 425°F (220°C) to ensure the coating crisps up while the inside stays juicy. A high heat also caramelizes the honey glaze, giving that glossy, sweet finish. If you’re using a convection oven, lower the temperature by 25°F to avoid over‑browning.
Why Your Nose Knows Best
Before you flip the chicken, give it a quick sniff. A hint of caramelized honey should dominate. If it still smells raw, give it a few more minutes. The aroma is a reliable indicator that the glaze has set and the coating is crisp.
The 5-Minute Rest That Changes Everything
Once the chicken is out of the oven, let it rest on a rack for 5 minutes. This allows the juices to redistribute, preventing them from spilling onto the coating. A rested chicken stays moist, while the coating remains crisp and doesn’t become soggy.
Avoiding Dry Chicken
If you’ve ever had a piece of chicken that’s dry, the culprit is often overcooking. The 165°F internal temperature is the sweet spot. Use a meat thermometer to check; once it hits that number, pull it out immediately.
Quick Buns Toasting Trick
Before you toast the buns, lightly butter them and sprinkle a pinch of sea salt. This adds flavor and creates a golden crust that holds the sandwich together. A buttered bun also prevents the ranch from soaking into the bread.
Serving with a Side
Pair your sandwich with a side of coleslaw or sweet potato fries for a balanced meal. The tangy slaw cuts through the richness, while the fries add a comforting, salty crunch that complements the spicy chicken.
Creative Twists and Variations
This recipe is a playground. Here are some of my favorite ways to switch things up:
Smoky Chipotle Variation
Swap the cayenne pepper for chipotle powder and add a splash of chipotle mayo. The smoky heat pairs beautifully with the honey glaze, creating a deeper flavor profile that’s perfect for chili‑season lovers.
Sweet Pineapple Variation
Incorporate a tablespoon of pineapple jam into the glaze for a tropical twist. The natural sugars of pineapple complement the honey, giving the sandwich a sweet, fruity kick.
Vegan Version
Use a plant‑based chicken substitute and replace the buttermilk ranch with a vegan yogurt sauce. The texture remains crispy, and the flavors stay intact, making it a great option for plant‑based diners.
Breakfast Twist
Serve the chicken on a toasted English muffin with a fried egg on top. The combination of savory chicken, sweet glaze, and runny yolk turns this into a hearty breakfast sandwich.
BBQ Glaze Variation
Swap the honey glaze for a smoky BBQ sauce and add a sprinkle of brown sugar. The sweet, tangy BBQ flavor offers a new dimension while maintaining the crispy coating.
Mediterranean Twist
Add crumbled feta and sliced olives to the sandwich, and replace the ranch with a tzatziki sauce. The Mediterranean flavors bring a refreshing, tangy contrast to the spicy chicken.
Storing and Bringing It Back to Life
Fridge Storage
Store assembled sandwiches in an airtight container for up to 2 days. Keep the buns separate and toast them fresh before serving to preserve their crispness.
Freezer Friendly
Freeze the cooked chicken pieces in a single layer on a parchment sheet; once frozen, transfer to a freezer bag. The chicken can be reheated in the oven at 350°F for 10 minutes. Buns and lettuce should be stored separately and assembled after reheating.
Best Reheating Method
Reheat the chicken in a preheated oven at 350°F for 8–10 minutes. Add a splash of water to the baking dish before reheating; the steam will keep the chicken moist and the coating crisp. Then toast the buns for a minute to regain that satisfying crunch.