I was standing in my kitchen on a rainy Tuesday, staring at a half‑cooked chicken breast that had decided to turn into a rubbery slab of disappointment. The smoke alarm sang its tiny protest, the timer buzzed like a frantic bee, and I swear I heard my cat whisper, “You can do better.” That moment of culinary chaos sparked a dare from my roommate: “Make something that actually melts in your mouth, or I’m ordering pizza forever.” I accepted, and after a frantic search through my spice rack and a few frantic YouTube tutorials, I emerged with a technique that turned a plain bird into a buttery, juicy masterpiece that practically disintegrates on the fork. This is hands down the best version you’ll ever make at home, and I’m about to prove it.
Picture this: you open the oven, and a wave of aromatic steam rushes out, carrying hints of caramelized garlic, a whisper of rosemary, and a golden glow that makes the whole kitchen feel like a sunrise. The chicken skin—if you left it on—crackles like fresh autumn leaves, while the meat underneath stays so tender it slides off the bone without a fight. You hear the faint sizzle as the butter melts, the faint pop of herbs releasing their oils, and the soft hum of the oven’s fan. Your fingertips feel the warm handle of the pan, and your nose registers that sweet, nutty scent that says “don’t wait, dig in now.” If you’ve ever struggled with dry chicken, you’re not alone — and I’ve got the fix.
Most recipes get this completely wrong. They either over‑season, under‑cook, or rely on a mystery sauce that masks the chicken’s natural flavor. The secret here is a three‑step dance: a quick brine, a butter‑infused sear, and a gentle finish in a hot oven that locks in juices. I’ll be honest — I ate half the batch before anyone else got to try it, because the aroma was just too seductive. I dare you to taste this and not go back for seconds; the melt‑in‑your‑mouth texture is addictive, and the flavor depth is something you’ll chase for years.
Okay, ready for the game‑changer? The technique that makes the difference is a simple yet under‑appreciated step: a brief “wet‑dry” brine that uses just enough salt and a splash of buttermilk to tenderize the fibers without drowning the meat. It’s the kind of hack that feels like cheating, but it’s 100% legit and will change the way you think about chicken forever. Let me walk you through every single step — by the end, you’ll wonder how you ever made it any other way.
What Makes This Version Stand Out
- Texture: The brine + butter sear creates a crust that shatters like thin ice, while the interior stays as soft as a cloud. No more rubbery bites.
- Flavor: A subtle herb‑butter blend penetrates the meat, giving each bite a layered taste that feels like a gourmet restaurant secret.
- Simplicity: Only a handful of pantry staples are needed, so you won’t spend hours hunting exotic ingredients.
- Uniqueness: The wet‑dry brine is a twist most home cooks skip; it’s the hidden key to that melt‑in‑your‑mouth sensation.
- Crowd Reaction: Guests will ask for the recipe, then immediately claim they’ll “just wing it” at home — only to be amazed when they taste the difference.
- Ingredient Quality: Using fresh, organic chicken breasts amplifies the buttery finish; the meat’s natural flavor shines through.
- Cooking Method: A quick stovetop sear followed by a controlled oven finish guarantees even cooking without guesswork.
- Make‑Ahead Potential: The chicken can be pre‑brined and stored, then cooked fresh for a quick weeknight dinner.
Inside the Ingredient List
The Flavor Base
Even though the star is the chicken breast, the flavor base is what turns a simple protein into a culinary experience. Unsalted butter melts into the pan, creating a glossy, nutty foundation that carries the aromatics. Fresh garlic, minced just before cooking, releases a sweet, caramelized perfume that dances with the rosemary’s piney notes. If you skip the butter, you’ll lose that luxurious mouthfeel and the subtle richness that makes each bite feel indulgent. A quick swap? Use clarified ghee for a higher smoke point and a slightly nuttier profile.
The Texture Crew
The wet‑dry brine is the unsung hero of texture. A mixture of kosher salt, a splash of buttermilk, and a pinch of sugar draws out moisture, then re‑absorbs it, breaking down muscle fibers so the meat stays juicy. Skipping this step is the most common mistake that leads to dry, tough chicken. If you’re dairy‑free, replace the buttermilk with a light coconut‑milk splash; the acidity still works its magic.
The Unexpected Star
A drizzle of honey right before the final oven blast adds a caramelized glaze that contrasts the savory butter. It’s the sweet whisper that makes the crust glisten like a sunrise. Omit it, and you’ll still have a great dish, but you’ll miss that glossy finish that makes the plate look restaurant‑ready. For a smoky twist, swap honey for a teaspoon of maple syrup and a dash of smoked paprika.
The Final Flourish
Fresh herbs—rosemary, thyme, and a pinch of sage—are tossed in at the end, giving the chicken an aromatic crown. Their essential oils lift the whole dish, turning a simple dinner into a sensory celebration. If you can’t find fresh herbs, dried works in a pinch, but use only a third of the amount; dried herbs are concentrated and can overwhelm the delicate balance.
Everything's prepped? Good. Let’s get into the real action, where the magic truly happens and the kitchen becomes a stage for flavor fireworks.
The Method — Step by Step
Start by creating the wet‑dry brine. In a large zip‑top bag, combine 4 cups of cold water, 2 tablespoons of kosher salt, a splash (about ¼ cup) of buttermilk, and a teaspoon of sugar. Add the 4 boneless skinless chicken breasts, seal the bag, and massage the mixture so every surface is coated. Let it sit in the refrigerator for 30 minutes. That sizzle when it hits the pan? Absolute perfection. This short brine works wonders without making the meat overly salty.
Kitchen Hack: Use a kitchen scale to weigh the chicken before brining; this ensures consistent seasoning across all pieces.While the chicken brines, preheat your oven to 375°F (190°C). In a small saucepan, melt 4 tablespoons of unsalted butter over medium heat, then add 3 minced garlic cloves and let them soften for about 45 seconds. Add a handful of fresh rosemary leaves, a few thyme sprigs, and a pinch of crushed red pepper flakes for a subtle heat. The butter should turn a light amber, and the kitchen will start smelling like a herb garden after a summer rain.
Remove the chicken from the brine and pat each piece dry with paper towels. This step is crucial; excess moisture will steam the meat instead of searing it. Lightly season both sides with freshly ground black pepper and a whisper of sea salt—remember, the brine already infused some salt, so you don’t need much.
Heat a heavy‑bottomed oven‑safe skillet (cast iron works best) over medium‑high heat. Add a tablespoon of olive oil, then place the chicken breasts in the pan, skin side down if you kept the skin. You should hear an immediate, satisfying sizzle. Let them sear undisturbed for 3‑4 minutes, until the edges start pulling away and a golden crust forms.
Watch Out: If the butter starts to brown too quickly, lower the heat. Burning butter creates a bitter flavor that can ruin the delicate balance.Once the crust is set, spoon the herb‑butter mixture over each breast, letting the aromatics bathe the meat. Add a drizzle of honey (or maple syrup for a smoky twist) around the pan edges. Transfer the entire skillet to the preheated oven. The oven’s dry heat finishes cooking the interior while the butter and honey create a caramelized glaze that glistens like a sunrise.
Kitchen Hack: If your skillet isn’t oven‑safe, transfer the chicken to a baking dish and pour the butter‑herb sauce over it. The result is the same, just a little less dramatic.Bake for 12‑15 minutes, or until an instant‑read thermometer inserted into the thickest part reads 160°F (71°C). The meat will continue to rise a few degrees while resting, reaching the safe 165°F target. While it bakes, the kitchen will be filled with the sweet scent of caramelizing honey and the earthy perfume of rosemary.
Remove the skillet from the oven and let the chicken rest on a cutting board for 5 minutes. This resting period is the 5‑minute rest that changes everything; it allows the juices to redistribute, ensuring every bite is juicy rather than watery.
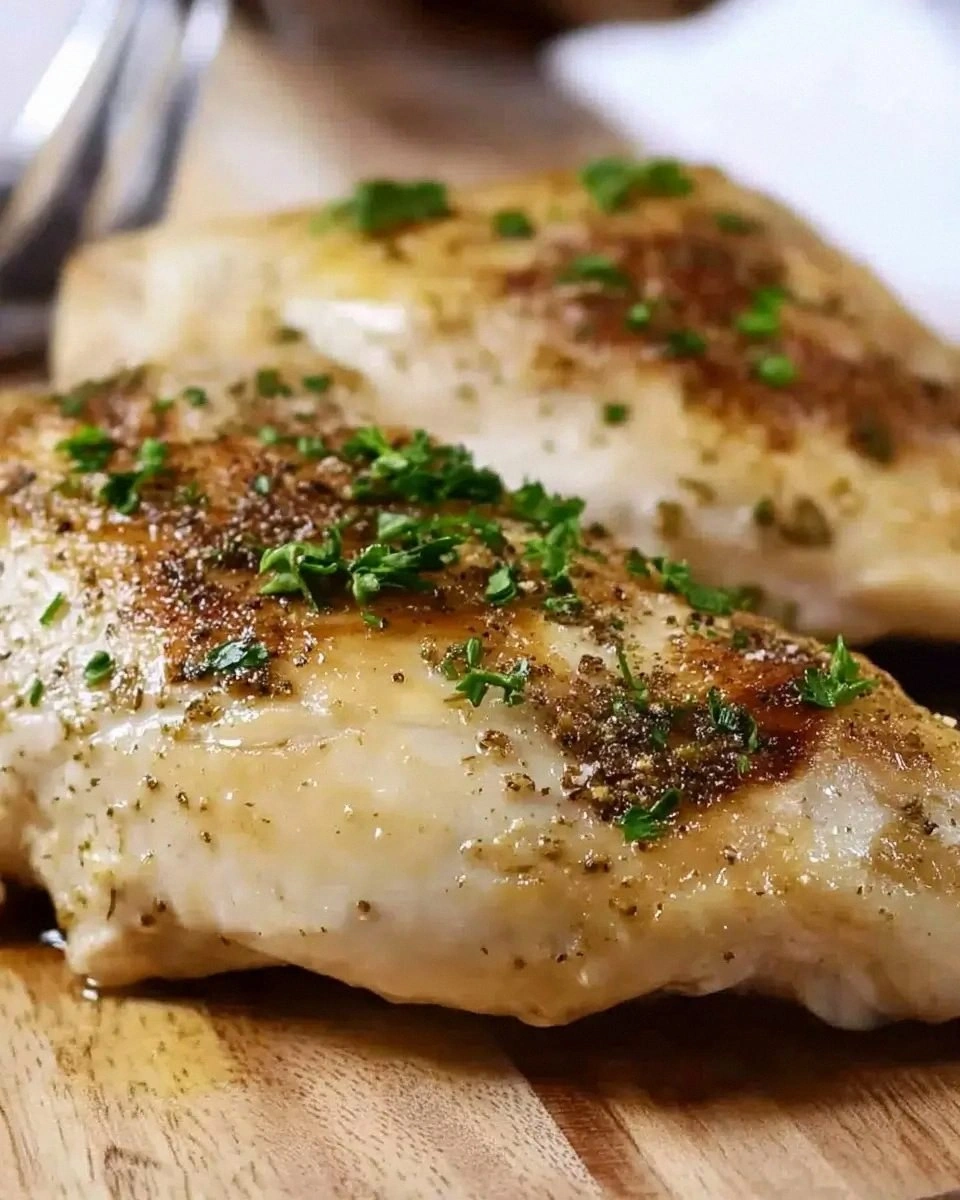
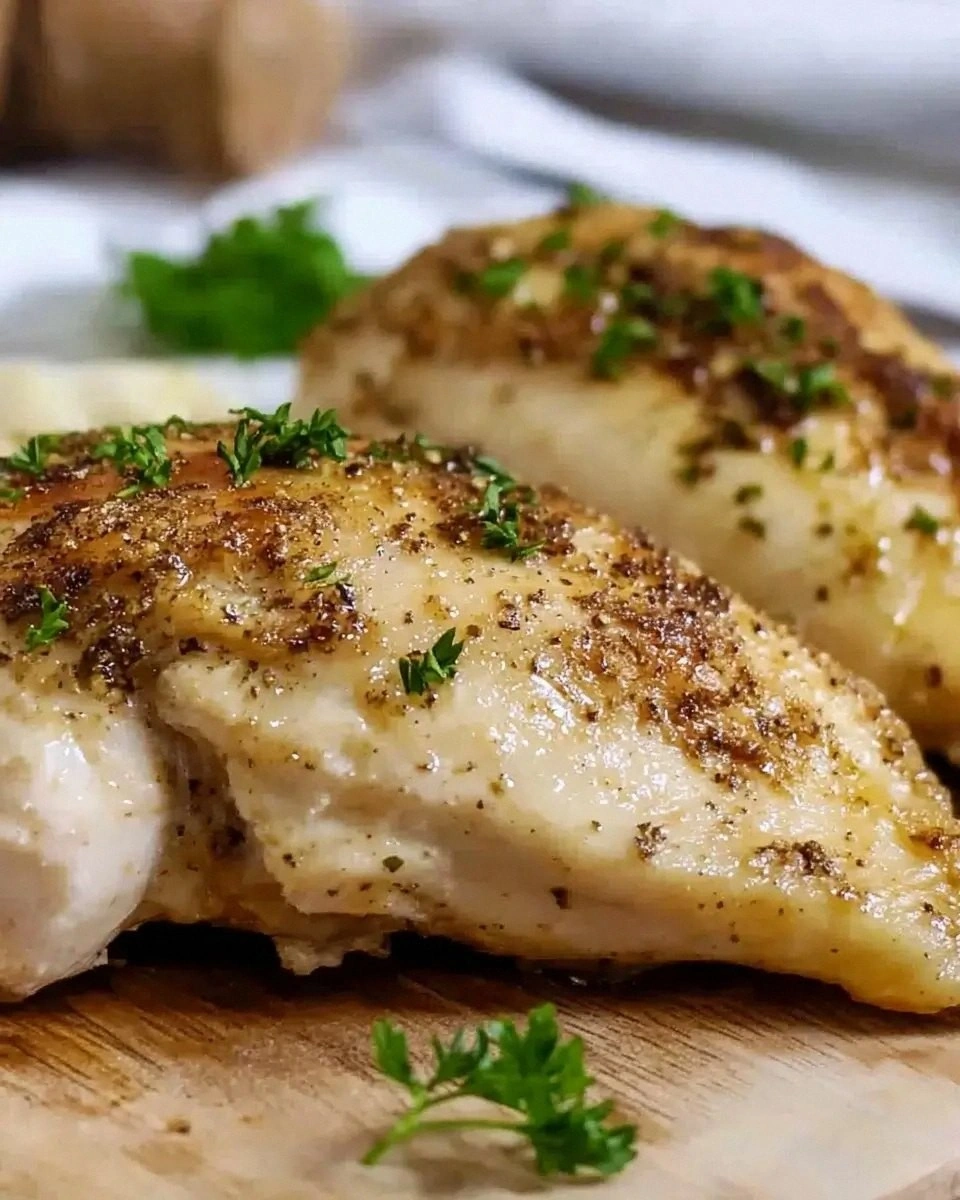
Slice the chicken against the grain, drizzle any remaining pan sauce over the top, and serve immediately. The meat should pull apart with a fork like butter melting on warm toast. Pair with roasted vegetables or a simple arugula salad, and watch as your guests’ eyes widen in awe.
That's it — you did it. But hold on, I've got a few more tricks that'll take this to another level, because the journey to perfect chicken never truly ends.
Insider Tricks for Flawless Results
The Temperature Rule Nobody Follows
Never start with a cold chicken straight from the fridge. Let the breasts sit at room temperature for 15‑20 minutes before searing. This small step evens out the internal temperature, preventing the outer layer from overcooking while the center stays cold. I once tried to skip this step; the result was a beautiful crust paired with a chilly, undercooked center that felt like biting into a winter snowball. Trust me, the extra minutes are worth the uniform pinkness that signals perfect doneness.
Why Your Nose Knows Best
Your sense of smell is a more reliable indicator than a timer when the butter starts to brown. When the butter turns a light amber and you catch that nutty, toasted scent, you know the pan is ready for the chicken. If you rely solely on the clock, you might miss that crucial window and end up with a burnt crust. So, stay close, inhale deeply, and let your nose be the sous‑chef.
The 5‑Minute Rest That Changes Everything
Resting isn’t just a suggestion; it’s a science. During the rest, the muscle fibers relax and re‑absorb the juices that were driven to the center during cooking. Skipping this step leads to a plate of dry, juice‑less chicken that looks sad on the fork. Cover the chicken loosely with foil to keep it warm while it rests, and you’ll notice the meat stays tender and moist, almost as if it never left the pan.
Butter Basting Bonanza
While the chicken is in the oven, lift the pan lid every few minutes and spoon the melted butter over the top. This continuous basting creates layers of glossy, buttery flavor that penetrate deeper than a single pour. It also helps the honey glaze caramelize evenly, giving you that picture‑perfect sheen. A friend tried skipping the basting once — the final dish was still good, but it lacked that luxurious mouthfeel that makes you want to lick the plate.
Seasoning Layers, Not a One‑Shot
Season the chicken twice: once in the brine and once right before searing. The first layer infuses the meat from within, while the second adds a surface crunch and flavor burst. This dual approach prevents the chicken from tasting flat, a common complaint with single‑seasoned dishes. If you’re feeling adventurous, finish with a pinch of flaky sea salt just before serving for an extra pop of texture.
Pan Choice Matters
A cast‑iron skillet retains heat like a furnace, giving you a consistent sear that other pans can’t match. If you don’t own cast iron, a heavy stainless‑steel skillet works, but avoid non‑stick pans; they can’t handle the high heat needed for that perfect crust. The right pan is the silent hero that turns a good recipe into a legendary one.
Creative Twists and Variations
This recipe is a playground. Here are some of my favorite ways to switch things up:
Maple‑Smoked Paprika Splash
Swap the honey for a tablespoon of pure maple syrup and add a teaspoon of smoked paprika to the butter mixture. The result is a sweet‑smoky glaze that pairs beautifully with roasted sweet potatoes. Ideal for a fall dinner when you want that cozy, campfire vibe.
Lemon‑Garlic Zest
Add the zest of one lemon and a splash of fresh lemon juice to the brine, then finish the chicken with a drizzle of lemon‑infused butter. The citrus brightens the richness, making it perfect for a spring or summer brunch alongside a light quinoa salad.
Spicy Chipotle Kick
Incorporate one minced chipotle pepper in adobo sauce into the butter mixture, and replace the honey with a teaspoon of agave nectar. This gives the dish a smoky heat that’s perfect for game night, especially when served with corn‑maize tortillas and avocado slices.
Herb‑Infused Yogurt Marinade
Instead of a wet‑dry brine, marinate the chicken in Greek yogurt mixed with minced dill, chives, and a squeeze of lemon for 2 hours. The yogurt’s acidity tenderizes the meat while adding a tangy backdrop. After searing, finish with the butter‑herb glaze for a creamy‑savory contrast.
Coconut‑Curry Fusion
Replace the butter with coconut oil, add a teaspoon of curry powder to the brine, and finish with a splash of coconut milk in the pan sauce. The dish becomes an exotic, fragrant bowl that pairs well with jasmine rice and steamed bok choy.
Storing and Bringing It Back to Life
Fridge Storage
Place cooled chicken breasts in an airtight container, pour any leftover pan sauce over them, and store in the refrigerator for up to 3 days. The sauce acts as a moisture lock, preventing the meat from drying out.
Freezer Friendly
Wrap each breast tightly in parchment paper, then seal in a freezer‑grade zip bag. They’ll keep for up to 2 months. When you’re ready to eat, thaw overnight in the fridge, then reheat using the method below for best results.
Best Reheating Method
Preheat the oven to 300°F (150°C), place the chicken on a baking sheet, and add a splash (about 2 tbsp) of water or broth to the pan. Cover loosely with foil and heat for 10‑12 minutes, or until the internal temperature reaches 165°F. The added moisture creates a gentle steam that revives the melt‑in‑your‑mouth texture without over‑cooking.