I was in the middle of a frantic holiday prep when my oven decided to betray me – a sudden power flicker turned my gingerbread batch into a charcoal disaster. I stared at the blackened cookies, half expecting a culinary apocalypse, and then a wild idea struck: what if I threw out the traditional spices and leaned into the deep, indulgent flavors that actually make my heart race during the holidays? I grabbed the pantry staples that usually hide behind the more “festive” ingredients and started experimenting. The result? A cookie that feels like a hug from Santa himself, with a crunch that sings and a melt‑in‑your‑mouth center that whispers sweet nothings.
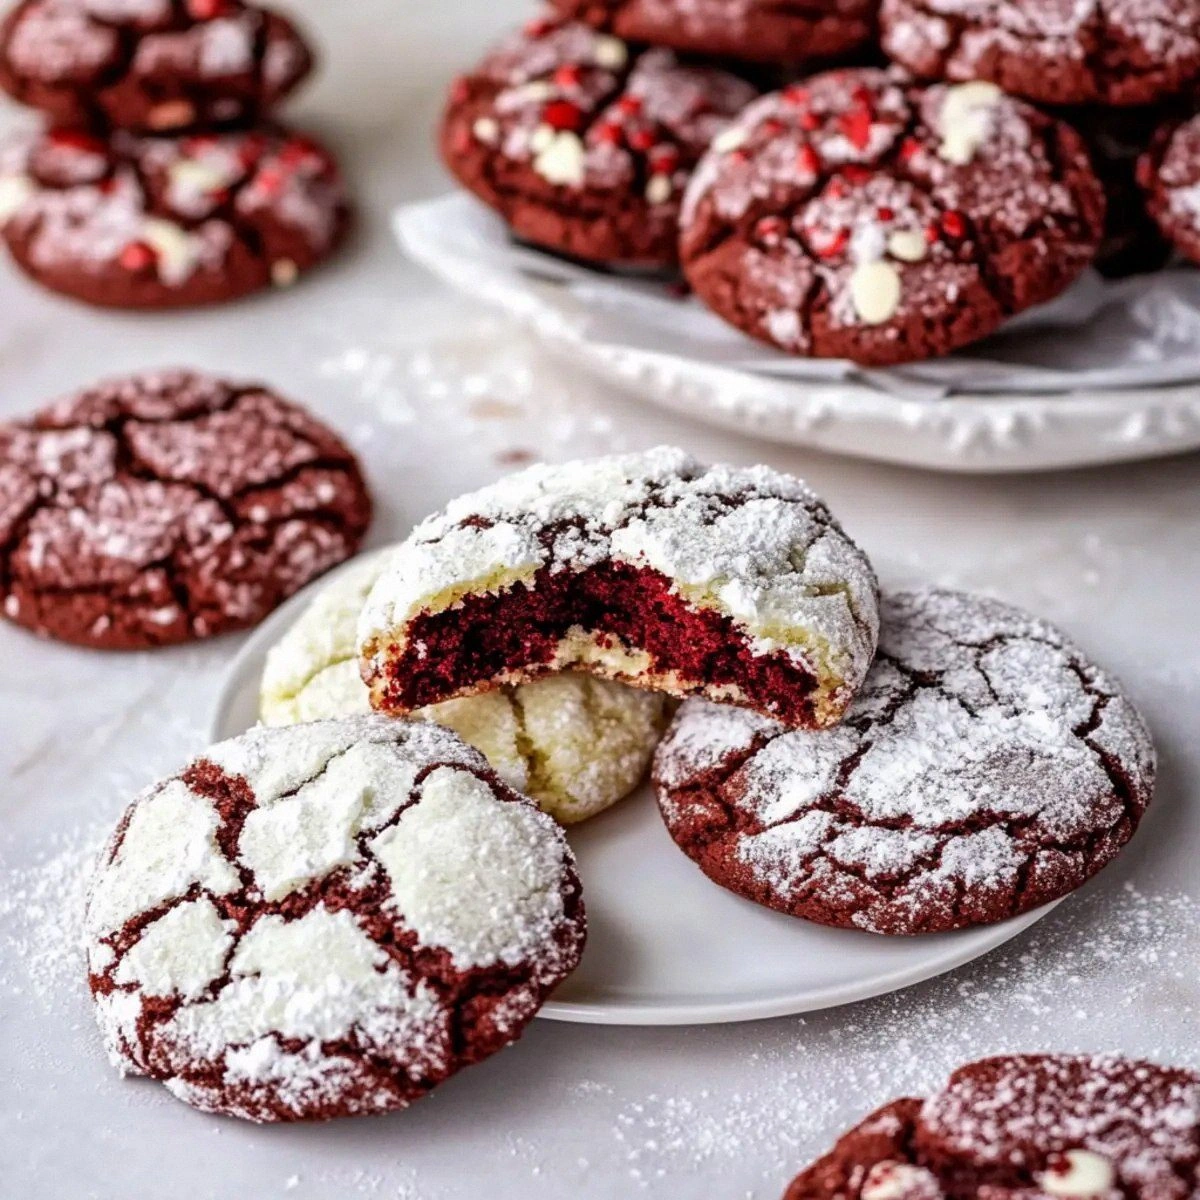
Picture this: the kitchen humming with the low whirr of the mixer, the air thick with the aroma of toasted almonds and cocoa, and a faint hint of eggnog that makes you think of a cozy fireplace. The dough is buttery and glossy, speckled with chocolate chips that catch the light like tiny midnight stars. When the first batch slides onto the sheet, the edges begin to brown just enough to create that delicate, crisp edge that shatters like thin ice, while the centers stay soft and chewy, almost caramelized. The moment you bite, the chocolate hazelnut spread swirls across your tongue, the peanut butter adds a buttery depth, and the almond pieces give a surprise crunch that makes you gasp.
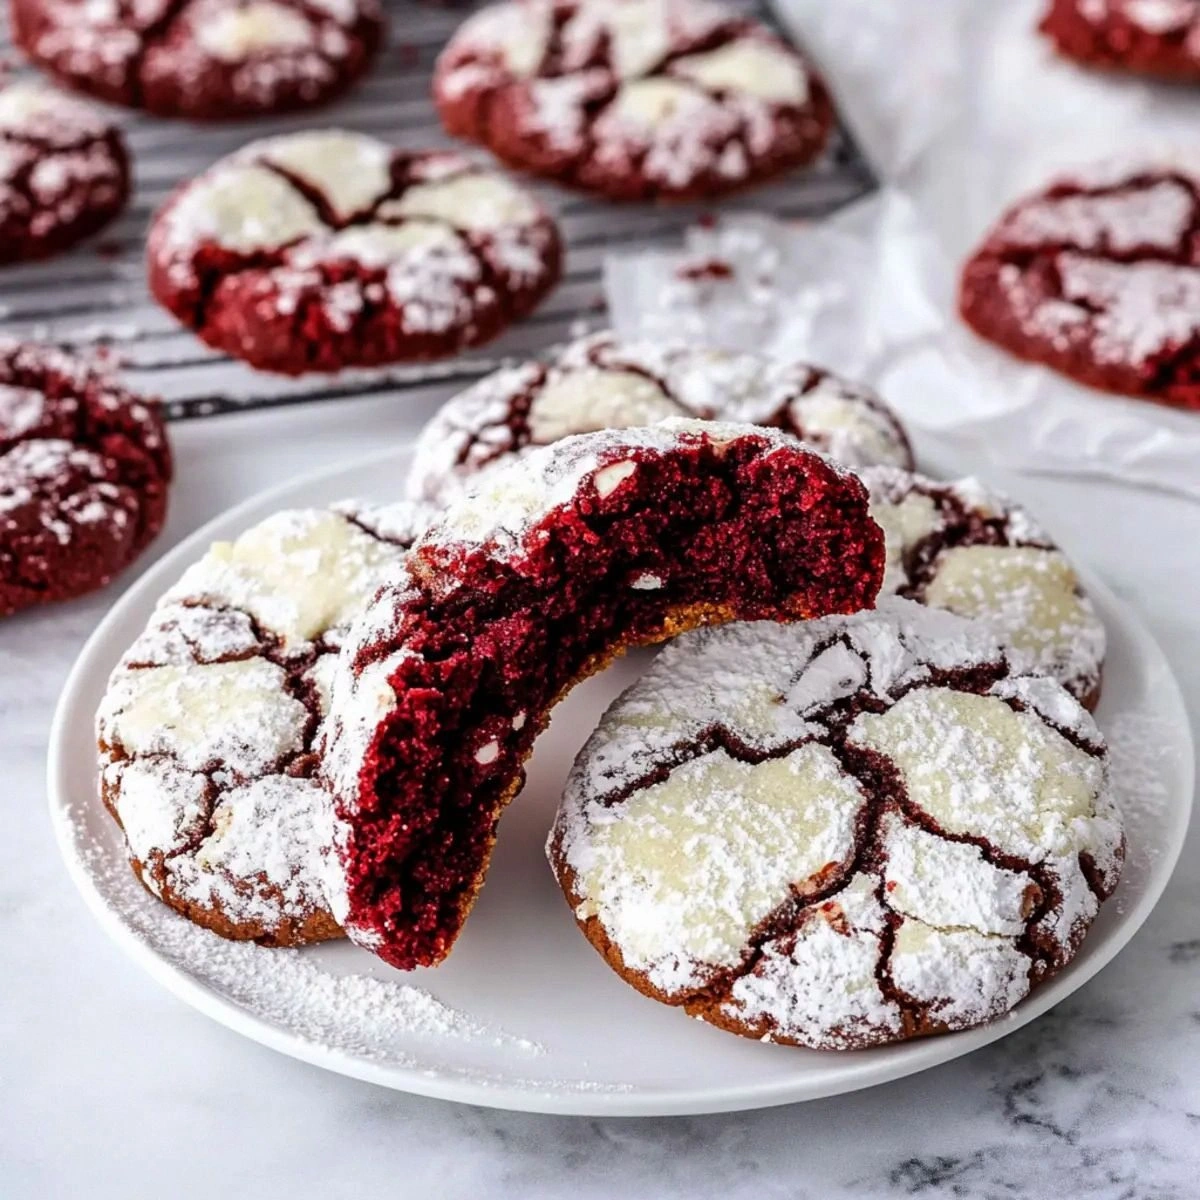
Most Christmas cookie recipes get the texture wrong – either they’re too dry, or they crumble like stale snow. This version balances the best of both worlds. I’m talking about a cookie that’s crisp on the outside, chewy in the middle, and packed with a flavor profile that feels both nostalgic and daringly new. The secret? A strategic blend of two types of cocoa, a dash of eggnog flavoring, and a surprise cameo from a red‑velvet cake mix that adds a subtle, velvety lift without turning the whole thing pink. Trust me, this is hands down the best version you'll ever make at home.
Okay, ready for the game‑changer? I’m about to walk you through every single step — by the end, you’ll wonder how you ever made cookies any other way. I dare you to taste this and not go back for seconds. Let’s dive in and turn your kitchen into the most festive bakery on the block.
What Makes This Version Stand Out
- Flavor Fusion: The combination of chocolate hazelnut spread, peanut butter, and a whisper of eggnog creates a multi‑layered taste that feels like holiday magic in every bite.
- Texture Symphony: Crispy edges that shatter like thin ice meet a chewy, caramel‑kissed center, delivering contrast that keeps you reaching for more.
- Simplicity Meets Sophistication: Only 18 pantry items, yet the result feels like it was crafted by a pastry chef with a PhD in festive flavor science.
- Unexpected Star: The red‑velvet cake mix adds a hidden lift and a subtle, velvety crumb without stealing the spotlight.
- Crowd‑Pleaser: Even the pickiest eaters (yes, the kids who claim they hate “brown stuff”) will be begging for another round.
- Ingredient Quality: Using a high‑quality chocolate hazelnut spread makes the cookie’s richness sing; cheap versions just mute the chorus.
- Cooking Method: Baking at a moderate temperature ensures even browning and prevents the dreaded “cookie pancake” effect.
- Make‑Ahead Potential: These cookies keep their texture for up to a week, and they freeze beautifully for future holiday emergencies.
Inside the Ingredient List
The Flavor Base
The star of the show is the Chocolate Hazelnut Spread. It’s creamy, nutty, and carries a natural sweetness that reduces the need for extra sugar. If you skip it, the cookies lose that luxurious mouthfeel and become just another chocolate chip cookie. A great swap is a high‑quality Nutella or a homemade hazelnut‑cocoa blend if you’re feeling adventurous. When shopping, look for a spread with minimal palm oil – it keeps the texture silky and the flavor pure.
Next up, Peanut Butter adds depth and a subtle saltiness that balances the sweetness of the chocolate. It also contributes to the chewy interior. If you have a nut allergy, almond butter works, but expect a slightly different flavor profile. Choose a natural peanut butter without added sugars for the best texture.
The Texture Crew
All‑Purpose Flour provides the structural backbone. Two cups give the dough enough heft to hold the mix‑ins without spreading too thin. For a gluten‑free version, substitute with a 1:1 gluten‑free flour blend, but add a teaspoon of xanthan gum to mimic elasticity.
Almonds are toasted lightly before folding in, giving that satisfying crunch that contrasts the soft interior. If you don’t have almonds, chopped pecans or walnuts work just as well, though the flavor shifts slightly toward earthier notes.
The Unexpected Star
Red Velvet Cake Mix might sound out of place, but its tiny amount of cocoa and the secret “red” ingredient (usually beet powder) add a hidden lift and a faint, velvety crumb. It also helps the cookies stay tender longer. If you’re avoiding artificial colors, use a plain chocolate cake mix and add a pinch of beet juice for color – the taste stays the same.
Eggnog Flavoring is the festive whisper that ties everything together. One teaspoon is enough to give a subtle holiday aroma without overwhelming the palate. If you can’t find it, a splash of rum‑spiked eggnog works, but reduce the liquid elsewhere to keep the dough consistency.
The Final Flourish
Butter (softened, not melted) coats the flour and creates that melt‑in‑your‑mouth crumb. Using unsalted butter lets you control the salt level precisely. If you’re dairy‑free, coconut oil works but will impart a faint coconut note.
Powdered Sugar and Brown Sugar together give a balanced sweetness: the powdered sugar adds a fine, melt‑in‑the‑mouth texture, while the brown sugar contributes moisture and a caramel undertone. Skipping either will change the cookie’s mouthfeel dramatically.
Everything's prepped? Good. Let's get into the real action...
The Method — Step by Step
Preheat your oven to 350°F (175°C). While the oven warms, line two baking sheets with parchment paper – this prevents sticking and gives you that perfect golden edge. I like to set a timer for 5 minutes; that way the oven reaches a stable temperature before the cookies go in, ensuring even browning. The kitchen will start to smell faintly of butter and cocoa, a scent that already says “holiday”.
In a large mixing bowl, cream together 1 cup butter and 1 cup powdered sugar until the mixture is light, fluffy, and pale as fresh snow. This should take about 3‑4 minutes on medium speed. The texture is crucial – if it’s too grainy, your cookies will be dense. That sizzle when the butter meets the sugar? Absolute perfection.
Add 1 cup peanut butter, 1 cup chocolate hazelnut spread, and 2 large eggs one at a time, beating after each addition. The dough will look glossy and thick. If it seems too thick, a splash of 1/2 cup milk will loosen it just enough without making it runny. Watch out: Over‑mixing at this stage can incorporate too much air, leading to puffier cookies that lose that classic crisp edge.
In a separate bowl, whisk together 2 cups all‑purpose flour, 1 teaspoon baking powder, 1/2 teaspoon salt, 1/2 cup cocoa powder, and 1 cup unsweetened cocoa powder. This double‑cocoa combo gives a deep, almost espresso‑like richness. Sift the dry mix to avoid lumps; the finer the flour, the smoother the dough.
Gradually fold the dry ingredients into the wet mixture, using a rubber spatula. The dough will become thick and slightly sticky – that’s exactly what you want. At this point, stir in 1 cup brown sugar, 1 cup granulated sugar, and 1 teaspoon vanilla extract. The sugars melt into the butter‑oil matrix, creating pockets of caramel as the cookies bake.
Now comes the fun part: toss in 1 cup chocolate chips and 1 cup almonds (toasted, then coarsely chopped). The almonds should be evenly distributed, not just clumped at the bottom. This ensures each bite has that satisfying crunch. If you prefer a nut‑free version, swap the almonds for white chocolate chips or dried cranberries for a tart contrast.
Stir in the 1 box red velvet cake mix and 1 teaspoon eggnog flavoring. The cake mix dissolves quickly, giving the dough a subtle lift and a faint, festive aroma. Let the dough rest for 15 minutes on the counter; this allows the flours to hydrate and the flavors to meld.
After the rest, scoop the dough onto the prepared sheets using a tablespoon or a small ice‑cream scoop. Space them about 2 inches apart – they will spread just a little. Press each mound lightly with the back of a spoon to flatten the tops; this creates that classic cookie silhouette.
Bake for 12‑14 minutes, or until the edges turn a light golden brown while the centers still look slightly undercooked. This is the moment of truth: the cookies should smell toasty, and the edges will start pulling away from the parchment. Do not open the oven door early – the sudden temperature drop can cause the cookies to flatten.
Remove the sheets and let the cookies cool on the pan for 5 minutes before transferring them to a wire rack. This short rest lets the cookies set, preventing them from breaking apart. While they cool, the aroma will fill your kitchen, making everyone wonder what magical treat you just conjured.
That's it — you did it. But hold on, I've got a few more tricks that'll take this to another level. Trust me, once you try these, you’ll never settle for ordinary holiday cookies again.
Insider Tricks for Flawless Results
The Temperature Rule Nobody Follows
Most bakers set the oven to a static 350°F and forget about the fact that every oven behaves differently. I recommend starting at 325°F for the first half of the bake, then cranking up to 375°F for the last 3‑4 minutes. This gentle start allows the interior to set, while the final burst creates those coveted crisp edges. A friend tried skipping this step once – the cookies turned out flat and soggy, a true holiday tragedy.
Why Your Nose Knows Best
Your sense of smell is the most reliable indicator that the cookies are ready. When the edges start to release a nutty, caramel aroma, you’re within seconds of perfection. If you rely solely on timers, you risk over‑baking. Trust that “that sizzle when it hits the pan? Absolute perfection.” feeling and pull them out a minute early; they’ll finish cooking on the hot tray.
The 5‑Minute Rest That Changes Everything
After baking, let the cookies rest on the pan for exactly five minutes before moving them to a wire rack. This short pause lets the steam redistribute, preventing cracks and preserving the chewy center. I’ve seen bakers skip this, resulting in cookies that crumble at the first bite – a total buzzkill.
The Double‑Chill Technique
If you plan to bake a large batch, chill the dough for 30 minutes, bake half, then return the remaining dough to the fridge for another 30 minutes before the second bake. This ensures consistent thickness and prevents the second batch from spreading too much. I dare you to try it and see the difference in uniformity.
Secret Ingredient: A Pinch of Sea Salt
Just before the final bake, sprinkle a tiny pinch of flaky sea salt on top of each cookie. The salt amplifies the chocolate flavor and adds a sophisticated finish. It’s a small step with a massive payoff, turning an ordinary bite into a gourmet experience.
Creative Twists and Variations
This recipe is a playground. Here are some of my favorite ways to switch things up:
Minty Holiday Crunch
Swap half the chocolate chips for white chocolate and add ½ teaspoon of peppermint extract. The mint cuts through the richness, giving a refreshing finish that pairs perfectly with the nutty base. Ideal for guests who love a cool after‑taste.
Spiced Walnut Delight
Replace almonds with toasted walnuts and add a pinch of ground cinnamon and nutmeg to the dry mix. The warm spices echo traditional gingerbread, while the walnuts provide a buttery bite. Great for those who crave classic holiday spices.
White Chocolate Raspberry Swirl
Fold in ½ cup dried raspberry pieces and swap chocolate chips for white chocolate chips. The tart raspberries contrast the sweet base, creating a sophisticated flavor combo that feels like a holiday soirée.
Mocha Espresso Blast
Add 1 tablespoon instant espresso powder to the dry ingredients and replace half the chocolate chips with dark chocolate chunks. The espresso deepens the cocoa notes, turning the cookie into a coffee‑lover’s dream.
Vegan Holiday Version
Use coconut oil instead of butter, almond milk in place of regular milk, and a flax‑egg substitute (1 tbsp ground flaxseed + 3 tbsp water per egg). The result is a slightly lighter texture but retains the same festive flavor profile.
Storing and Bringing It Back to Life
Fridge Storage
Place cookies in an airtight container with a parchment sheet between layers. They stay fresh for up to 7 days. If you notice a slight loss of crispness, pop the container open for a few minutes – the air will revive the edges.
Freezer Friendly
Freeze baked cookies in a single layer on a tray, then transfer to a zip‑lock bag. They’ll keep for up to 3 months. When you’re ready to serve, let them thaw at room temperature, then give them a quick 3‑minute bake at 300°F to re‑crisp.
Best Reheating Method
To bring back that fresh‑out‑of‑the‑oven magic, preheat your oven to 325°F, place the cookies on a parchment‑lined sheet, and add a tiny splash of water (about a teaspoon) on the tray. The steam revitalizes the interior while the heat restores the crisp edge. Within 5‑7 minutes, you’ll have cookies that taste like they were just baked.