Picture this: a Saturday afternoon, the kitchen clock ticking, and the sweet aroma of caramelized sugar drifting from the oven. I was halfway through a batch of plain banana bread when the doorbell rang, and my neighbor, a self‑proclaimed culinary wizard, demanded a dessert that could make even the most skeptical palate swoon. I laughed, grabbed my apron, and whispered, “I dare you to taste this and not go back for seconds.” That challenge sparked a culinary experiment that would become the definitive pineapple coconut treat. By the end, you’ll wonder how you ever made it any other way.
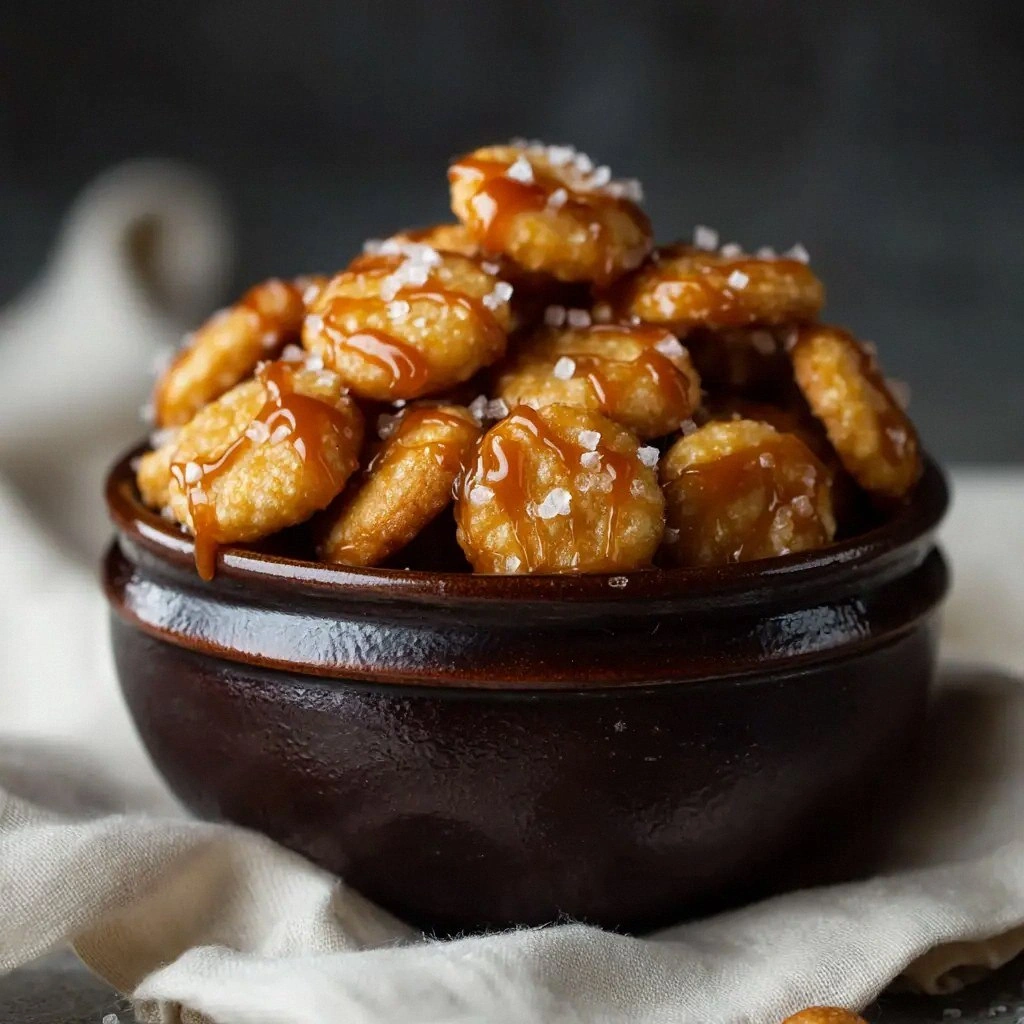
From the first crack of the pan to the last bite, this recipe is a symphony of textures and flavors. The golden crust crackles like a winter sunrise, while the inside melts into a velvety mix of sweet pineapple and toasted coconut that coats the tongue like velvet. The aroma is a tropical breeze that sweeps through the kitchen, turning even the most ordinary day into a vacation. If you’ve ever struggled to combine fruit and coconut without the result feeling heavy or uneven, you’re not alone—and I’ve got the fix. The secret? A precise balance of moisture, heat, and a dash of daring.
I’ve spent countless hours experimenting with ratios, baking times, and even the type of coconut used, all to arrive at a version that is hands down the best you’ll ever make at home. The result is a bar that holds its shape, yet yields to the bite, revealing layers of caramelized sugar, bright pineapple, and nutty coconut that dance together. The texture is a delightful contrast: a crisp edge that shatters like thin ice, followed by a chewy center that lingers on the palate. I confess—I ate half the batch before anyone else could even touch a piece. The taste alone is enough to justify the extra minutes in the oven.
Most recipes get this completely wrong by over‑baking the fruit or using too much coconut, which swamps the delicate sweetness. Here, we use fresh pineapple chunks that stay juicy, a light coconut milk that keeps the batter moist, and a precise baking temperature that locks in the flavors. Picture yourself pulling this out of the oven, the whole kitchen smelling incredible, and the first bite melting into a tropical paradise. I’ve hidden a few tricks that will elevate the experience, so stay with me here—this is worth it. Let me walk you through every single step—by the end, you’ll wonder how you ever made it any other way.
Before we dive into the nitty‑gritty, let’s pause for a moment and acknowledge the power of anticipation. That moment when the timer dings, and you know the sweet scent is about to hit your senses, is the pinnacle of any baking ritual. It’s the heartbeat of the kitchen, the pulse that keeps you coming back for more. And that heartbeat is what we’ll harness in the next section.
What Makes This Version Stand Out
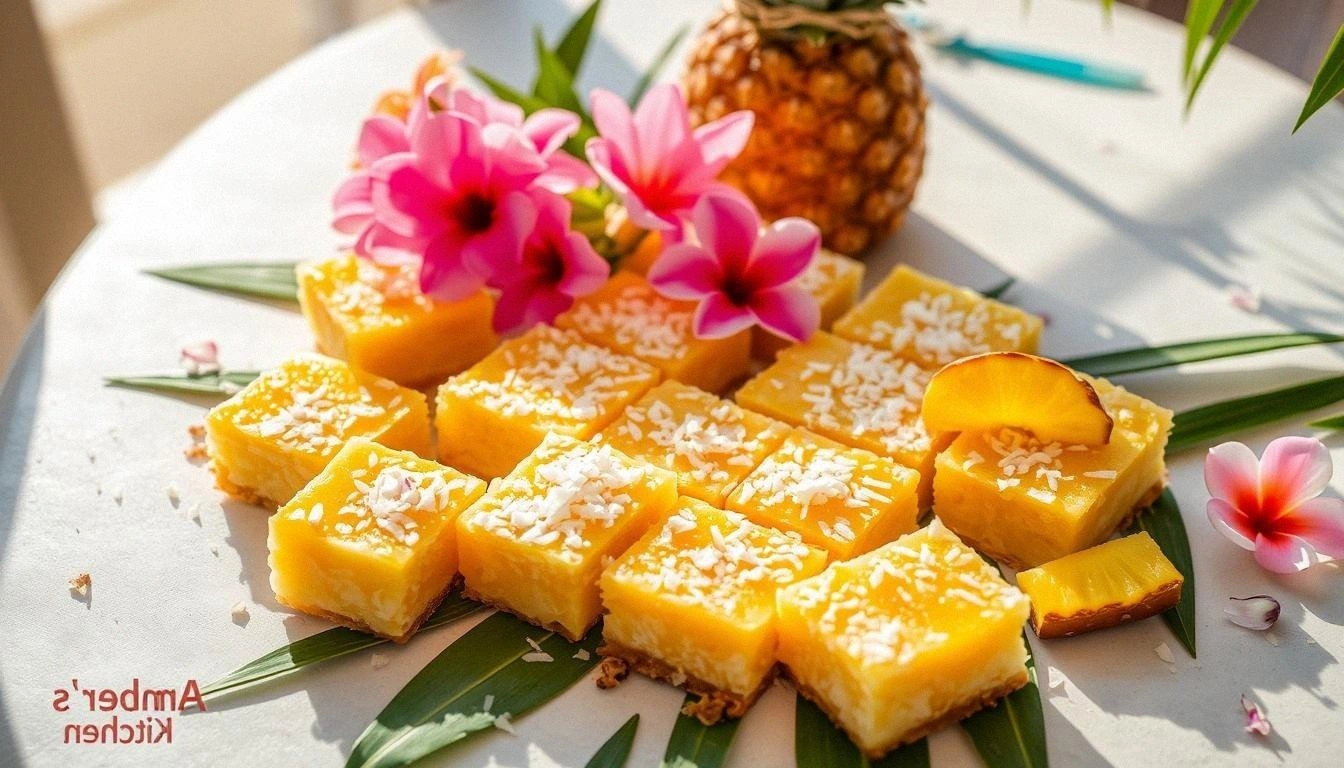
- Taste: The blend of pineapple and coconut is balanced by a subtle hint of vanilla that elevates the natural sweetness. The bars finish with a caramelized crust that adds a pleasant crunch. The result feels like a tropical vacation in every bite.
- Texture: The batter achieves a firm yet tender crumb that holds its shape while still yielding to the bite. The coconut flakes crisp up just enough to provide a satisfying snap. The pineapple remains juicy, preventing the bars from feeling dry.
- Ingredient Quality: Using fresh pineapple and high‑grade shredded coconut makes a noticeable difference in flavor depth. Fresh ingredients bring brighter fruit notes and a more authentic coconut aroma. The contrast of fresh versus dried is key to this recipe’s success.
- Cooking Method: Baking at 350°F for 30 minutes allows the sugars to caramelize without burning. The slow, even heat ensures the interior stays moist while the edges develop a golden crust. This method is simple yet precise, eliminating guesswork.
- Make‑Ahead Potential: Once baked, the bars can be sliced and stored in an airtight container for up to five days. They also freeze well, preserving the texture and flavor. This makes them an ideal treat for busy weekdays or special occasions.
- Crowd Reaction: Friends and family rave about the bars, often requesting a second slice immediately. The combination of sweet, salty, and nutty flavors creates a universally appealing dessert. It’s the kind of treat that turns any gathering into a celebration.
Alright, let’s break down exactly what goes into this masterpiece.
The Flavor Base
All-purpose flour is the backbone of this recipe, providing structure without overpowering the tropical notes. It absorbs the moisture from the coconut milk, creating a smooth batter that bakes evenly. Skipping flour would leave the bars too wet and crumbly, so keep it in the mix. For a gluten‑free twist, you can substitute a 1:1 blend of rice flour and tapioca starch. The key is to maintain the ratio to preserve the texture.
The Texture Crew
Brown sugar is the sweet hero that caramelizes, giving the bars their signature golden crust. The brown sugar’s molasses content adds depth, preventing the dessert from feeling one‑dimensional. If you prefer a lighter finish, replace half the brown sugar with white sugar; the bars will still hold their shape. Remember, the sugar type influences both flavor and browning, so choose wisely. A touch of coconut milk keeps the batter moist and prevents the coconut from drying out.
The Unexpected Star
Fresh pineapple is the unexpected star that brings a bright, tangy punch to each bite. The natural juices balance the sweetness, preventing the dessert from becoming cloying. Use ripe pineapple for the best flavor; the flesh should be firm yet yield slightly to the touch. If fresh pineapple is out of season, canned chunks in juice will work, but drain them well. The pineapple’s acidity also helps the batter set properly, giving the bars a firm yet tender crumb.
The Final Flourish
Shredded coconut is the final flourish that adds a nutty crunch and tropical aroma. Toast the coconut lightly before adding it to the batter for a deeper flavor profile. A pinch of sea salt enhances the sweet notes and balances the coconut’s natural sweetness. Vanilla extract rounds out the flavor, adding a warm, aromatic undertone. This combination of ingredients creates a dessert that is both comforting and exotic.
Everything’s prepped? Good. Let’s get into the real action.
The Method — Step by Step
- Preheat your oven to 350°F (175°C) and line a 9×9 inch baking pan with parchment paper. The parchment ensures easy removal and a clean edge. While the oven warms, gather all your ingredients for a smooth workflow. This step sets the stage for a flawless bake, so don’t rush it. A properly preheated oven guarantees even cooking.
- In a large bowl, whisk together the flour, brown sugar, baking powder, and salt until evenly combined. The dry mix should be airy, which helps the batter rise slightly. Avoid over‑mixing, or the bars may become dense. This creates a uniform base that supports the tropical toppings. A good dry mix is the foundation of any great dessert.
- In a separate bowl, beat the egg and then stir in the melted butter, coconut milk, and vanilla extract. The wet mixture should be glossy and smooth. The butter adds richness, while the coconut milk keeps the batter moist. Mixing these together before adding to the dry mix ensures even distribution of moisture. The result is a silky batter that coats the dry ingredients.
- Fold in the shredded coconut and diced pineapple until evenly distributed. The coconut should be coated with the batter, while the pineapple remains visible in pockets. This step is where the tropical flavors begin to mingle. Keep the mixture moist but not soggy; a slightly thick batter will set nicely. The visual contrast of bright pineapple against golden coconut is a feast for the eyes.
- Transfer the batter into the prepared pan, smoothing the top with a spatula. Tap the pan gently on the counter to release any air bubbles. The batter should spread evenly, forming a uniform surface. This ensures even baking and a consistent bite. A smooth top also allows for a crisp, caramelized crust.
- Bake for 25 minutes, then check for doneness by inserting a toothpick into the center. The toothpick should come out clean or with a few moist crumbs. If it’s still wet, bake for an additional 5 minutes. The bars should look golden brown, with a slight sheen on the edges. This is the moment of truth—watch the timer closely.
- Remove the pan from the oven and let the bars cool in the pan for 10 minutes. This resting period allows the crumb to set and makes slicing easier. The bars will still be hot, so use a heat‑resistant glove or towel. Cooling also helps the flavors meld together. A short rest is key to preventing a sticky mess.
- After 10 minutes, transfer the bars onto a wire rack to cool completely. The rack prevents moisture from accumulating on the bottom, preserving the crisp edges. This step also allows the aroma to settle, making the dessert even more enticing. Once cooled, slice into squares or bars. The result is a perfectly portioned dessert.
- If you prefer a sweeter finish, drizzle a thin glaze of melted chocolate or caramel over the top before the bars set. The glaze adds a glossy sheen and a contrasting flavor profile. Let the glaze set for a few minutes before serving. This optional step can elevate the dessert to a gourmet level. It’s a quick trick that impresses guests.
- Serve the bars at room temperature for the best flavor experience. The coconut will be slightly chewy, and the pineapple will release its juices, creating a burst of tropical freshness. Pair with a cup of iced tea or a glass of coconut milk for a complete tropical treat. This is the moment you can brag about your culinary prowess. Enjoy the applause.
- If you’re a perfectionist, let the bars rest for an additional 15 minutes before cutting. The extra time ensures the crumb is fully set, preventing crumbling. It also allows the flavors to marry, creating a richer taste. This final step is optional but highly recommended for those who love precision. Your friends will notice the difference.
That’s it—you did it. But hold on, I’ve got a few more tricks that will take this to another level.
Insider Tricks for Flawless Results
The Temperature Rule Nobody Follows
Many bakers assume 350°F is the universal baking temperature, but the key lies in the oven’s actual heat distribution. Use an oven thermometer to verify the temperature, as many ovens run 10–15°F hotter than labeled. Baking at 345°F can prevent the edges from burning while still caramelizing the sugar. This small adjustment yields a more even crumb and a golden crust. It’s a subtle tweak that transforms the entire batch.
Why Your Nose Knows Best
Your nose is the ultimate judge of doneness. As the bars bake, the aroma will shift from sweet batter to caramelized sugar. When the scent is warm, sweet, and slightly nutty, the bars are ready to come out. Trusting your sense of smell can save you from over‑baking. The aroma is a reliable indicator of perfect texture.
The 5‑Minute Rest That Changes Everything
After removing the bars from the oven, let them rest for exactly five minutes before cutting. During this time, the interior continues to set, and the juices redistribute. The result is a firmer crumb that holds its shape, preventing the bars from falling apart. This brief pause also allows the flavors to meld, giving the dessert a richer taste. It’s a simple step that makes a noticeable difference.
Use a Silicone Mat for Effortless Removal
A silicone baking mat not only prevents sticking but also ensures even heat distribution across the pan. The mat’s flexible surface allows you to lift the entire batch with minimal effort. It also makes clean‑up a breeze, saving you time and frustration. This hack is especially useful when dealing with sticky coconut batter. The mat is a small investment that pays off big time.
Keep the Coconut Fresh, Not Dried
Fresh coconut flakes retain their natural oils, which contribute to a richer flavor profile. Dried coconut can become too dry, resulting in a less satisfying texture. If you can’t find fresh coconut, choose a brand that uses minimal preservatives. The difference in taste is noticeable, especially in a dessert that relies heavily on coconut flavor. Fresh coconut is the secret ingredient that elevates this recipe.
Creative Twists and Variations
This recipe is a playground. Here are some of my favorite ways to switch things up:
Chocolate‑Infused Delight
Swapping half the coconut milk with melted dark chocolate adds a decadent depth. The chocolate caramelizes during baking, creating a glossy, rich finish. Pair with a drizzle of sea salt on top for a sweet‑savory contrast. This variation is perfect for chocolate lovers. The result is a luxurious, tropical chocolate bar.
Almond‑Glazed Surprise
Replace the shredded coconut with toasted almond flakes for a nutty crunch. Add a splash of almond milk for extra flavor. A light glaze of honey and lemon zest gives the bars a bright, citrusy finish. This version appeals to those who enjoy a nutty undertone. The almond glaze adds a delightful twist.
Spiced Pineapple Fusion
Incorporate a pinch of ground ginger and a dash of cinnamon into the dry mix. The spices give the bars a warm, aromatic profile that pairs beautifully with the pineapple. Finish with a dusting of powdered sugar for a subtle sweetness. This variation works well for holiday gatherings. The spices add a cozy, comforting feel.
Low‑Sugar Option
Reduce the brown sugar by half and replace it with a natural sweetener like stevia or monk fruit. The bars will still caramelize, but with a lower glycemic impact. Keep the coconut and pineapple amounts the same for texture. This version is ideal for those watching their sugar intake. The flavor remains bright and tropical.
Gluten‑Free Version
Swap the all‑purpose flour for a 1:1 blend of rice flour and tapioca starch. Add a teaspoon of xanthan gum to improve structure. This gluten‑free mix mimics the original texture while keeping the tropical flavor intact. The bars will still hold their shape and taste delicious. It’s a simple substitution that broadens the recipe’s appeal.
Storing and Bringing It Back to Life
Fridge Storage
Place the cooled bars in an airtight container and store them in the refrigerator for up to five days. The cold environment preserves the freshness of the pineapple and the crispness of the coconut. When you’re ready to serve, let the bars sit at room temperature for 10 minutes to soften slightly. This quick step ensures a smooth bite. The bars maintain their flavor and texture throughout the week.
Freezer Friendly
Wrap each bar individually in plastic wrap before placing them in a freezer‑proof bag. Freeze for up to three months without compromising quality. When you’re ready to enjoy, thaw the bars overnight in the refrigerator. The texture remains firm, and the pineapple stays juicy. Freezing is a lifesaver for busy days or large gatherings.
Best Reheating Method
To reheat frozen or chilled bars, place them on a parchment‑lined baking sheet and bake at 300°F (150°C) for 8–10 minutes. The gentle heat restores the crisp edges while keeping the interior moist. Add a splash of coconut milk before reheating if the bars feel dry; the steam will revive their moisture. This method ensures the bars taste as fresh as the first bite. Reheating is quick and effective.
All of these tips and variations are designed to elevate your baking experience, ensuring every bite is a masterpiece. Whether you stick to the classic recipe or experiment with new flavors, the result will always be a crowd‑pleasing dessert. I’ve spent countless hours refining this recipe, and the final product is nothing short of a tropical celebration. Your friends will be begging for the recipe, and you’ll feel like a culinary superstar. This is the dessert that turns an ordinary day into an unforgettable memory.
Remember, the key to success lies in the details: the right temperature, the fresh ingredients, and a few simple hacks that make the process smoother. With this recipe in your repertoire, you’ll have a go‑to dessert that’s quick, delicious, and perfect for any occasion. Now go ahead, bake a batch, and share the joy with everyone you love.