Picture this: I’m in my kitchen, a half‑finished batch of chickpea patties sitting on the counter, the air thick with the scent of cumin and coriander. I’m halfway through the day, a craving for something hearty and wholesome gnawing at me, when the timer on the microwave goes off and the patties start to steam in their own juices. I reach for the skillet, hoping the sizzling will be enough to save the batch, but the edges are soggy, the mixture clumps like a bad glue. I’ve been there—my previous attempts at chickpea patties ended in a mushy disaster that tasted like a plant‑based attempt at a meatloaf. I swear on my last attempt, I had to rescue the batch with a handful of extra flour, and even then the result was a sad, flat pancake.
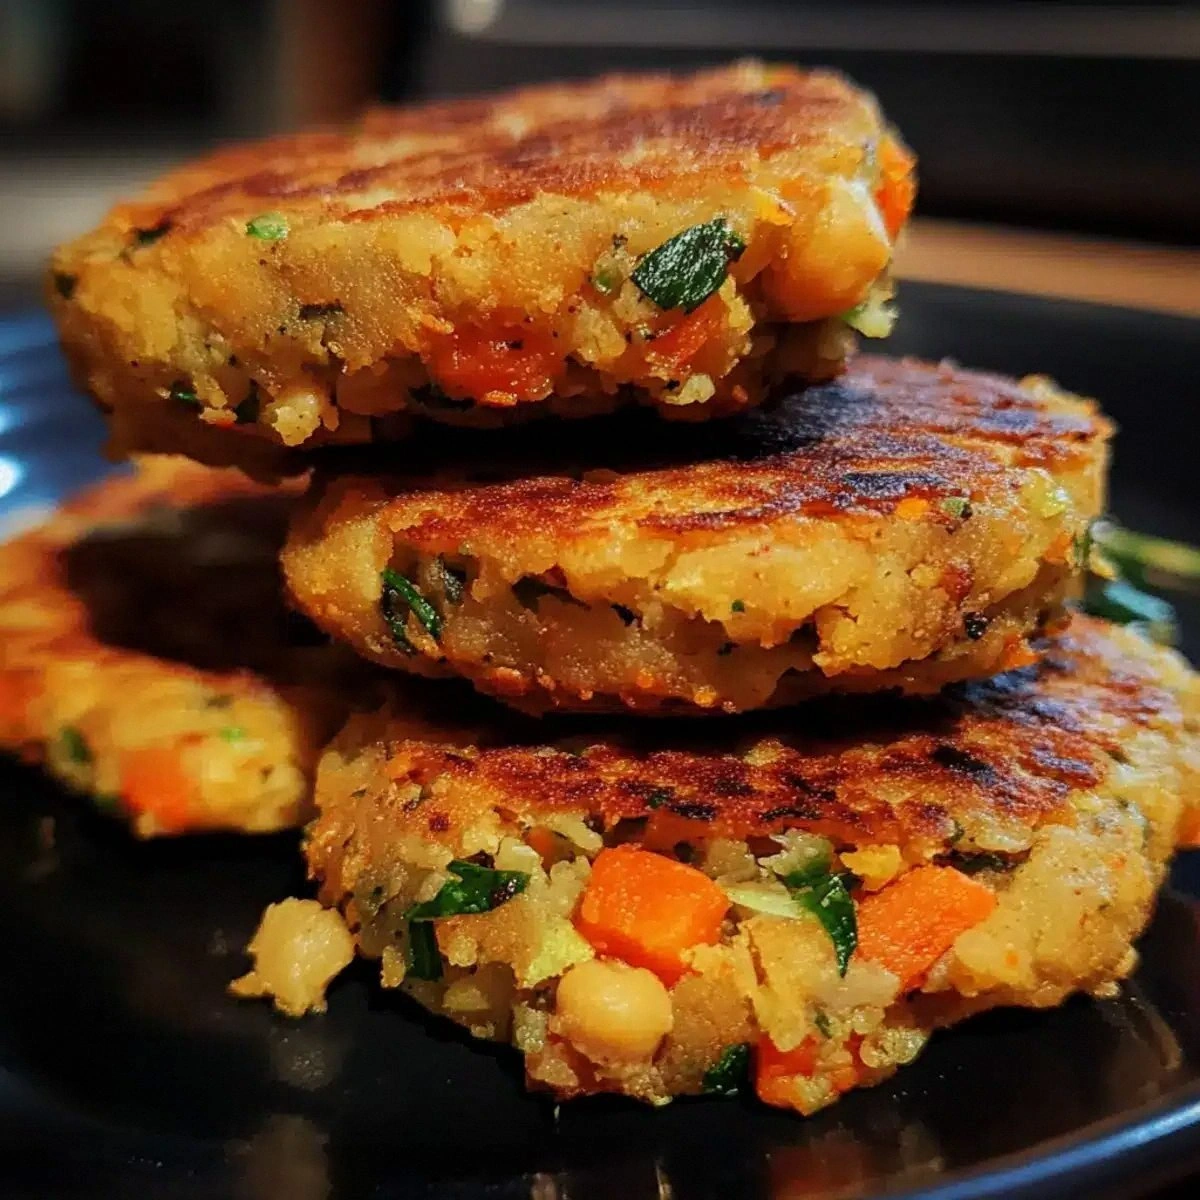
The moment I finally cracked open the can of chickpeas, the kitchen filled with a nutty aroma that promised something more than a bland side dish. The bright green of fresh parsley and cilantro made my eyes water, and the grated carrot added a subtle sweetness that tingled on the tongue. When the skillet hit the stove, the sound of oil hitting the pan was a satisfying hiss, and the first patty browned into a golden crust that crackled like a tiny fireworks display. I could taste the subtle heat from the red pepper flakes, a hint of citrus from the lemon zest, and a savory depth from the cumin that made my taste buds dance. The texture was a contrast: a crisp exterior, a moist, flavorful interior that fell apart in your mouth like a cloud of herbs and veggies.
This version of the chickpea veggie patties is a game‑changer, and I’m not just saying that because it tastes like a plant‑based version of a classic burger. What makes it stand out is the balance of herbs that infuse the mixture, the subtle crunch from the grated carrot, and the silky sauce that coats each patty like velvet. It’s a recipe that feels like a hug in a bowl—comforting yet adventurous, and it’s so versatile that you can serve it as an appetizer, a main course, or a side. I dare you to taste this and not go back for seconds; it’s that addictive. The secret? A splash of lemon zest that brightens the whole dish and a generous amount of chickpea flour that locks everything together.
If you’re reading this, you’re probably thinking you’ve tried chickpea patties before, but I’ll be honest—most recipes get this completely wrong. They either over‑bake, under‑season, or forget the crucial step of adding the flour to bind. That’s why I’m about to walk you through every single step of this recipe. By the end, you’ll wonder how you ever made it any other way, and you’ll be armed with the knowledge to create a patty that’s crispy on the outside, tender on the inside, and bursting with fresh herb flavors.
What Makes This Version Stand Out
- Flavor: The combination of parsley, cilantro, and lemon zest creates a bright, herbaceous profile that cuts through the earthiness of chickpeas, giving each bite a lively kick. The cumin and coriander add depth and a warm, smoky undertone that feels comforting yet sophisticated.
- Texture: The grated carrot and chopped spinach introduce a subtle crunch and moisture, while the chickpea flour locks everything together into a cohesive patty that holds up in the pan.
- Ease: No pre‑cooking or complicated steps—just mash, mix, form, and fry. You can have these patties on the table in under 45 minutes, making them a perfect quick dinner or snack.
- Nutrition: Packed with plant protein, fiber, and micronutrients, these patties are a wholesome option that satisfies hunger without compromising on flavor.
- Versatility: Serve them on a bun with your favorite toppings, plate them with a side of roasted veggies, or crumble them over a salad. The recipe is a playground for creativity.
- Make‑Ahead: Prepare the mixture ahead of time, refrigerate, and simply form the patties when you’re ready to cook. It’s a perfect prep‑and‑cook strategy for busy evenings.
- Crowd‑Pleaser: Whether you’re feeding a family, a group of friends, or a potluck crowd, these patties are guaranteed to be a hit. Their bright colors and fresh flavors make them Instagram‑worthy.
Inside the Ingredient List
The Flavor Base
At the heart of these patties is a blend of herbs that transforms simple chickpeas into a flavor explosion. Fresh parsley and cilantro bring a green, peppery note that brightens the dish, while cumin and coriander add a subtle earthiness that balances the herbs. The lemon zest is the secret weapon—it adds a citrusy lift that cuts through the richness of the olive oil and chickpea flour, keeping the patties from feeling heavy.
If you can’t find fresh cilantro, a teaspoon of dried cilantro works as a decent substitute, though the flavor will be less vibrant. For those who love a bit of heat, a pinch of cayenne pepper can replace the red pepper flakes, but keep in mind that it will give the patties a more pronounced bite.
The Texture Crew
Grated carrot and chopped spinach (or kale) are the unsung heroes of the texture. The carrot adds a subtle sweetness and a crunchy bite that contrasts beautifully with the soft chickpeas. The leafy greens introduce moisture and a burst of green that keeps the patties from drying out during cooking.
If you’re allergic to gluten, you can replace chickpea flour with a gluten‑free all‑purpose blend. For a nutty flavor, try adding a tablespoon of ground almonds or walnuts to the mix—just be sure to pulse them finely so they don’t interfere with the binding.
The Unexpected Star
The two cloves of minced garlic might seem like a standard seasoning, but they’re essential for depth. Garlic’s pungency cuts through the mildness of chickpeas, giving the patties a robust base note that lingers on the palate. If you’re a garlic lover, feel free to double the amount—just be prepared for a bold, unmistakable aroma.
For a subtle twist, try adding a teaspoon of smoked paprika. It’ll give the patties a smoky undertone that pairs well with the cumin and coriander, creating a more complex flavor profile.
The Final Flourish
Chickpea flour is the binding agent that turns the mixture into a cohesive patty. It absorbs the moisture from the onions, carrots, and greens, and when heated, it forms a firm crust that holds everything together. If you don’t have chickpea flour on hand, a tablespoon of cornstarch or arrowroot powder can be an adequate substitute.
Olive oil does more than just add richness—it helps the patties brown evenly and creates a crispy exterior. Use a good quality extra‑virgin olive oil for the best flavor, but any neutral oil will work if you’re short on time.
Everything’s prepped? Good. Let’s get into the real action.
The Method — Step by Step
- Drain the two cans of chickpeas and rinse them under cold water to remove excess sodium. Place the chickpeas in a large bowl and mash them with a fork or potato masher until they’re mostly broken down but still have some texture. The goal is a chunky consistency that will help the patties hold together. While you’re mashing, you can reserve a tablespoon of the chickpea liquid for later if the mixture feels too dry.
- Add the minced onion, minced garlic, grated carrot, chopped spinach or kale, parsley, cilantro, cumin, coriander, salt, pepper, red pepper flakes, and lemon zest to the mashed chickpeas. Mix everything together until the herbs are evenly distributed. At this point, the mixture should look like a thick, green‑speckled paste with bits of carrot and onion. This is the moment of truth—if you’re not satisfied with the aroma, give it a quick taste and adjust the seasoning.
- Stir in the chickpea flour and olive oil. The flour will absorb moisture and help bind the patties. If the mixture feels too dry, add a splash of the reserved chickpea liquid or a tablespoon of water until it holds together when pressed. The texture should be firm enough to shape but still slightly moist.
- Divide the mixture into 8 equal portions and shape each into a patty about 1/2 inch thick. If the mixture is sticky, wet your hands with a little water to prevent sticking. The patties should be about 3 inches in diameter—just big enough to hold a bite of each.
- Heat a non‑stick skillet over medium heat and add a splash of olive oil. Once the oil shimmers, place the patties in the skillet, leaving a little space between each. Cook for 3–4 minutes on each side, or until they develop a golden crust. The edges should pull away from the pan and the center should feel firm. Remember to keep the heat moderate—too high and the outside will burn before the inside cooks.
- Flip the patties gently with a spatula and cook for an additional 3–4 minutes, or until the second side is also golden brown. The patties should be crisp on the outside and juicy on the inside. While cooking, you’ll notice a wonderful aroma of toasted herbs that will fill your kitchen.
- Once the patties are cooked, transfer them to a plate lined with paper towels to drain any excess oil. Let them rest for a minute or two before serving. Resting allows the juices to redistribute, ensuring each bite is moist and flavorful.
- Serve immediately with your choice of accompaniments—tahini sauce, a fresh salad, or a slice of crusty bread. If you’re feeling adventurous, top each patty with a dollop of Greek yogurt or a drizzle of tahini for an extra layer of creaminess.
That’s it — you did it. But hold on, I’ve got a few more tricks that will take this to another level.
Insider Tricks for Flawless Results
The Temperature Rule Nobody Follows
Cooking at the right temperature is crucial. If the skillet is too hot, the patties will burn on the outside while remaining raw inside. I recommend setting the heat to medium and letting the skillet preheat for a minute before adding the oil. A quick test is to sprinkle a tiny drop of water on the pan; if it sizzles and evaporates immediately, the heat is just right.
Why Your Nose Knows Best
You don’t need to taste every step. Your nose is a reliable guide—when the mixture starts to smell slightly toasty and the herbs become fragrant, it’s a sign the flavor is developing properly. If the mixture smells flat, add a pinch of salt or a dash of lemon zest to brighten it up.
The 5-Minute Rest That Changes Everything
After the patties finish cooking, let them rest for five minutes on a wire rack. This step allows the juices to redistribute, preventing the patties from becoming soggy when you bite into them. I’ve seen people skip this step, and the result is a flat, unappetizing patty that feels like a pancake.
Keep the Oil in Check
Using too much oil can make the patties greasy. Measure out exactly two tablespoons of olive oil and let it warm in the pan before adding the patties. If you find the oil is still too thick after cooking, drizzle a little water over the patties to help them crisp up.
The Freshness Factor
Fresh herbs are key to this recipe’s success. If you’re in a pinch, use frozen spinach instead of fresh, but make sure to squeeze out all excess moisture. The difference in flavor is subtle but noticeable—fresh herbs give the patties a bright, vibrant taste that frozen greens can’t replicate.
Creative Twists and Variations
This recipe is a playground. Here are some of my favorite ways to switch things up:
Spicy Korean Fusion
Swap the cumin and coriander for a tablespoon of gochujang and add a handful of kimchi to the mix. Top the patties with a drizzle of sesame oil and sprinkle sesame seeds on top. The result is a fiery, umami‑rich patty that pairs beautifully with a simple cucumber salad.
Mediterranean Delight
Replace the spinach with chopped sun‑dried tomatoes and add a tablespoon of feta cheese to the mixture. Serve the patties on a bed of quinoa and drizzle with a lemon‑yogurt sauce. This version has a tangy, salty profile that feels like a Mediterranean street‑food snack.
Mexican Street Tacos
Season the mixture with cumin, coriander, and a pinch of chipotle powder. Serve the patties in warm corn tortillas with diced avocado, salsa, and a squeeze of lime. The result is a hearty taco that’s both vegetarian and incredibly satisfying.
Indian Curry Twist
Add a tablespoon of garam masala and a splash of coconut milk to the mixture. Cook the patties as usual, then serve them over a bed of basmati rice and garnish with fresh cilantro. The coconut milk adds a creamy, tropical note that complements the spices.
Breakfast Power Bowl
Slice the cooked patties thin and sauté them with a beaten egg and a handful of sautéed spinach. Serve the mixture over a bed of roasted sweet potato cubes. This breakfast version is protein‑packed and perfect for a quick, energizing start to the day.
Storing and Bringing It Back to Life
Fridge Storage
Store the cooked patties in an airtight container in the refrigerator for up to 3 days. Keep them on a paper towel to absorb excess moisture, preventing them from becoming soggy. When ready to eat, reheat them in a skillet over medium heat for a few minutes until warm and crisp.
Freezer Friendly
Uncooked patties can be frozen for up to 3 months. Place them on a parchment‑lined tray and freeze until solid, then transfer to a zip‑lock bag. When you’re ready to cook, heat them directly from the freezer; they’ll need about 2 minutes per side in a hot skillet.
Best Reheating Method
The key to reheating is to avoid steaming them. Use a skillet over medium heat and add a splash of olive oil. If the patties feel dry, add a tiny splash of water to create steam, then cover the pan for a minute to re‑hydrate them. This trick brings the patties back to their original texture and flavor.