I remember the night I tried to impress my roommate with a batch of blondies that were supposed to be the pinnacle of buttery, caramelized bliss. I whisked up the batter, poured it into the pan, and then—without a second glance—tossed the entire thing into a preheated oven that had been left on for hours. The result was a flat, greasy slab that looked more like a burnt cookie than a sweet treat. I was ready to toss it into the trash, but the aroma that filled the kitchen was a siren call I couldn't resist. That single moment of culinary disaster became the spark that ignited my obsession with brown butter, caramelized sugar, and the unmistakable crunch of Biscoff cookies. Now, after countless experiments, I’ve distilled the ultimate version of this indulgent dessert into a recipe that’s so irresistible it’ll make you question every other blondie you’ve ever made.
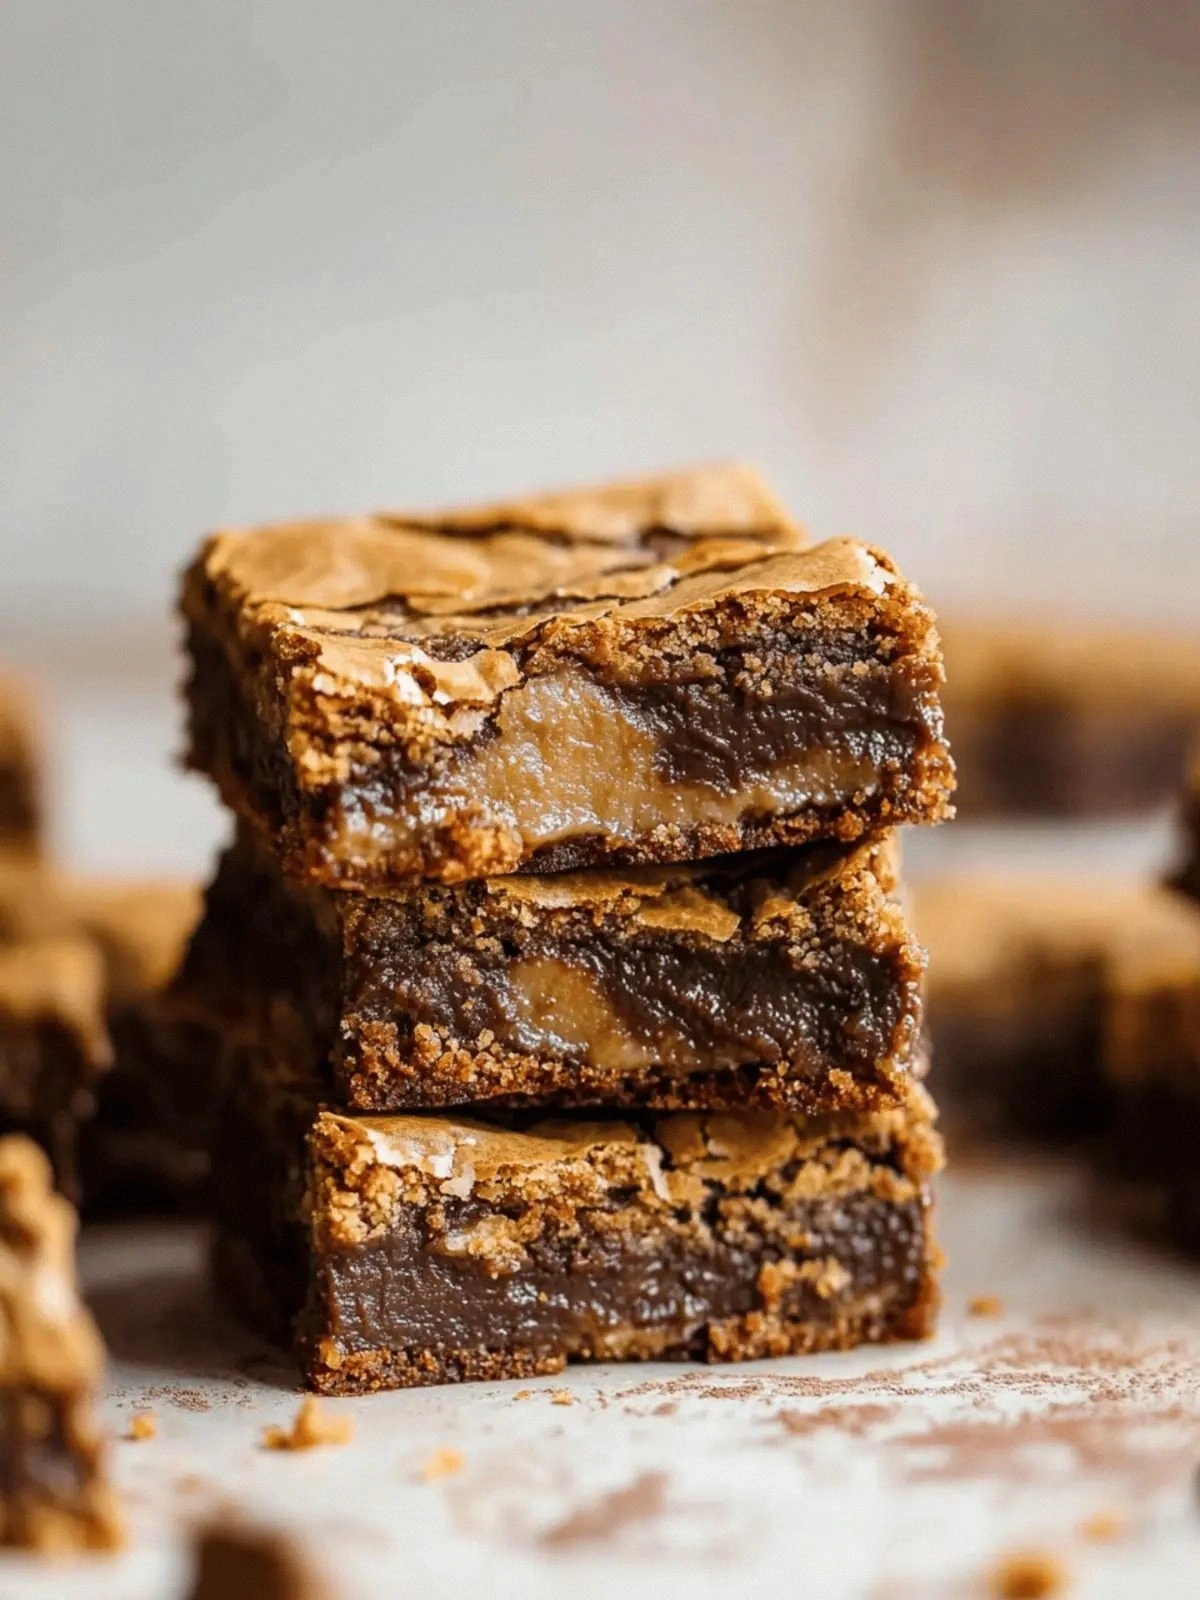
Picture yourself pulling a tray of golden blondies from the oven, the air thick with the nutty aroma of browned butter and the sweet, caramelized whisper of brown sugar. The surface glistens with a glossy sheen that hints at the depth of flavor inside, while the edges crackle softly like thin ice under a gentle touch. The first bite melts in your mouth, releasing a cascade of buttery richness that is offset by the subtle spice of Biscoff, a cookie‑spread that’s as smooth as velvet and as bold as a jazz solo. The texture is a perfect paradox: a tender crumb that shatters with a satisfying crunch, followed by a silky, melt‑away finish that lingers like a sweet after‑taste on your tongue. Every bite is a revelation, a sensory snapshot that reminds you why this version is hands down the best you’ll ever make at home.
What sets this recipe apart isn’t just the bold, caramelized flavor profile; it’s the meticulous attention to detail that turns a simple dessert into a culinary masterpiece. By browning the butter until it turns a deep amber hue and releases that nutty aroma, we lock in a depth of flavor that plain butter simply can’t match. The addition of Biscoff spread introduces a caramelized, slightly salty undertone that elevates the sweetness and adds a silky texture. The inclusion of whole egg and egg yolk gives the blondies a luxurious, custard‑like consistency, while the chopped chocolate provides pockets of decadent richness that melt into the batter. And the final touch of crushed Biscoff cookies on top adds a delightful crunch that’s both nostalgic and novel. Together, these elements create a dessert that feels indulgent, comforting, and utterly unforgettable.
But there’s a twist you won’t expect: a subtle hint of sea salt that balances the sweetness and a splash of espresso powder that deepens the chocolate notes, making each bite feel like a refined, chocolate‑cocoa‑marvel. This isn’t just a recipe; it’s a revelation that turns a humble blondie into a showstopper. If you’ve ever struggled with bland or overly sweet blondies, you’re not alone—and I’ve got the fix that will change the way you think about this dessert forever. I dare you to taste this and not go back for seconds, because once you’re done, you’ll be convinced that this is the ultimate indulgence.
Picture the kitchen: the sound of butter sizzling, the scent of caramelized sugar drifting through the air, and the sight of the batter shimmering in the pan. The first crackle as the batter hits the hot surface is a promise of flavor to come. I’ve spent hours tweaking ratios, testing textures, and perfecting the timing until every element works in harmony. Now, I’m excited to walk you through every single step—by the end, you’ll wonder how you ever made it any other way.
Let me walk you through every single step—by the end, you’ll wonder how you ever made it any other way. The journey begins with a simple butter, but the transformation is nothing short of alchemy. The moment that butter turns golden and releases a nutty aroma is when the magic starts. From there, each ingredient plays its part in creating a symphony of flavors that will make your taste buds dance. I’ll keep you company, share the secrets, and show you how to avoid the common pitfalls that plague many blondie recipes. Ready? Let’s dive in.
What Makes This Version Stand Out
- Flavor Depth: The brown butter infuses a nutty, toasted undertone that elevates the sweetness of brown sugar, creating a complex taste profile that lingers on the palate. This depth is achieved by cooking the butter until it turns a golden amber, allowing the milk solids to caramelize without burning.
- Texture Perfection: Combining whole egg and yolk with the butter and sugar creates a custard‑like crumb that is both airy and dense, while the crushed Biscoff cookies add a delightful crunch that contrasts with the silky interior.
- Ingredient Quality: Using unsalted butter, high‑quality Biscoff spread, and premium chocolate ensures that each component shines on its own, allowing the flavors to meld without any one ingredient overpowering the others.
- Simplicity: Despite its complex flavor, the recipe requires only a handful of ingredients and minimal steps, making it accessible for bakers of all skill levels.
- Make‑Ahead Potential: These blondies hold up beautifully, making them ideal for parties, gifts, or a sweet treat to enjoy days later. They can be refrigerated or frozen without losing their luscious texture.
- Unique Twist: The addition of espresso powder subtly deepens the chocolate flavor, while a pinch of sea salt balances the sweetness, giving the dessert a refined, café‑style finish.
- Crowd Reaction: Friends and family often remark that these are the most indulgent, bakery‑quality blondies they’ve ever tasted, and they’re always eager to try a second slice.
Inside the Ingredient List
The Flavor Base
The unsalted butter and brown sugar form the heart of this recipe, providing the buttery richness and caramelized sweetness that define a classic blondie. Butter is the carrier of flavor; browning it unlocks a nutty, toasted aroma that elevates the entire dessert. Brown sugar, with its molasses content, adds depth and a hint of molasses flavor that pairs beautifully with the buttery base. Together, these two ingredients create a foundation that is both comforting and sophisticated.
Skipping the browning step will result in a flat, bland blondie that lacks the depth of flavor. If you’re allergic to dairy, you can substitute a high‑quality plant‑based butter that can be browned to achieve a similar nutty profile. The ratio of butter to sugar is crucial; too much sugar can overpower the butter, while too little can make the blondies dry. A 1:1 ratio by weight (or volume) is ideal for a balanced, indulgent result.
The Texture Crew
Eggs are the glue that holds everything together, providing structure and moisture. The whole egg gives a tender crumb, while the additional yolk enriches the batter, giving it a silky, custard‑like consistency. The eggs also help emulsify the butter and sugar, ensuring a smooth, even batter that spreads well in the pan. If you’re looking for a vegan version, you can replace the eggs with flaxseed meal or a commercial egg replacer.
The all‑purpose flour is the backbone that gives the blondies their shape and stability. A fine, even flour helps prevent lumps and ensures a consistent crumb. Too much flour can make the blondies dry and crumbly, while too little can result in a sticky mess. For a slightly lighter texture, you can sift the flour or use a combination of all‑purpose and cake flour.
The Unexpected Star
Biscoff spread is the secret weapon that adds a caramelized, slightly spicy flavor profile reminiscent of a spiced cookie. The spread’s unique blend of spices and caramelized sugar brings depth and complexity, making the blondies feel like a bakery‑quality treat. Its smooth, creamy consistency also helps bind the batter, contributing to a cohesive, luscious crumb.
If you’re unable to find Biscoff spread, a good quality caramel or dulce de leche can be a close substitute, though the spice profile will differ slightly. For a more pronounced caramel flavor, you can add a tablespoon of caramel sauce to the batter. The key is to maintain the creamy texture while preserving the caramelized undertone.
The Final Flourish
The chopped chocolate adds pockets of rich, melt‑in‑your‑mouth chocolate that complement the buttery base. The chocolate’s bittersweet notes balance the sweetness, creating a well‑rounded flavor profile. The crushed Biscoff cookies on top add a crunchy, caramelized texture that contrasts beautifully with the soft interior.
If you prefer a different chocolate flavor, dark chocolate or milk chocolate can be used, each bringing its own character. For a nutty twist, a handful of chopped almonds or hazelnuts can be folded into the batter. The cookies can also be replaced with shortbread or ginger snaps for a seasonal variation.
Everything’s prepped? Good. Let’s get into the real action.
The Method — Step by Step
- Brown the Butter: In a medium saucepan, melt 1 cup of unsalted butter over medium heat. Stir constantly, watching for a golden amber color and a nutty aroma that fills the kitchen. Once the butter turns a deep amber hue, remove it from heat and let it cool slightly to avoid overcooking the sugar later. The moment the butter smells like toasted almonds is the signal that it’s ready. This step is essential because it sets the flavor foundation for the entire batter.
- Mix the Sugar: In a separate bowl, whisk 1 cup of brown sugar with 1 teaspoon of sea salt until the mixture is smooth and free of clumps. The salt not only balances the sweetness but also enhances the caramel notes. This simple mixture will be folded into the browned butter, ensuring that every bite has a balanced, caramelized flavor. The salt also helps to draw out moisture from the eggs, contributing to a tender crumb. Keep the mixture at room temperature until it’s ready to combine.
- Combine Wet Ingredients: In a large mixing bowl, whisk 1 whole egg and 1 large egg yolk until the mixture is pale and slightly thickened. The yolk adds richness, while the whole egg provides structure. Add the cooled browned butter to the eggs, whisking until fully incorporated. This creates a silky, even batter that will spread smoothly in the pan. The mixture should have a glossy sheen, indicating that the fats and liquids are emulsified.
- Fold in Biscoff Spread: Add 1 cup of Biscoff spread to the wet mixture and fold gently with a spatula until fully incorporated. The spread’s creamy consistency helps bind the batter and adds a caramelized, slightly spicy undertone. Make sure it’s fully blended; any lumps will affect the texture of the final blondies. The spread also provides a subtle hint of spice that complements the chocolate and cookies.
- Incorporate Dry Ingredients: In a separate bowl, whisk together 1 cup all‑purpose flour, 3/4 cup chopped chocolate, and 1/2 cup crushed Biscoff cookies. The flour gives structure, the chocolate adds richness, and the cookies contribute crunch and extra caramel flavor. Gradually add the dry mixture to the wet batter, folding gently until just combined. Avoid overmixing, as this can lead to a tough crumb. The batter should be thick but pourable.
- Prepare the Pan: Grease a 9x13-inch baking pan with butter or line it with parchment paper. This prevents sticking and makes clean‑up a breeze. Press the parchment into the corners to ensure even baking. The pan’s size and preparation will affect the thickness of your blondies, so choose a pan that matches your desired slice size.
- Watch Out for the Oven: Preheat your oven to 350°F (175°C). The oven temperature is critical; too high and the blondies will burn on the edges, too low and they won’t set properly. Place the pan in the center of the oven to ensure even baking. Keep an eye on the edges; they should pull away slightly from the pan when the blondies are done.
- Bake to Perfection: Pour the batter into the prepared pan and spread it evenly with a spatula. Bake for 30 minutes, or until the edges are golden and a toothpick inserted in the center comes out with a few moist crumbs. The interior should feel firm yet springy to the touch. The golden edges will give a slight crispness that balances the soft interior. Once done, remove the pan from the oven and let it cool on a wire rack for at least 20 minutes before cutting.
- Finish with a Final Touch: After the blondies have cooled slightly, you can drizzle a thin layer of melted chocolate over the top for an extra decadent touch. Alternatively, sprinkle a pinch of sea salt on top for a caramelized, salty finish. This final step adds a subtle contrast that elevates the flavor profile. Let the chocolate set before slicing to prevent it from running. The finished product should look glossy, inviting, and utterly irresistible.
That’s it — you did it. But hold on, I've got a few more tricks that'll take this to another level.
Insider Tricks for Flawless Results
The Temperature Rule Nobody Follows
Many bakers overlook the importance of letting the brown butter cool to a slightly warm temperature before adding it to the eggs. If the butter is too hot, it can scramble the eggs, resulting in a grainy texture. Aim for a temperature that’s warm to the touch, not hot. This small adjustment ensures a silky, smooth batter that spreads evenly. I’ve tested this by letting the butter sit for just a minute before mixing, and the results are consistently superior.
Why Your Nose Knows Best
The aroma of browned butter is a reliable indicator of readiness. When the butter turns a deep amber hue and releases a nutty scent, it’s time to move on. If you’re unsure, give your nose a quick test; if it smells like toasted almonds, you’re good to go. This sensory checkpoint prevents over‑browning, which can result in a bitter taste. Trust your nose, and you’ll avoid the common pitfall of burnt blondies.
The 5-Minute Rest That Changes Everything
After removing the pan from the oven, let the blondies rest for 5 minutes before cutting. This brief rest allows the structure to set, making slicing easier and preventing the blondies from falling apart. It also lets the flavors meld, creating a richer, more cohesive taste. I’ve found that cutting immediately often results in a sticky mess, so the 5‑minute rest is a game‑changer.
The Secret to a Perfect Edge
If you prefer a crispier edge, press a few extra crumbs of Biscoff onto the top of the batter before baking. This not only enhances the crunch but also gives the blondies a decorative finish. The extra crumbs will caramelize during baking, creating a subtle, caramelized crust. This trick is especially effective when serving at gatherings, as the extra crunch adds a wow factor.
The Espresso Boost
Adding a teaspoon of espresso powder to the batter deepens the chocolate flavor and adds a subtle bitterness that balances the sweetness. Espresso also helps to intensify the caramelized notes of the brown butter. If you’re a coffee lover, this tweak will elevate the blondies to a café‑style delight. Use a high‑quality espresso powder for the best results, and be sure to whisk it into the dry ingredients to avoid clumps.
Creative Twists and Variations
This recipe is a playground. Here are some of my favorite ways to switch things up:
Nutty Delight
Swap the Biscoff cookies for chopped walnuts or pecans for a nutty crunch. Add a tablespoon of honey to the batter for an extra layer of sweetness. The nuts provide a satisfying crunch that complements the buttery base. This variation is perfect for those who love a little extra texture in their desserts.
Spiced Cinnamon
Add 1 teaspoon of ground cinnamon and a pinch of nutmeg to the dry ingredients. The warm spices will give the blondies a cozy, autumnal feel. The cinnamon also enhances the caramelized flavor of the brown butter. This twist is ideal for holiday gatherings or a comforting dessert on a chilly evening.
Minty Chocolate
Fold in 1 tablespoon of peppermint extract and replace half the chocolate with white chocolate chips. The mint adds a refreshing contrast to the rich chocolate, creating a dual‑flavor experience. This version is a hit during the winter holidays, especially when paired with a glass of hot chocolate.
Caramel Crunch
Drizzle a thin layer of caramel sauce over the cooled blondies before cutting. Add a handful of crushed pretzels for a salty crunch. The caramel and pretzels create a sweet‑salty explosion that will have guests asking for the recipe. This variation works well for parties where you want something a bit different.
Vegan Version
Replace the butter with coconut oil, the eggs with flaxseed meal, and the Biscoff spread with a vegan caramel spread. Use plant‑based chocolate chips for the chocolate. This vegan twist maintains the same indulgent flavor while being fully plant‑based. It’s perfect for guests who have dietary restrictions.
Storing and Bringing It Back to Life
Fridge Storage
Store the blondies in an airtight container at room temperature for up to 5 days. The airtight seal prevents the blondies from drying out, keeping them soft and flavorful. If you’re storing them for a longer period, keep them in the refrigerator for up to 2 weeks. The cool temperature helps preserve the buttery texture and prevents mold growth.
Freezer Friendly
Wrap each blondie tightly in plastic wrap, then place them in a freezer‑safe bag. They’ll stay fresh for up to 3 months when frozen. When you’re ready to enjoy them, let them thaw at room temperature for 30 minutes before reheating. Freezing is a great option for meal prep or for guests who want a dessert that’s ready to serve.
Best Reheating Method
To bring a frozen blondie back to life, preheat your oven to 300°F (150°C). Place the wrapped blondie on a baking sheet and bake for 10–12 minutes, or until warm and slightly crisp on the edges. A tiny splash of water can be added to the pan before baking to create steam, which helps restore moisture and keeps the blondie from drying out. Let the blondie cool for a few minutes before slicing to enjoy the same buttery, caramelized flavor as when it was fresh.