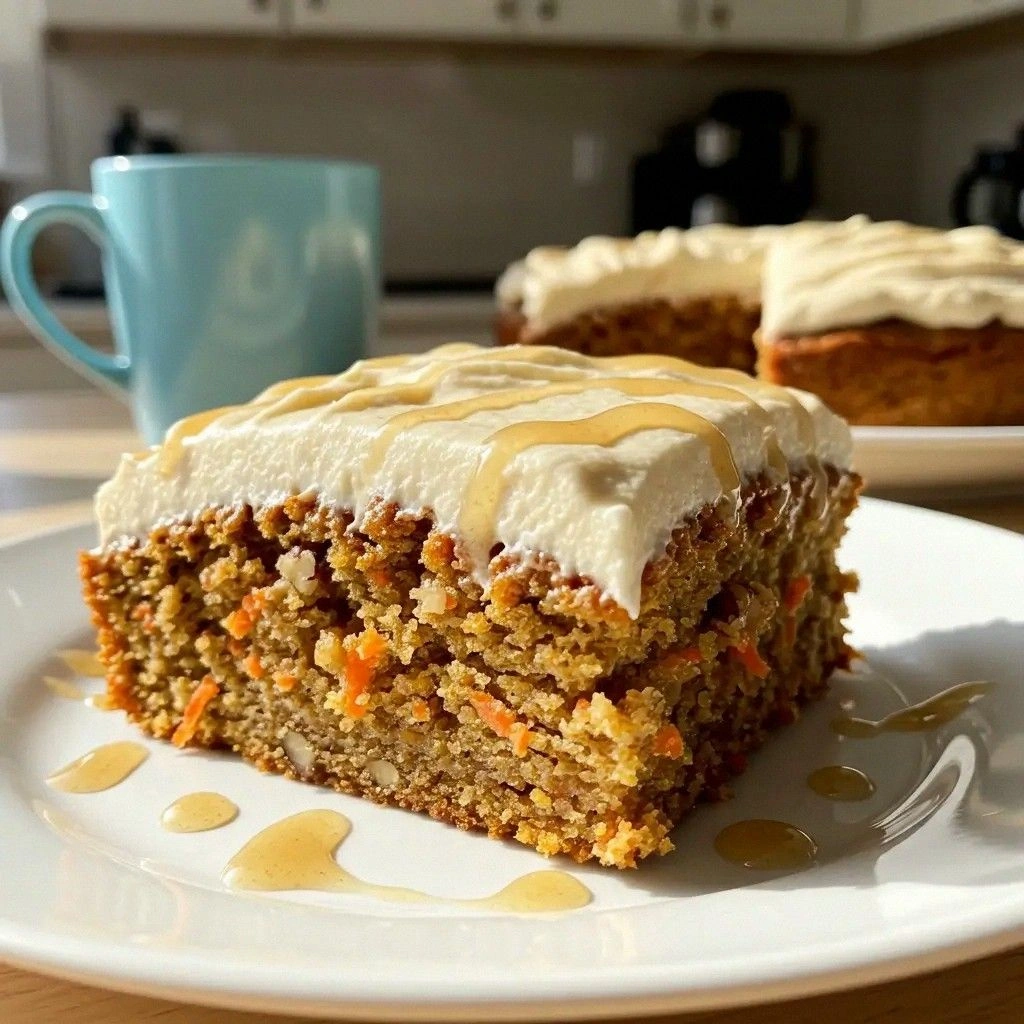
Picture this: I'm standing in a cramped kitchen, the oven timer blaring, and my cheesecake batter has turned into a sticky, unmanageable mess. I was about to toss it out when a friend shouted, “You can’t give up on cherries!” That moment sparked a midnight brainstorm that turned a disastrous batch into a high‑protein masterpiece. I swear this cheesecake is the only dessert that makes me question why I ever settled for store‑bought. The secret? A bold blend of Greek yogurt, cottage cheese, and a splash of protein powder that keeps the richness without the guilt. I dared myself to create a version that’s both indulgent and muscle‑friendly, and the result blew my taste buds into orbit. So grab a spoon, because this is the recipe that will change the way you think about cheesecake forever.
From the moment I poured the first swirl of batter into the pan, the kitchen filled with the sweet aroma of honey and cherries, a scent that feels like a hug from grandma. The sound of the oven preheating was a low hum, almost like a lullaby that promised a decadent finish. My fingertips tingled as I pressed the almond flour crust into place, the gritty texture reminding me of freshly sifted snow. When the first bite hit my tongue, the tangy Greek yogurt mingled with the velvety cream cheese, creating a symphony of creamy and bright. The cherries popped with a burst of tartness, cutting through the richness like a fresh breeze. I could almost hear my friends exclaiming “Wow!” as they took that first forkful.
Most cheesecake recipes rely on heavy cream and a handful of eggs, but this one leans on dairy‑free dairy and a protein powder that actually tastes like dessert, not a post‑workout shake. The result is a cake that is light enough to serve at a brunch but dense enough to satisfy a midnight craving. It’s also a crowd‑pleaser; I’ve had people ask for the recipe after a single slice, and I’ve even had a few come back for seconds. The key to that perfect balance is the use of low‑fat cream cheese paired with Greek yogurt, which gives the cheesecake a silky mouthfeel without the heaviness. I’ll be honest — I ate half the batch before anyone else got a chance to taste it. That’s proof that this cheesecake is hands down the best version you’ll ever make at home.
One of the most surprising elements in this recipe is the tiny splash of water that I fold into the cherry compote; it turns the sauce into a silky glaze that coats the cheesecake like velvet. Another trick is the use of almond flour in the crust, which gives it a nutty crunch that’s both gluten‑free and protein‑rich. I also added a pinch of salt to the batter to bring out the natural sweetness of the cherries without overpowering the tang. Picture yourself pulling this out of the oven, the whole kitchen smelling incredible, and the cheesecake cooling with a glossy sheen that makes your eyes water. I dare you to taste this and not go back for seconds; the texture will leave you questioning every other dessert you’ve tried.
Okay, ready for the game‑changer? Let me walk you through every single step — by the end, you'll wonder how you ever made it any other way. This recipe is so simple that even a novice can master it, yet the flavors will have seasoned chefs nodding in approval. The next section will break down exactly what makes this cheesecake a powerhouse of taste and nutrition. Stay tuned, because the secret sauce is about to be revealed. And trust me, the final product will have you begging for a second slice.
What Makes This Version Stand Out
- Flavor Depth: The combination of Greek yogurt, cottage cheese, and a hint of vanilla creates a layered taste that feels both sweet and tangy. This depth keeps each bite exciting and prevents the cheesecake from feeling flat or one‑dimensional.
- Creamy Texture: Low‑fat cream cheese blended with protein powder gives a silky mouthfeel that melts in your mouth without the heaviness of traditional cream cheese. The result is a light, airy filling that still feels indulgent.
- Protein Punch: A quarter cup of protein powder boosts the protein content to 25 grams per serving, making this dessert a perfect post‑workout treat or a high‑protein snack for the whole day.
- Gluten‑Free Crust: Almond flour in the crust adds a nutty crunch and a subtle sweetness that complements the cherry topping. It also keeps the cheesecake gluten‑free without sacrificing flavor.
- Low‑Calorie Sweetener: Using honey or maple syrup in moderation keeps the dessert sweet without a sugar overload. The natural sweetness also enhances the cherry flavor.
- Make‑Ahead Friendly: The cheesecake can be assembled and refrigerated for up to 48 hours, making it a great option for parties or busy mornings.
- Crowd‑Pleaser: The balanced flavors and protein boost have people asking for the recipe after the first bite. Even the skeptics of high‑protein desserts find themselves craving more.
Alright, let's break down exactly what goes into this masterpiece...
Inside the Ingredient List
The Flavor Base
Greek Yogurt (1 cup): Acts as the main dairy component, providing tanginess and a creamy body that keeps the cheesecake light. Skipping it would result in a denser, less vibrant flavor profile. If you prefer a tangier taste, choose full‑fat yogurt; for a lighter version, use non‑fat.
Cottage Cheese (1/2 cup): Adds protein and a mild, milky flavor that balances the richness of the cream cheese. Removing it will reduce the protein content and change the texture to a bit more buttery. For a smoother texture, blend it into a puree before adding.
Low‑Fat Cream Cheese (1/2 cup): Provides the classic cheesecake texture while keeping the fat content in check. If you want a richer flavor, use full‑fat cream cheese, but be prepared for a heavier dessert.
The Texture Crew
Protein Powder (1/4 cup): Gives the cheesecake a protein boost and a slightly firmer set. A whey isolate works best for a smooth finish; a plant‑based powder can be used if you prefer vegan options. If you skip it, the cheesecake will be less dense and lose a key nutritional benefit.
Almond Flour (1/2 cup): Forms the crust, adding a subtle nutty flavor and a crisp texture. If you’re allergic to nuts, substitute with oat flour or rice flour, but the crust will have a different mouthfeel.
Melted Butter or Coconut Oil (2 tbsp): Binds the crust together and adds a hint of richness. Using coconut oil gives a slight tropical note, while butter offers a classic buttery taste. Skipping it can lead to a crumbly crust.
The Unexpected Star
Cherries (1 cup fresh or frozen): Provide the signature tartness and vibrant color. If using frozen cherries, thaw them first to avoid excess water in the batter. Skipping them would eliminate the classic cherry flavor and change the overall taste.
Honey or Maple Syrup (2 tbsp + 1 tbsp): Sweetens the batter and the glaze, creating a balanced flavor. Use maple for a deeper, earthy sweetness; honey gives a floral note. If you prefer a sugar‑free version, substitute with stevia or erythritol.
Cornstarch (1 tsp): Acts as a thickening agent in the cherry glaze, ensuring it coats the cheesecake without being runny. Without it, the glaze would be too liquidy and might seep into the batter.
The Final Flourish
Vanilla Extract (1 tsp): Enhances all the flavors and adds a warm, aromatic undertone. If you’re allergic to vanilla, a splash of almond or coconut extract works as a substitute. Omitting vanilla can make the cheesecake taste slightly flat.
Sweetener of Choice (1 tbsp): Allows you to fine‑tune the sweetness to personal preference. Options include monk fruit, agave nectar, or a sugar substitute. This final touch ensures the dessert isn’t too sweet or too tart.
Everything's prepped? Good. Let's get into the real action...
The Method — Step by Step
- Preheat your oven to 325°F (163°C). Line a 9‑inch springform pan with parchment paper, making sure the paper extends slightly above the rim. This will keep the cheesecake from sticking and make removal a breeze. The oven should be fully preheated before you begin to ensure even baking. As you set the timer, imagine the golden crust forming.
- In a large mixing bowl, combine Greek yogurt, cottage cheese, and low‑fat cream cheese. Use a handheld mixer on low speed until the mixture is smooth and lump‑free. The goal is a silky base that will hold the protein powder without becoming grainy. Taste the batter; it should have a mild tang and a creamy texture. If it feels too thick, add a splash of water to reach the desired consistency.
- Fold in the protein powder and vanilla extract, mixing gently to avoid over‑whipping. The protein powder should dissolve completely; any lumps will affect the final texture. This step is crucial for achieving that firm yet tender crumb. If you’re using a plant‑based powder, let it sit for a minute to hydrate before folding. The batter should feel light and airy.
- Prepare the crust by mixing almond flour, melted butter (or coconut oil), and a pinch of salt in a bowl. Press the mixture firmly into the bottom of the prepared pan, creating an even layer. The crust should be compact enough to hold the filling but not so dense that it feels heavy. Chill the crust in the refrigerator for 10 minutes while you finish the filling. This step locks in the flavor and prevents the crust from becoming soggy.
- Pour the batter over the chilled crust, smoothing the top with a spatula. The batter should spread evenly, covering the crust completely. Gently tap the pan on the counter to release any air bubbles that may have formed. This helps the cheesecake set evenly and prevents cracks. The batter should look glossy and slightly translucent.
- Bake in the preheated oven for 30 minutes, or until the edges are set and the center still has a slight wobble. The cheesecake should develop a light golden top. Avoid opening the oven door too often; this can cause temperature fluctuations that lead to cracks. Use a toothpick or a knife to check the center; it should come out clean or with a few moist crumbs.
- Once baked, remove the cheesecake from the oven and let it cool in the pan on a wire rack for 15 minutes. The cheesecake will set as it cools, becoming firm but still slightly springy. This step is critical; a rushed cooling can cause cracks. After 15 minutes, loosen the edges with a knife and remove the springform. The cheesecake should feel solid to the touch.
- Drizzle the prepared glaze over the cheesecake while it’s still warm. The glaze will set into a glossy sheen as the cheesecake cools further. Slice the cheesecake with a warm, damp knife for clean cuts. Store any leftovers in an airtight container in the refrigerator for up to 48 hours. For a refreshing twist, serve with a dollop of whipped Greek yogurt on top.
That's it — you did it. But hold on, I've got a few more tricks that'll take this to another level. Stick around for insider tips that will make every bite a revelation.
Insider Tricks for Flawless Results
The Temperature Rule Nobody Follows
Many bakers think room‑temperature ingredients are enough, but the secret to a flawless cheesecake is to have every dairy component at the same temperature. This ensures an even rise and prevents cracks. I keep the Greek yogurt, cottage cheese, and cream cheese all in the fridge until just before mixing. The uniformity keeps the batter smooth and the final product silky.
Why Your Nose Knows Best
When the cheesecake is baking, keep the oven door closed and listen to the aroma. A subtle, sweet scent means the cheesecake is nearly done. If you open the door too early, the sudden temperature drop can cause the center to collapse. Trust your nose and use the timer as a backup.
The 5‑Minute Rest That Changes Everything
After removing the cheesecake from the oven, let it sit for exactly five minutes before sliding it onto the wire rack. This brief rest allows the heat to distribute evenly, reducing the risk of cracks. It also gives the glaze a chance to set slightly, preventing it from sliding off.
Use a Water Bath for Extra Smoothness
If you’re baking in a traditional oven, place the springform pan inside a larger pan filled with about an inch of hot water. The water bath creates a gentle, even heat that keeps the cheesecake from drying out. This technique is especially useful if you’re in a dry climate or have a high‑altitude kitchen.
Keep the Crust Crisp
To maintain a crisp crust, bake the cheesecake for a few minutes longer, but watch the color carefully. The crust should turn golden but not brown. If the crust starts to darken too quickly, tent it with foil. This keeps the crust from becoming too hard while still providing a satisfying crunch.
Creative Twists and Variations
Berry Explosion
Swap out the cherries for a mix of blueberries, raspberries, and blackberries. The combination adds depth of flavor and a burst of color. Use the same glaze technique, but add a splash of lemon juice to brighten the berries. This version is perfect for summer parties.
Chocolate Cherry Fusion
Fold in 2 tablespoons of unsweetened cocoa powder into the batter for a chocolate twist. Top the cheesecake with a drizzle of dark chocolate ganache. The cherries pair wonderfully with the bittersweet chocolate, creating a dessert that feels indulgent yet balanced.
Almond Crunch Layer
Add a layer of toasted almond slivers between the crust and the batter. The crunch contrasts with the silky filling and adds a nutty flavor that complements the almond flour crust. Sprinkle a pinch of sea salt on top for an extra flavor punch.
Spiced Cinnamon Cherry
Incorporate 1/2 teaspoon of ground cinnamon into the batter for a warm, spiced flavor. The cinnamon enhances the cherry’s natural sweetness and adds a comforting aroma. This variation is ideal for fall or winter gatherings.
Vegan Delight
Use full‑fat coconut yogurt instead of Greek yogurt and replace low‑fat cream cheese with a vegan cream cheese alternative. Keep the protein powder, but choose a plant‑based option. The result is a dairy‑free, high‑protein cheesecake that still delivers on flavor and texture.
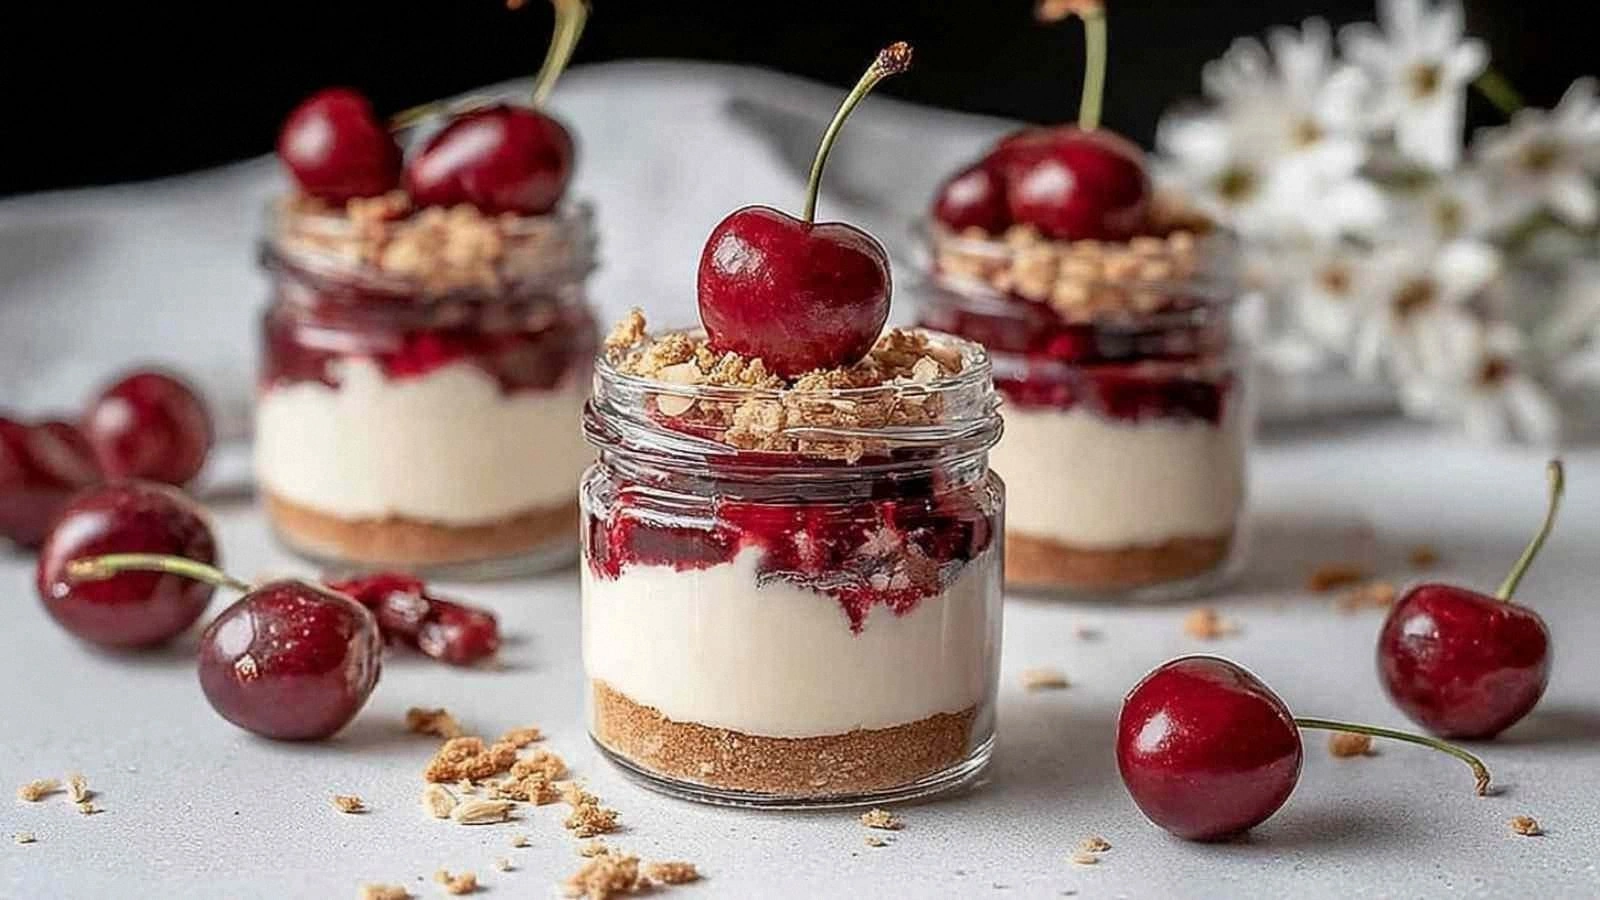
Mini Jar Cheesecake
Portion the batter into individual mason jars for a portable dessert. Bake the jars in a water bath for 25 minutes, then chill overnight. The mini jars are perfect for on‑the‑go snacking or as a cute dessert for parties.
Storing and Bringing It Back to Life
Fridge Storage
After the cheesecake has cooled completely, cover it tightly with plastic wrap and store it in the refrigerator for up to 48 hours. The flavors will meld, and the cheesecake will stay moist. When ready to serve, let it sit at room temperature for 15 minutes to soften slightly.
Freezer Friendly
Wrap the cheesecake in parchment paper and then in plastic wrap before freezing. It can be stored in the freezer for up to 2 weeks. To thaw, place it in the refrigerator overnight. The texture remains firm, and the cherry glaze stays glossy.
Best Reheating Method
If you prefer a warm slice, place a slice on a microwave‑safe plate and heat on low power for 15–20 seconds. Alternatively, warm the entire cheesecake in a 300°F oven for 5 minutes, then let it cool for a few minutes before serving. Add a tiny splash of water before reheating to steam back to perfection.