Chocolate Chip Cookies
There's something special about biting into a warm, chewy chocolate chip cookie, fresh from the oven. It's a comfort that never gets old, and it's a treat that I've perfected in my own gluten-free kitchen. As a home cook who's had to adapt to a gluten-free diet, I've learned that it's all about the right techniques and ingredients. In this recipe, I'll share my secrets for making the perfect gluten-free chocolate chip cookies, using a special blend of flours and a rest period that ensures the best texture.
I remember the first time I made gluten-free chocolate chip cookies - it was a disaster! The dough was too crumbly, the cookies spread too much, and the flavor was just off. But I didn't give up. I experimented with different flours, ratios, and techniques until I landed on this recipe, which has become a staple in my household. Whether you're gluten-free or not, these cookies are sure to become a favorite.
So, what makes these cookies so special? For starters, I use a blend of gluten-free flours that provides the perfect balance of texture and flavor. I also add a touch of xanthan gum to help with structure and texture. But the real secret to these cookies is the rest period - by letting the dough rest for 20-30 minutes, the starches have time to fully absorb the liquid ingredients, resulting in a tender, chewy cookie that's never gritty or gummy.
These cookies are perfect for anyone who loves a classic chocolate chip cookie, but with a gluten-free twist. They're easy to make, fun to customize, and delicious to eat. So go ahead, grab a cup of coffee or a glass of cold milk, and get ready to indulge in the perfect gluten-free chocolate chip cookie.
In this recipe, I'll walk you through every step of the process, from mixing the dough to baking the cookies. I'll share my tips and tricks for getting the best results, and I'll provide you with a list of ingredients and equipment that you'll need to get started. So let's get baking, and let's make some delicious gluten-free chocolate chip cookies!
Why You’ll Love This Recipe
- These cookies are easy to make and require minimal ingredients
- They're perfect for a quick dessert or snack
- The gluten-free flours make them accessible to those with dietary restrictions
- The rest period ensures that the cookies will have the best possible texture and flavor
- You can customize the recipe by adding in your favorite mix-ins
- They're perfect for a crowd, as they make a large batch of cookies
- They're also great for a special occasion, such as a birthday or holiday
Why This Recipe Works
The key to these cookies is the combination of gluten-free flours and the rest period. By using a blend of rice flour, tapioca starch, and xanthan gum, we create a dough that's both tender and chewy. The rice flour provides a light, delicate texture, while the tapioca starch adds structure and helps to bind the ingredients together. The xanthan gum, meanwhile, helps to improve the texture and prevent the cookies from becoming too crumbly.
The rest period is also crucial, as it allows the starches to fully absorb the liquid ingredients. This results in a cookie that's tender and chewy, rather than gritty or gummy. By letting the dough rest, we can ensure that the cookies will have the best possible texture and flavor.
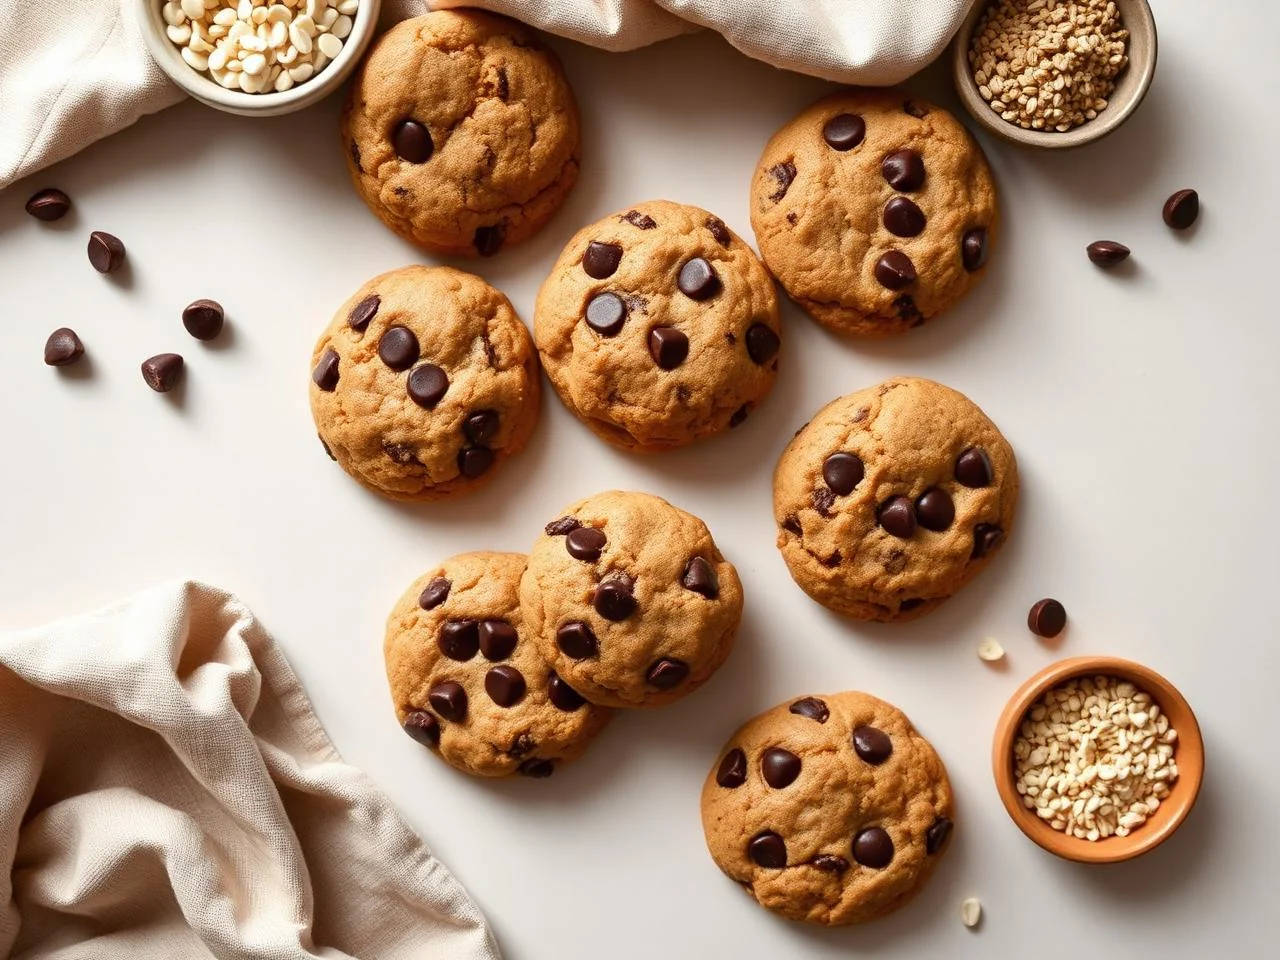
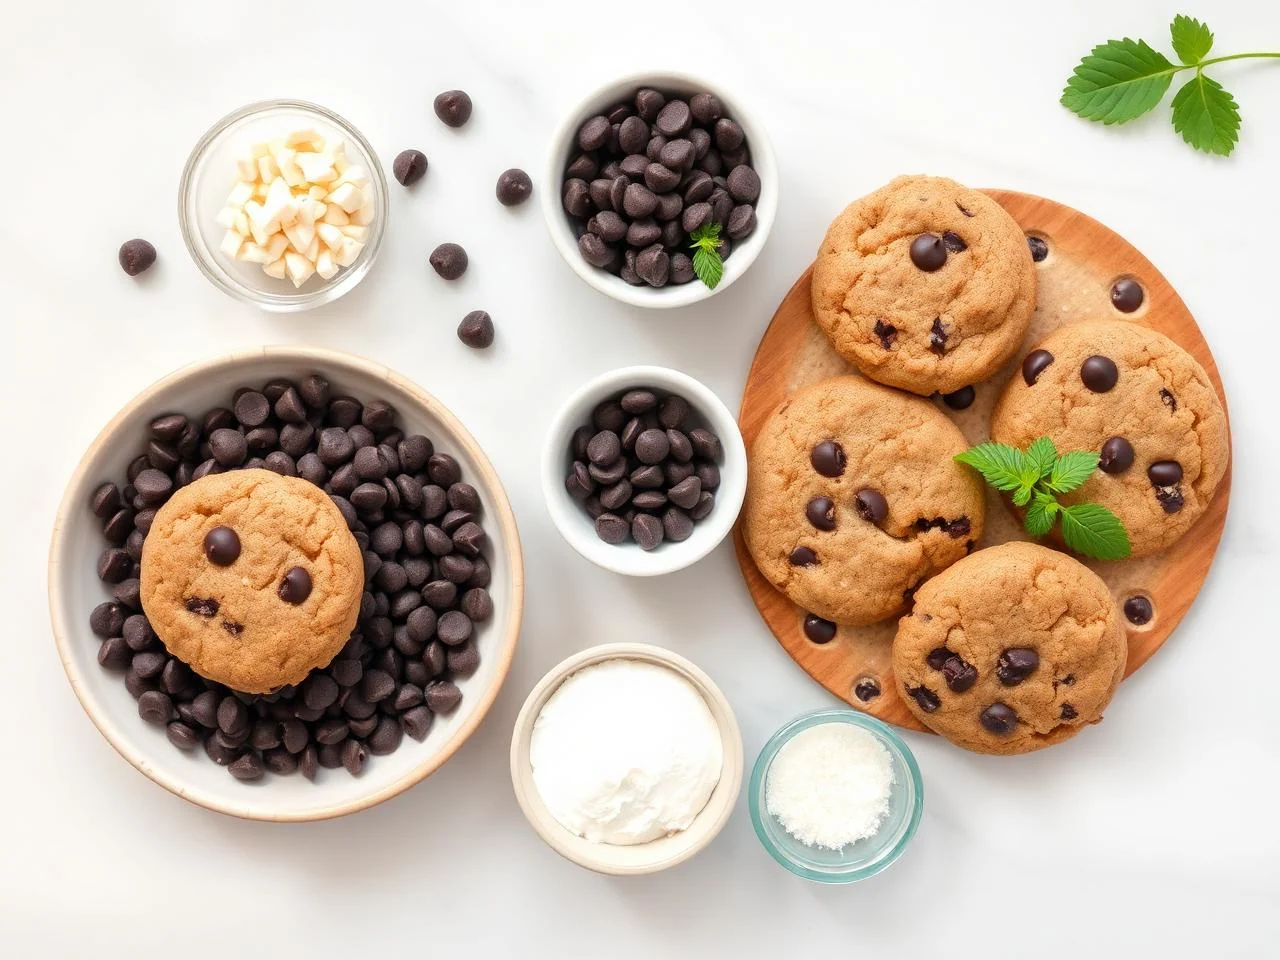
Another important factor is the use of high-quality chocolate chips. I like to use a combination of dark and semi-sweet chocolate chips, as they provide a rich, deep flavor that complements the sweetness of the cookies. You can also customize the recipe by adding in your favorite mix-ins, such as nuts or dried fruit.
Ingredients You’ll Need
When it comes to making gluten-free chocolate chip cookies, the ingredients are just as important as the technique. In this recipe, we'll be using a blend of gluten-free flours, along with some high-quality chocolate chips and a few other essential ingredients. Be sure to choose a high-quality gluten-free flour blend that contains a combination of rice flour, tapioca starch, and xanthan gum.
Also, make sure to use high-quality chocolate chips that are free from gluten and other common allergens. You can also customize the recipe by adding in your favorite mix-ins, such as nuts or dried fruit.
- 1 1/2 cups (190g) gluten-free flour blendI like to use a blend that contains a combination of rice flour, tapioca starch, and xanthan gum. This provides the best texture and flavor for the cookies.
- 1/2 cup (100g) granulated sugarThis adds sweetness to the cookies and helps to balance out the flavor of the chocolate chips.
- 1/4 cup (50g) brown sugarThis adds a rich, caramel-like flavor to the cookies and helps to keep them moist.
- 1/2 cup (115g) unsalted butter, at room temperatureThis helps to bind the ingredients together and adds flavor to the cookies. Make sure to use high-quality, gluten-free butter.
- 2 large eggsThese help to bind the ingredients together and add moisture to the cookies. Make sure to use fresh, high-quality eggs.
- 1 teaspoon vanilla extractThis adds a sweet, creamy flavor to the cookies and helps to balance out the flavor of the chocolate chips.
- 1/2 teaspoon saltThis helps to balance out the flavor of the cookies and adds a touch of sweetness.
- 1 cup (120g) semi-sweet chocolate chipsThese add flavor and texture to the cookies. You can also use a combination of dark and semi-sweet chocolate chips for a more complex flavor.
- 1/2 cup (60g) chopped walnuts (optional)These add texture and flavor to the cookies. You can also use other nuts, such as pecans or hazelnuts, if you prefer.
- 1/4 teaspoon xanthan gumThis helps to improve the texture of the cookies and prevent them from becoming too crumbly.
- 1/4 teaspoon baking sodaThis helps to balance out the flavor of the cookies and adds a touch of sweetness.
Equipment You’ll Need
How to Make Chocolate Chip Cookies
- 1Preheat the oven to 375°F (190°C) and line a baking sheet with parchment paper. This will help the cookies to bake evenly and prevent them from sticking to the sheet.
- 2In a medium-sized bowl, whisk together the gluten-free flour blend, xanthan gum, baking soda, and salt. This will help to combine the dry ingredients and ensure that they are evenly distributed throughout the cookies.
- 3In a large mixing bowl, use a hand mixer or whisk to cream together the butter and sugars until light and fluffy. This should take about 2-3 minutes, and will help to incorporate air into the dough and create a tender texture.
- 4Beat in the eggs one at a time, followed by the vanilla extract. This will help to bind the ingredients together and add moisture to the cookies.
- 5Gradually mix in the dry ingredients until just combined, being careful not to overmix. This will help to prevent the cookies from becoming tough or dense.
- 6Stir in the chocolate chips and walnuts (if using). This will help to distribute the mix-ins evenly throughout the cookies and add flavor and texture.
- 7Cover the bowl with plastic wrap and let the dough rest for 20-30 minutes. This will allow the starches to fully absorb the liquid ingredients and result in a tender, chewy cookie.
- 8Scoop tablespoon-sized balls of dough onto the prepared baking sheet, leaving about 2 inches of space between each cookie. This will help the cookies to bake evenly and prevent them from spreading too much.
- 9Bake for 10-12 minutes, or until the edges are lightly golden brown and the centers are set. This will help to create a crispy exterior and a chewy interior.
- 10Remove the cookies from the oven and let them cool on the baking sheet for 5 minutes before transferring them to a wire rack to cool completely. This will help to prevent the cookies from breaking or becoming misshapen.
- 11Once the cookies are cool, you can store them in an airtight container at room temperature for up to 5 days. You can also freeze them for up to 2 months and thaw them at room temperature when you're ready to serve.
Expert Tips
- Make sure to use high-quality gluten-free flour blend that contains a combination of rice flour, tapioca starch, and xanthan gum.
- Don't overmix the dough, as this can result in tough or dense cookies.
- Let the dough rest for the full 20-30 minutes to allow the starches to fully absorb the liquid ingredients.
- Use high-quality chocolate chips that are free from gluten and other common allergens.
- If you want a chewier cookie, bake for 8-10 minutes. If you want a crisper cookie, bake for 12-14 minutes.
- You can customize the recipe by adding in your favorite mix-ins, such as nuts or dried fruit.
- Make sure to scoop the cookies into balls of the same size so that they bake evenly.
- If you're using a convection oven, reduce the baking time by 1-2 minutes.
Common Mistakes to Avoid
- Using a low-quality gluten-free flour blend that doesn't contain a combination of rice flour, tapioca starch, and xanthan gum.
- Overmixing the dough, which can result in tough or dense cookies.
- Not letting the dough rest for the full 20-30 minutes, which can result in cookies that are gritty or gummy.
- Using low-quality chocolate chips that are not free from gluten and other common allergens.
- Not scooping the cookies into balls of the same size, which can result in cookies that bake unevenly.
- Not checking the cookies frequently during the baking time, which can result in cookies that are overcooked or undercooked.
Variations and Substitutions
- Add in your favorite mix-ins, such as nuts or dried fruit, to create a unique flavor combination.
- Use different types of chocolate chips, such as dark or milk chocolate, to create a different flavor profile.
- Add a teaspoon of espresso powder to the dough to create a mocha-flavored cookie.
- Use a combination of granulated sugar and brown sugar to create a cookie with a richer flavor.
- Add a pinch of salt to the dough to balance out the sweetness of the cookies.
- Use a gluten-free flour blend that contains a combination of almond flour and coconut flour for a different texture and flavor.
- Make a batch of cookie dough and freeze it for up to 2 months, then bake the cookies as needed.
What to Serve With Chocolate Chip Cookies
These cookies are perfect for serving as a snack or dessert. You can enjoy them on their own, or pair them with a glass of cold milk or a cup of hot coffee. They're also great for packing in lunchboxes or taking on the go.
Some other ideas for serving these cookies include:
- Pairing them with a scoop of ice cream for a decadent dessert
- Using them as a base for a sundae, topped with whipped cream, chocolate sauce, and chopped nuts
- Serving them alongside a warm cup of coffee or tea for a cozy breakfast or snack
Make-Ahead, Storage, Freezing and Reheating
These cookies can be stored in an airtight container at room temperature for up to 5 days. You can also freeze them for up to 2 months and thaw them at room temperature when you're ready to serve.
To freeze the cookies, simply place them in a single layer on a baking sheet and put them in the freezer until they're frozen solid. Then, transfer them to a freezer-safe bag or container and store them in the freezer for up to 2 months.
To thaw the cookies, simply leave them at room temperature for a few hours or overnight. You can also thaw them in the microwave by heating them for 10-15 seconds at a time, checking on them until they're thawed and warm.
It's also a good idea to label the container or bag with the date and the contents, so you can easily keep track of how long they've been stored.
Frequently Asked Questions
What type of gluten-free flour blend should I use?
I recommend using a blend that contains a combination of rice flour, tapioca starch, and xanthan gum. This will provide the best texture and flavor for the cookies.
Can I use a different type of sugar?
Yes, you can use a different type of sugar, such as coconut sugar or honey, but keep in mind that it may affect the flavor and texture of the cookies.
How long can I store the cookies?
The cookies can be stored in an airtight container at room temperature for up to 5 days, or frozen for up to 2 months.
Can I make the cookies ahead of time?
Yes, you can make the cookie dough ahead of time and store it in the fridge for up to 24 hours or freeze it for up to 2 months. Simply thaw the dough and bake the cookies as needed.
What if I don't have xanthan gum?
You can omit the xanthan gum or substitute it with a different ingredient, such as guar gum or cornstarch. However, keep in mind that the texture of the cookies may be affected.
Can I use a convection oven?
Yes, you can use a convection oven, but reduce the baking time by 1-2 minutes to prevent overcooking.
How do I know when the cookies are done?
The cookies are done when they're lightly golden brown around the edges and set in the center. You can also check the internal temperature, which should be around 190-200°F (88-93°C).
Can I make the cookies in a different size?
Yes, you can make the cookies in a different size, but keep in mind that the baking time may be affected. For example, if you make the cookies smaller, they may bake more quickly, while larger cookies may take longer to bake.
Ingredients
- 1 1/2 cups (190g) gluten-free flour blend
- 1/2 cup (100g) granulated sugar
- 1/4 cup (50g) brown sugar
- 1/2 cup (115g) unsalted butter, at room temperature
- 2 large eggs
- 1 teaspoon vanilla extract
- 1/2 teaspoon salt
- 1 cup (120g) semi-sweet chocolate chips
- 1/2 cup (60g) chopped walnuts (optional)
- 1/4 teaspoon xanthan gum
- 1/4 teaspoon baking soda
Instructions
- Preheat the oven to 375°F (190°C) and line a baking sheet with parchment paper. This will help the cookies to bake evenly and prevent them from sticking to the sheet.
- In a medium-sized bowl, whisk together the gluten-free flour blend, xanthan gum, baking soda, and salt. This will help to combine the dry ingredients and ensure that they are evenly distributed throughout the cookies.
- In a large mixing bowl, use a hand mixer or whisk to cream together the butter and sugars until light and fluffy. This should take about 2-3 minutes, and will help to incorporate air into the dough and create a tender texture.
- Beat in the eggs one at a time, followed by the vanilla extract. This will help to bind the ingredients together and add moisture to the cookies.
- Gradually mix in the dry ingredients until just combined, being careful not to overmix. This will help to prevent the cookies from becoming tough or dense.
- Stir in the chocolate chips and walnuts (if using). This will help to distribute the mix-ins evenly throughout the cookies and add flavor and texture.
- Cover the bowl with plastic wrap and let the dough rest for 20-30 minutes. This will allow the starches to fully absorb the liquid ingredients and result in a tender, chewy cookie.
- Scoop tablespoon-sized balls of dough onto the prepared baking sheet, leaving about 2 inches of space between each cookie. This will help the cookies to bake evenly and prevent them from spreading too much.
- Bake for 10-12 minutes, or until the edges are lightly golden brown and the centers are set. This will help to create a crispy exterior and a chewy interior.
- Remove the cookies from the oven and let them cool on the baking sheet for 5 minutes before transferring them to a wire rack to cool completely. This will help to prevent the cookies from breaking or becoming misshapen.
- Once the cookies are cool, you can store them in an airtight container at room temperature for up to 5 days. You can also freeze them for up to 2 months and thaw them at room temperature when you're ready to serve.