I was halfway through a week of bland salads and burnt toast when the kitchen exploded into chaos. My friend dared me to whip up something crunchy, something that would make even my picky cousin swoon. I grabbed a couple of zucchini, a splash of olive oil, and a handful of spices, and the moment the slices hit the hot pan, the kitchen filled with a scent that made my stomach do a happy dance. That was the spark that ignited this recipe—an obsession with turning a humble vegetable into a crispy, flavor-packed snack that feels like a guilty pleasure without the guilt.
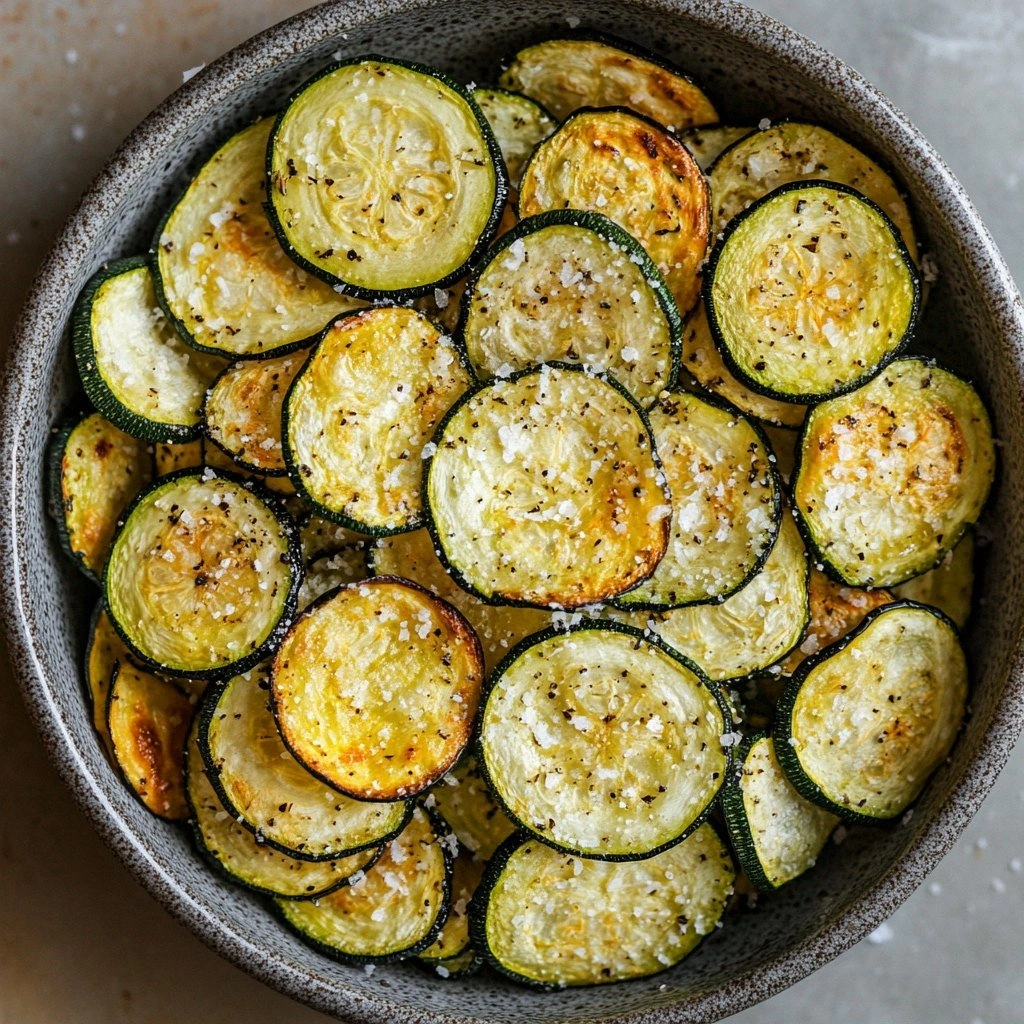
Picture this: the bright green zucchini strips glistening under a drizzle of golden olive oil, the air thick with the nutty aroma of toasted breadcrumbs and parmesan. As the first batch sizzles, you hear the crisp pop that signals the transformation from raw to crunchy. The first bite is a burst of savory, buttery notes, followed by a subtle peppery heat that lingers on the tongue. The texture is a delicate balance—light enough to feel like a cloud, yet firm enough to satisfy the craving for something with a satisfying snap.
What makes this version the ultimate crunchy zucchini chip? It’s not just the ingredients; it’s the method, the timing, and the subtle seasoning tweaks that elevate every bite. I’m talking about a coating that locks in moisture, a sprinkle of parmesan that adds depth, and a dash of paprika that gives it a smoky undertone. Most recipes get this completely wrong—here’s what actually works. I dare you to taste this and not go back for seconds.
Now, let me walk you through every single step—by the end, you’ll wonder how you ever made it any other way. The next section will break down what sets this recipe apart, so you can appreciate the science behind the crunch.
What Makes This Version Stand Out
- Crunch: The secret to that perfect snap is a thin breadcrumb coating that crisps without burning. When the slices hit the hot oil, the crumbs form a golden shell that holds the zucchini’s moisture inside. Skipping the breadcrumb step turns the chips into a soggy mess.
- Flavor: A balanced blend of garlic powder, paprika, and a hint of lemon zest creates a savory profile that feels indulgent yet fresh. The parmesan adds a cheesy depth that keeps the chips from tasting too plain. If you love bold flavors, this is the recipe for you.
- Texture: The olive oil doesn’t just coat; it creates a barrier that keeps the zucchini tender inside while the outside becomes airy and crisp. The baking powder lifts the coating, giving it a light, almost airy feel. The result? A chip that feels like a cloud when you bite into it.
- Speed: With a prep time of just 10 minutes and a cook time of 15, you can have a fresh batch of chips on the table in less than 30 minutes. No long marinating or overnight prep—just slice, season, and cook.
- Versatility: These chips work as a snack, a side, or a crunchy topping for salads and soups. Toss them with a yogurt dip for a light appetizer, or use them to add texture to a quinoa bowl. The possibilities are endless.
- Health Conscious: Low in calories, high in fiber, and packed with nutrients from the zucchini. The olive oil provides healthy fats, while the parmesan adds protein. It’s a guilt-free treat that satisfies.
- Make‑ahead Potential: They stay crisp for up to two days when stored properly, making them a great make‑ahead snack for busy weeks.
Alright, let's break down exactly what goes into this masterpiece. Below is a detailed ingredient list that will guide you through every component.
Inside the Ingredient List
The Flavor Base
The foundation of this recipe is a simple yet powerful combination of olive oil, salt, pepper, and garlic powder. Olive oil not only adds a subtle buttery taste but also helps the coating adhere to the zucchini. Salt brings out the natural sweetness of the vegetable, while pepper adds a mild heat that balances the richness. Garlic powder offers an aromatic depth that lingers on the palate. If you’re avoiding dairy, you can replace the parmesan with nutritional yeast for a cheesy flavor.
Why this matters: each seasoning layer works together to create a complex flavor profile that feels satisfying and indulgent. Skipping any of these will flatten the taste, turning the chips into a bland snack. For example, if you leave out the garlic powder, you lose that savory backbone that holds the dish together.
Swap tip: For a smoky twist, replace paprika with smoked paprika or add a pinch of chipotle powder. If you’re short on paprika, a dash of cayenne will give you a similar heat level. When buying olive oil, opt for a light or extra-light variety so it doesn’t overpower the zucchini.
The Crunch Factor
Breadcrumbs are the secret weapon that transforms zucchini into a crispy chip. They absorb excess moisture, creating a light, airy coating that crisps up beautifully. Use fresh, plain breadcrumbs for the best texture; stale ones will result in a denser coating. If you’re gluten-free, swap breadcrumbs for crushed rice crackers or almond flour for a nutty crunch.
Why this matters: Breadcrumbs act as a barrier, preventing the zucchini from steaming rather than crisping. They also provide the structural integrity needed for a chip that can hold a dip or be tossed into a salad without falling apart. Without breadcrumbs, the zucchini would become soggy and lose its iconic crunch.
Swap tip: For a higher protein option, mix in some grated parmesan with the breadcrumbs. If you prefer a sweeter crunch, try adding a sprinkle of brown sugar or honey to the breadcrumb mix before coating.
The Cheese Component
Parmesan cheese is the star that brings a savory, umami punch to the chips. It melts slightly during cooking, creating a golden crust that adds both flavor and visual appeal. Use freshly grated parmesan for the best melt and flavor; pre-grated cheese can contain added salt, which may alter the seasoning balance.
Why this matters: Parmesan provides a salty, nutty flavor that complements the zucchini’s sweetness. It also helps to bind the breadcrumb coating, creating a cohesive chip. Without cheese, the chips would taste flat and lack depth.
Swap tip: If you’re lactose intolerant, try a vegan parmesan or a sprinkle of nutritional yeast for a similar umami flavor. For a more robust taste, mix in a bit of aged cheddar or gouda with the breadcrumbs.
The Final Flourish
The final touch comes from a pinch of baking powder and a dash of lemon zest. Baking powder helps the coating puff up slightly, giving the chips an extra lightness. Lemon zest adds a bright, citrusy note that cuts through the richness of the olive oil and parmesan.
Why this matters: Baking powder’s leavening effect creates a slightly airy coating that feels less dense. Lemon zest’s bright acidity balances the dish, preventing it from feeling too heavy. Omitting these elements will result in a denser, less vibrant chip.
Swap tip: If you prefer a milder citrus flavor, replace lemon zest with orange zest or a splash of lemon juice after baking. For an extra kick, add a pinch of cayenne pepper to the final seasoning mix.
Everything's prepped? Good. Let's get into the real action.
The Method — Step by Step
-
Start by washing your zucchini thoroughly and patting them dry with a clean towel. A dry surface ensures that the oil and seasoning stick properly. Slice the zucchini into 1/8-inch thick rounds using a mandoline or a sharp knife. Aim for uniform thickness to guarantee even cooking.
-
In a large mixing bowl, whisk together 2 tablespoons of olive oil, 1 teaspoon of salt, 1/2 teaspoon of black pepper, and 1 teaspoon of garlic powder. This liquid base will coat each slice evenly. If you’re using lemon zest, add it now to infuse the oil with a citrusy aroma.
-
Add the zucchini slices to the bowl and toss until each piece is coated. Make sure every slice gets a thin, even layer of oil and seasoning. Let the coated zucchini rest for 5 minutes; this allows the flavors to penetrate the vegetable.
-
In a separate shallow dish, combine 1/2 cup of breadcrumbs with 1/4 cup of grated parmesan, 1/2 teaspoon of baking powder, and 1 teaspoon of paprika. Mix thoroughly so the spices are evenly distributed. This breadcrumb mixture will form the crispy shell.
-
Coat each zucchini slice in the breadcrumb mixture, pressing gently to ensure the crumbs stick. Discard any excess crumbs and place the coated slices on a parchment-lined baking sheet, spacing them apart so they don’t touch. This spacing is key for even crisping.
-
Preheat your oven to 400°F (200°C). Place the baking sheet in the middle rack and bake for 12-15 minutes, flipping the chips halfway through. The edges should start pulling away and the coating should turn golden brown. Keep an eye on them; zucchini can burn quickly.
-
Once baked, remove the chips from the oven and let them cool on a wire rack for 5 minutes. This cooling period allows the coating to set and become extra crisp. The smell of freshly baked chips should fill your kitchen and make your mouth water.
-
Taste a chip and adjust seasoning if needed. If you prefer a saltier chip, sprinkle a little extra salt. If you like more heat, add a pinch of cayenne or more paprika. This final tweak ensures each batch tastes exactly how you want it.
-
Serve immediately for the best crunch, or store in an airtight container for up to two days. If you’re storing, place a paper towel in the container to absorb excess moisture. When you’re ready to reheat, pop them in a 350°F oven for 5 minutes to restore crispness.
That’s it— you did it. But hold on, I've got a few more tricks that'll take this to another level.
Insider Tricks for Flawless Results
The Temperature Rule Nobody Follows
Many people bake these chips at 350°F, but the higher temperature of 400°F is crucial for achieving that perfect golden crust. The heat creates a Maillard reaction that gives the coating a deep, nutty flavor. If you’re using a convection oven, lower the temperature by 25°F to avoid overcooking.
Why Your Nose Knows Best
The aroma of freshly baked chips is a reliable indicator of doneness. When the scent is buttery and slightly nutty, the coating is ready. If the smell is more raw or oily, give them a few more minutes. Trust your nose—it's the best judge of crunch.
The 5-Minute Rest That Changes Everything
Letting the chips cool on a wire rack for 5 minutes before serving is more than a courtesy. It allows the coating to set, preventing the crumbs from falling off when you bite. This simple step elevates the texture from good to unforgettable.
Use a Mandoline for Even Slices
Uniform thickness ensures even cooking. A mandoline slicer gives you razor-thin, consistent slices that bake uniformly. If you don’t have one, a sharp knife and a cutting board with a ruler can help you approximate even thickness.
Don’t Skip the Baking Powder
Baking powder is the secret to a lighter coating. It creates tiny air pockets that make the chips feel airy. If you’re gluten-free, you can use a gluten-free breadcrumb mix that already contains leavening agents.
Creative Twists and Variations
This recipe is a playground. Here are some of my favorite ways to switch things up:
Spicy Sriracha Chips
Swap the paprika with sriracha powder and add a teaspoon of sriracha sauce to the olive oil mixture. The result is a fiery chip that pairs well with a cool yogurt dip.
Herb Garden Crunch
Incorporate fresh chopped rosemary and thyme into the breadcrumb mix. The herbs infuse the chips with a fragrant, earthy aroma that elevates the flavor profile.
Cheesy Garlic Parmesan
Replace the paprika with garlic powder and double the parmesan. The chips become rich, cheesy, and perfect for a movie night snack.
Vegan Delight
Use a vegan parmesan substitute and ensure the breadcrumbs are dairy-free. This version keeps the crunch and flavor while staying plant-based.
Sweet Cinnamon Sugar
Swap the paprika for cinnamon and add 1 tablespoon of brown sugar to the breadcrumb mix. The chips become a sweet treat that pairs wonderfully with a glass of milk.
Storing and Bringing It Back to Life
Fridge Storage
Place the cooled chips in an airtight container or zip-top bag. Store them in the refrigerator for up to two days. The airtight seal prevents moisture from softening the coating.
Freezer Friendly
For longer storage, freeze the chips on a parchment-lined tray until solid, then transfer to a freezer bag. They’ll keep for up to a month. When you’re ready, pop them in a 350°F oven for 5 minutes.
Best Reheating Method
To revive the crunch, preheat the oven to 350°F, spread the chips in a single layer, and bake for 5-7 minutes. Add a splash of water to the baking sheet to create steam, then finish in the oven for an extra minute to crisp up.